 Michael S. Liberman
Moving to Mirrorless: One Year with the Nikon Z6
Note: The post was originally intended for March 2020, and I thought the COVID-19 stay at home order would provide plenty of time time to pull this together. But because of COVID-19 work has been really busy, so this post is just seeing the light of day. Also, this post is about my mirrorless camera decision making and adoption process and not a technical review of the Nikon Z6. If you’re looking for that try the excellent write-ups from Photography Life and Digital Photography Review.
In recent years, one of the greatest questions facing amateur and professional photographers alike is whether to make the move from digital single lens (DSLR) cameras to mirrorless (ML) cameras. In my travel workflow posts I’ve documents my interest in ML cameras for traveling lighter, but a concern about whether the autofocus capabilities of ML cameras were on par with DSLRs. On the gear page I’ve documented my journey through film and digital cameras including the DSLRs I’ve owned – starting with the Nikon D100, then the D7000, on to the D600, and most recently the D750. I seem to upgrade DSLRs every few years – enough time for technological advances to compel me to consider something new. As an amateur I don’t need to most advanced gear, but over time I’ve moved from DX with the D100 and D7000 to FX full-frame with the D600 and D750.
In August 2018 Nikon announced the Nikon Z7 and Z6 mirrorless cameras. (This wasn’t Nikon’s first attempt at a mirrorless camera line, having announced the Nikon 1 in 2011 and subsequently discontinuing the line in 2018.) I was intrigued by the Z6 and the potential capabilities of the new Z-mount lenses, just not so intrigued that I was ready to make a purchase. I did some online research, read a couple of reviews, then set the idea of a new camera aside while I focused on getting ready for the Southeast Asia trip.
I returned from Southeast Asia in early March of 2019. And as I usually do when I get back from a trip I began preparing a blog post about the workflow used while on the trip and then back at home. For reference on writing the post I started by looking back at the previous workflow post. I came across this line in the post … while the compact size of mirrorless cameras is tempting for travel, I think the autofocus systems of the smaller cameras isn’t quite advanced as the autofocus systems offered by full-size DSLRs.
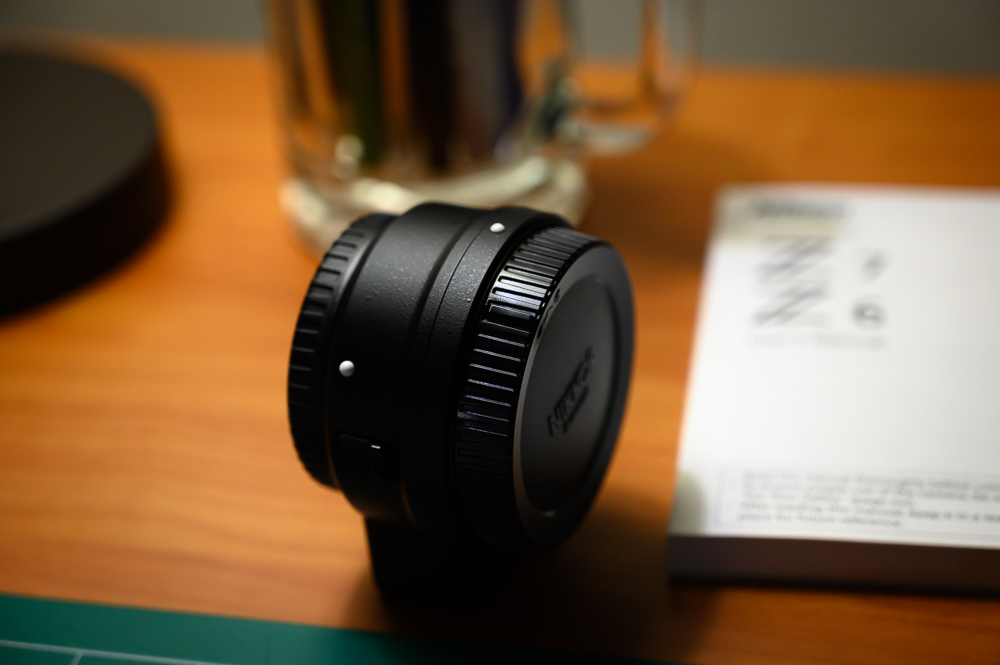
That statement got me reassessing whether it was still true. So I started researching mirrorless cameras again. Initial reports showed the autofocus systems of the Nikon Z cameras to be good, but not great, but with the possibility of improvement through firmware updates. However, reviews of the Z system lenses were excellent and Nikon released a roadmap detailing planned lens releases for the next several years. I liked that the roadmap would let me plan for how to transition from an F-mount system to Z-mount by letting me know what lenses Nikon would release and when they would be available. Nikon also announced an F-mount to Z-mount adapter to allow the use of existing F-mount lenses on a Z camera. And reviews of the Z6 video performance were outstanding.
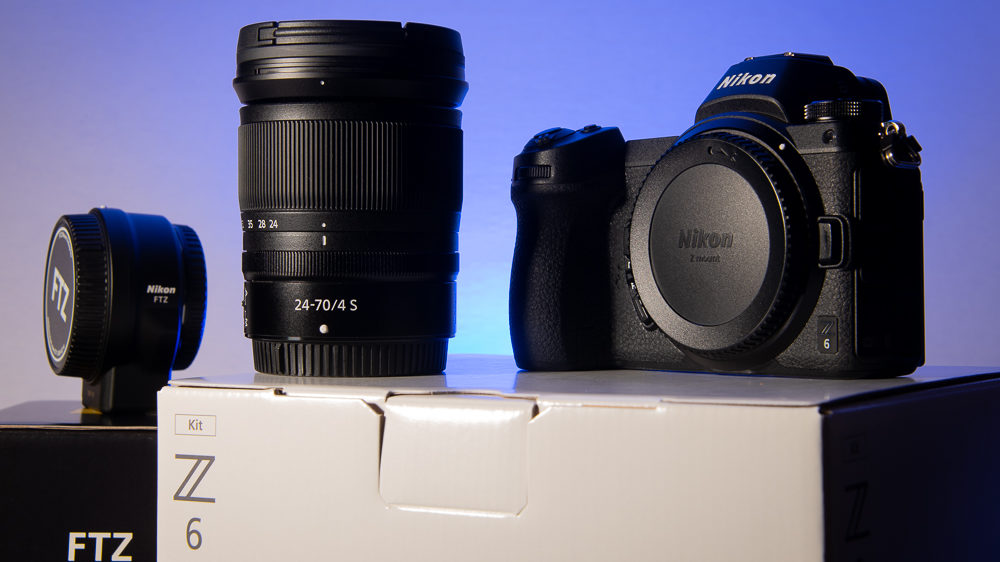
In March 2019 Nikon announced a promotion with a couple hundred dollars off a Nikon Z6 camera, 24-70mm f/4 lens, an FTZ adapter, and an additional $200 for trading in any DSLR camera. I also received my tax refund and my birthday was at the end of the month. The stars were aligning and it was time to make a purchase. I traded in the D7000 and got the Nikon Z6.
I purchased the Nikon Z6 Mirrorless Camera combo with the NIKKOR Z 24-70mm f/4 S lens, and the Mount Adapter FTZ from B&H on March 22 and it arrived early the following week. I charged up the EN-EL15b battery (I bought an extra so I had two), put a Sony 64GB XCD card in the slot (bought two of these as well), mounted the lens, turned on the power, and pressed the shutter button. My initial impression was very good. Despite being very similar to my 5-year old D750 – both being 24 megapixel cameras, clearly Nikon had made some enhancements in technology. The Z6 paired with the 24-70mm f/4 lens produced sharp images with excellent color rendition and contrast. I liked the size, weight, and feel of the camera, but as with any new camera, the button placement would take come getting used to.
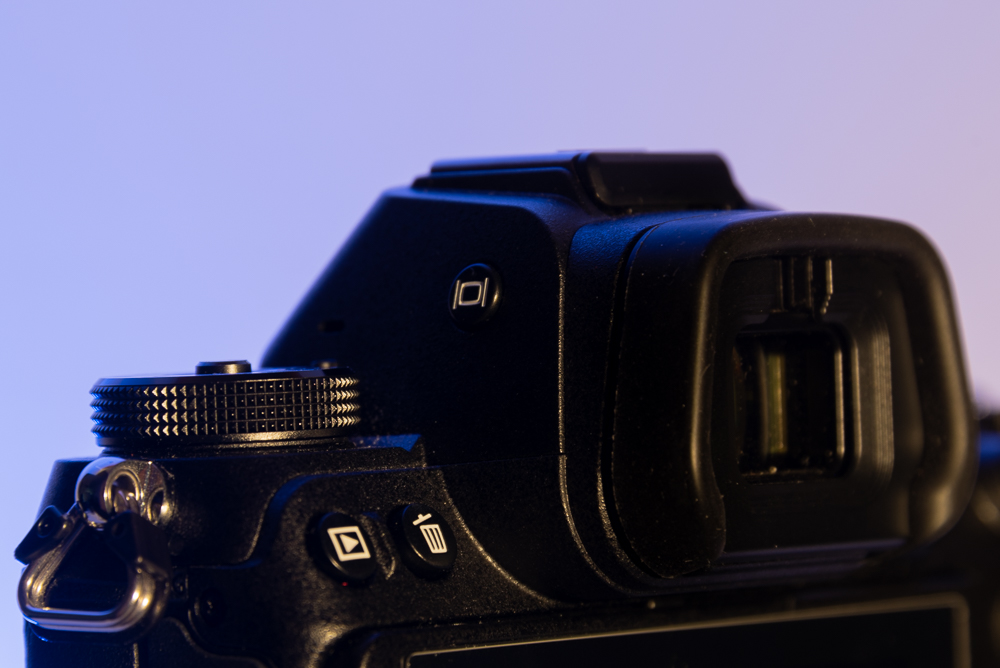
I also liked the electronic viewfinder, but it was an entirely new experience. Initial impression – the resolution was more than enough to make critical framing, focus, and exposure decisions. My first decision was how to setup the electronic viewfinder and the rear monitor displays. Pressing the Monitor Mode Button on the left of the viewfinder cycles through four display settings – Automatic display switch (changes between the viewfinder and the rear monitor when you look through the viewfinder or take your eye away), Viewfinder only, Monitor only, Prioritize viewfinder (putting your eye to the viewfinder turns the display on). I’m primarily using Prioritize viewfinder because this choice seems most like my experience with DSLRs and has the benefit of extending battery life – a key consideration given the battery demands of a fully electronic mirrorless camera compared to a DSLR with an optical viewfinder.
However, in Automatic display switch mode, the first “muscle memory” step is adjusting to how the viewfinder eye sensor works. Place your eye to the viewfinder and the electronic viewfinder turns on. Take your eye away, the viewfinder turns off and the monitor turns on. Pretty straightforward. But if something comes too close to the eye sensor – say your hand operating controls on the back of the camera – then the LCD monitor turns off and the electronic viewfinder is activated. A little disconcerting when the LCD monitor suddenly goes blank for no apparent reason. But it’s just one of those things that takes getting used to.
I spent a few days reading the manual, adjusting to control placement, playing with the touchscreen, trying out various auto focus modes, and taking pictures of objects on my desk. And after a while I was ready to commit to a setup for regular use. I won’t go through every setting, but here are few highlights:
RAW 14-bit I’ve always shot 12-bit RAW files on the primary card with a JPEG backup on the second card. There is more data in a 14-bit raw file, so after years of favoring a smaller file size over less photo data, it seem like a good time to make a change.
No JPEG Backup While I’ve always made JPEG backups on the second SD card, I’ve never had cause to actually use the backup file. And with only a single card slot on the Z6, what’s the point of having two copies of the same file on the same card for backup purposes? And the XCD cards seem much more sturdy compared to SD cards.
Back Button Focus I’ve set up my cameras with back button focus for years using the AF-ON button. Now I find it a very natural way of shooting. I’m too twitchy to be an effective half-press-shutter-button-focus shooter. I used to inadvertently shoot unneeded frames while getting focus. So I prefer setting up the camera to separate these functions.
Auto ISO Auto sensitivity control is ON for consistently exposed photos. My settings are ISO maximum sensitivity 6400 and minimum shutter speed 1/500. With these settings I get a good percentage of usable shots when not in Manual mode for other purposes.
I used the camera throughout the summer with this setup shooting a couple of track and field meets with so-so results, taking it on a beach trip to Rhode Island, and bringing it on walks through the trails around my office building. Now that I was using the camera in real world shooting situations, I could see the battery life was going to be okay. The Z6 definitely goes through batteries faster than the D750, but for my stills and video shooting style likely wasn’t going to be going through more than one or two batteries a day.
So after using the camera for several months my overall assessment remained positive, but with nearly 200 menu settings to consider I was feeling overwhelmed and still hadn’t devised a good method for taking advantage of the U1, U2, and U3 customizable user settings. But I had an idea about how to proceed.
I’ve taken a couple seminars with the photographer Steve Simon, the author of The Passionate Photographer, including Mastering the Nikon D7000 in October 2011 and The Passionate Nikon Photographer Two-Day Mastery Workshop in October 2013. Steve’s focus is to simplify camera setup and that’s exactly what I needed. I signed up for his Nikon Z6 & Z7 Series One-Day Mirrorless Mastery Bootcamp on the second weekend in September in New York City.
I took the train from DC’s Union Station to Penn Station and arrived on a wet Friday afternoon in New York. The city was getting drenched by Dorian as the hurricane made its way up the east coast. First stop – the B&H Photo NYC SuperStore at 420 9th Ave. I’d never been to B&H before and wanted to see the store in person. I spent about an hour looking around and then got to the serious shopping. I picked a NIKKOR Z 14-30mm f/4 S Lens and the NIKKOR Z 35mm f/1.8 S Lens. My longterm zoom lens plan was to pair the 14-30mm with the 24-70mm as part of an eventual f/4 zoom trinity. And while I have 24mm and 50mm F-mounts, I’ve always wanted a 35mm prime. The 35mm is the basis of my longterm f/1.8 prime lens plan. The 35mm isn’t the best Z-mount lens, but since making the purchase, I find it’s usually my go to lens. (I’ve since sold the F-mount 50mm f/1.4 and purchased a NIKKOR Z 50mm f/1.8 S Lens.)
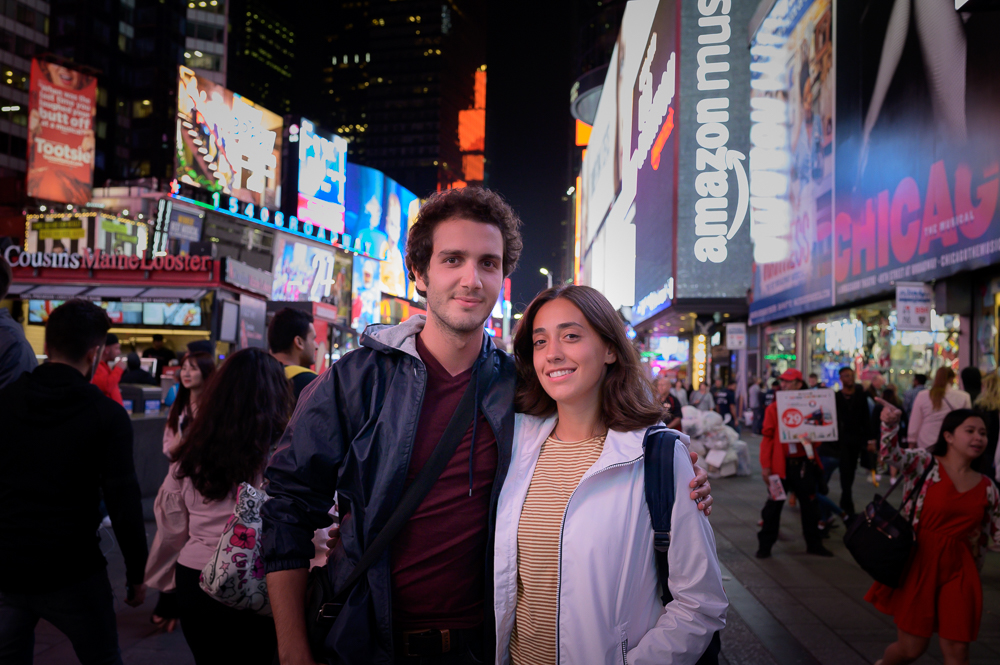
That evening I met Sinem and Murat for dinner at Angelo’s Pizza on Broadway. Sinem is from Istanbul and Murat is from Izmir and both are university students who were part of the international team of lifeguards at our community pool over the summer. As luck would have it they arrived in New York on Friday to start the travel portion of their summer work/travel program. After dinner we stopped for a beer a few blocks away at McCoy’s Pub and then went to see the lights of Time Square. Aways great to be able to meet up with friends when you are away from home! Before heading back to Turkey at the end of September, Sinem and Murat met up with other traveling lifeguards to see the Grand Canyon, Las Vegas, San Diego, Los Angeles and San Francisco.
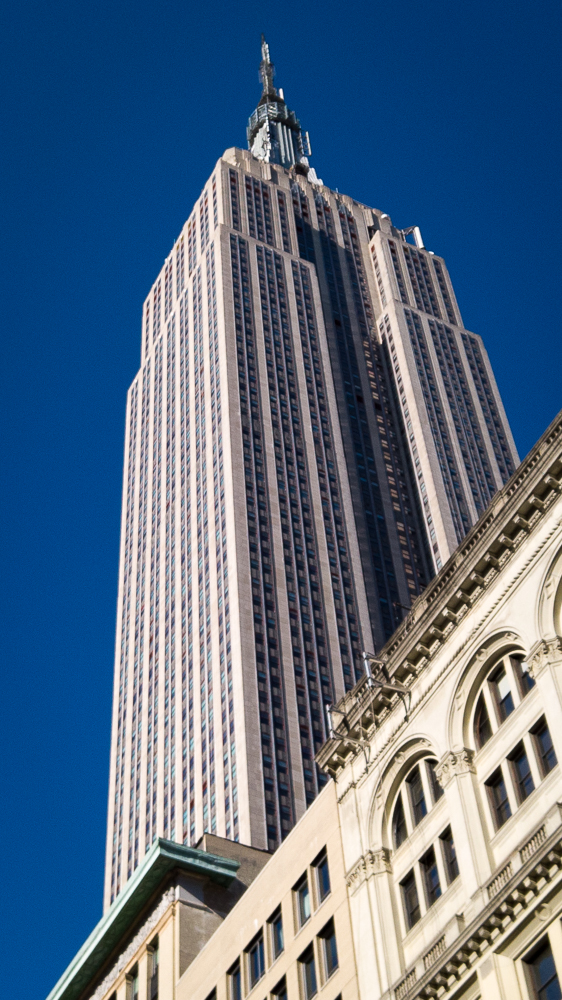
The next morning skies cleared on a glorious late summer morning in New York City. I walked the 30 or so blocks down 5th Avenue from the Courtyard New York Manhattan to the NYC Seminar & Conference Center at 71 West 23rd Street passing Rockefeller Center, the Chrysler Building, the Empire State Building, Madison Square Park, and the Flat Iron Building.
The seminar was everything I’d hoped for. A small class with only four other photographers – each with Z7s. The external controls and the menus of the Z7 and Z6 are the basically the same, so being the only Z6 photographer in the room wasn’t a problem. The primary differences between the Z7 and Z6 are sensor size (45 megapixels in the Z7 compared to 24 for the Z6), autofocus points (493 for the Z7 and 273 for the Z6), and frames per second (with the Z6 at 12 and the Z7 at 9). With a small group there was plenty of time for Steve to answer individual questions.
The morning session covered external buttons, then menus, shooting modes, and autofocus. After a lunch break there was more on autofocus, then white balance, file formats, ISO, exposure, histogram, and picture controls. Some seminars are about putting the camera down and following a PowerPoint presentation, but Steve wants you to have camera in-hand, changing settings and testing results. And at the end of the day we went down to the sidewalk on W. 23rd St. to test various focus modes and camera setup. Thinking back on this 10 months later, I don’t remember why I was having problems with setup last summer, but I came away from the seminar with a much better understanding of the camera and how as a mirrorless camera it differed from by previous DSLRs.
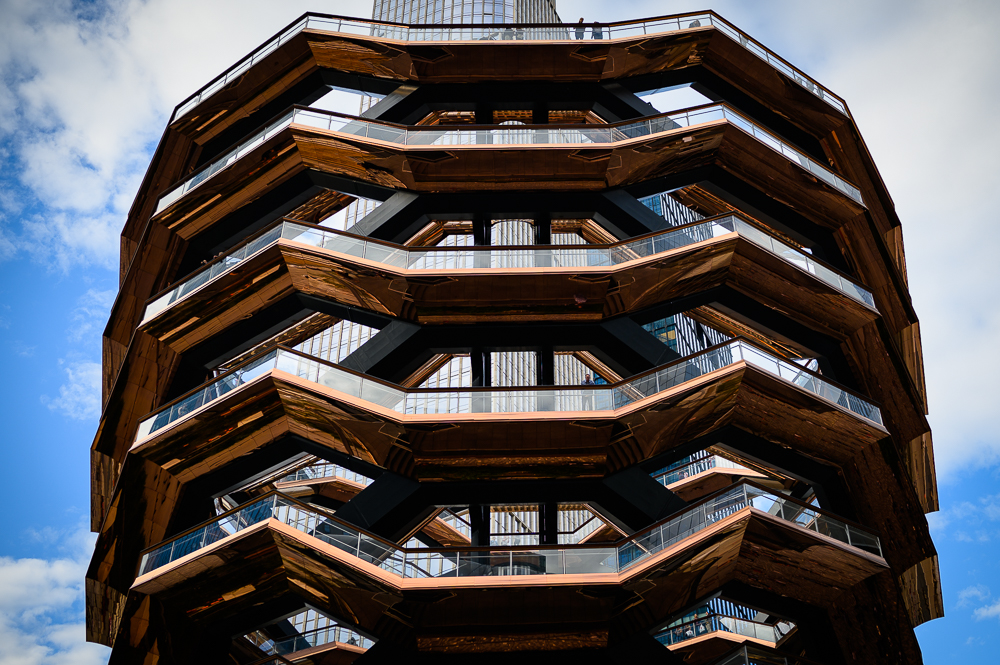
I was booked on the 6:05 PM Amtrak train from Penn Station back to DC and fellow workshop student Allyson was taking the same train back to Philadelphia. Steve suggested we photo walk the High Line up to see Hudson Yards and the Vessel on the way to Penn Station. Great suggestion, Steve! We made the walk up in about an hour, leaving plenty of time to stop for some pictures of the Vessel and to get a beer to carry-on the train. Allyson has travelled to many of the same places I’ve been to, so we had many photo experiences to share on the way home.
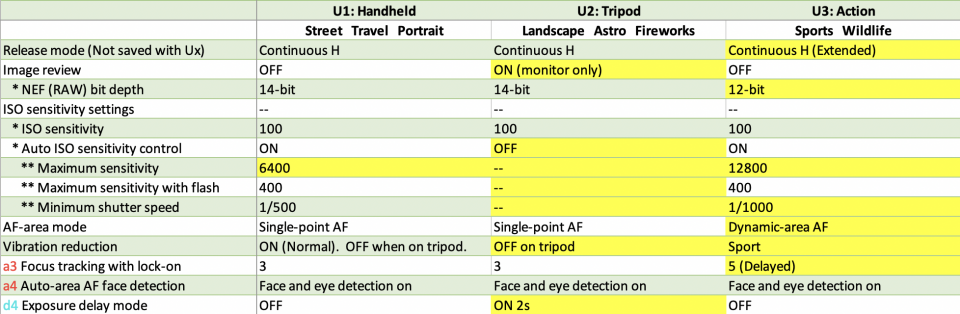
So what’s been happening in the 10 months since New Your City? In October I finalized my camera setup based on the Mirrorless Mastery Bootcamp and a great article on the Photography Life Website. If you are interested in Steve Simon’s approach, then I strongly recommend you visit Photo Educate and consider attending one of his workshops. I usually don’t do endorsements, but I can tell you that Steve has greatly helped my photographic journey and I will continue attending his workshops for more photographic learning opportunities. If you are looking for an online resource, then take a look at Nasim Mansurov’s comprehensive Recommended Nikon Z6 Settings on Photography Life. I also decided on an approach for the U1, U2, and U3 settings so that U1 is handheld (street, travel, and portraits), U2 is tripod (landscape, astrophotography, and fireworks), and U3 is action (sports and wildlife). With these settings I can quickly get the camera ready for the kind of situations I typically photograph.
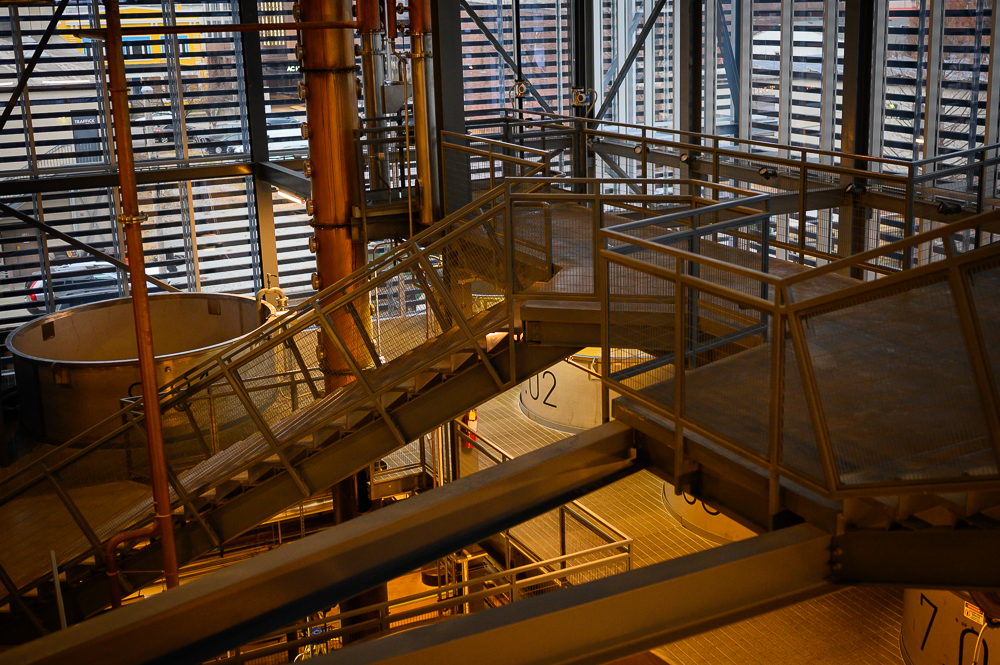
Last November I didn’t bring the Z6 on the trip to Brazil and instead went with the D750 and the DJI OSMO Pocket. Before we left I didn’t have a chance to add the Z6 and new glass to my insurance. Given the safety concerns in Brazil’s larger cities it seemed smarter to travel with insured gear. But I did bring the Z6 to Louisville for the holidays in December and a visit to the Rabbit Hole Distillery.

In February Nikon released the fifth firmware update since I purchased the camera 15 months ago, with Firmware 3.0 adding significant focus tracking improvements. With these firmware improvements the Z6 has gone from a very good camera to an excellent camera! It’s great to see that Nikon continues to improve the capabilities of both the Z6 and Z7, supporting a complex decision to move from DSLRs to mirrorless.
Since the onset of the pandemic, I haven’t done much shooting at all, but there are always good opportunities for socially distanced photography! In the meantime, I should probably get busy updating the gear page. Thanks for reading.
So you like the Z6 overall? Autofocus works pretty well? I’m considering selling my D7500 and lenses and going for it to upgrade to full-frame, the Z-mount, and a slightly smaller body, but years ago I used had an Olympus mirrorless four-thirds briefly that everybody raved about and it just focus hunted forever in low light and I hated it. So I’m a little concerned about AF performance, curious on your thoughts? Thanks! Great article by the way!
Morgan – I do like the Z6 overall. Easily the best image quality of any camera I have owned! And I’m very satisfied with the autofocus performance. I like that Nikon worked to improve autofocus performance through ongoing firmware updates. However, it seems like the just released Z6II, with Dual EXPEED 6 Image Processors, will put to rest any concerns about autofocus performance. If I was moving to mirrorless now I would buy the Z6II. Thanks for reading!