Onboard Jet Blue flight 456 to Boston:
Off on another adventure with Dr. Craven and the travelers from Milford HS. As usual, I spent a good part of the past week figuring out what to bring – and what not to bring, but I’m safely below the 50lb limit.

Home for the next two weeks!
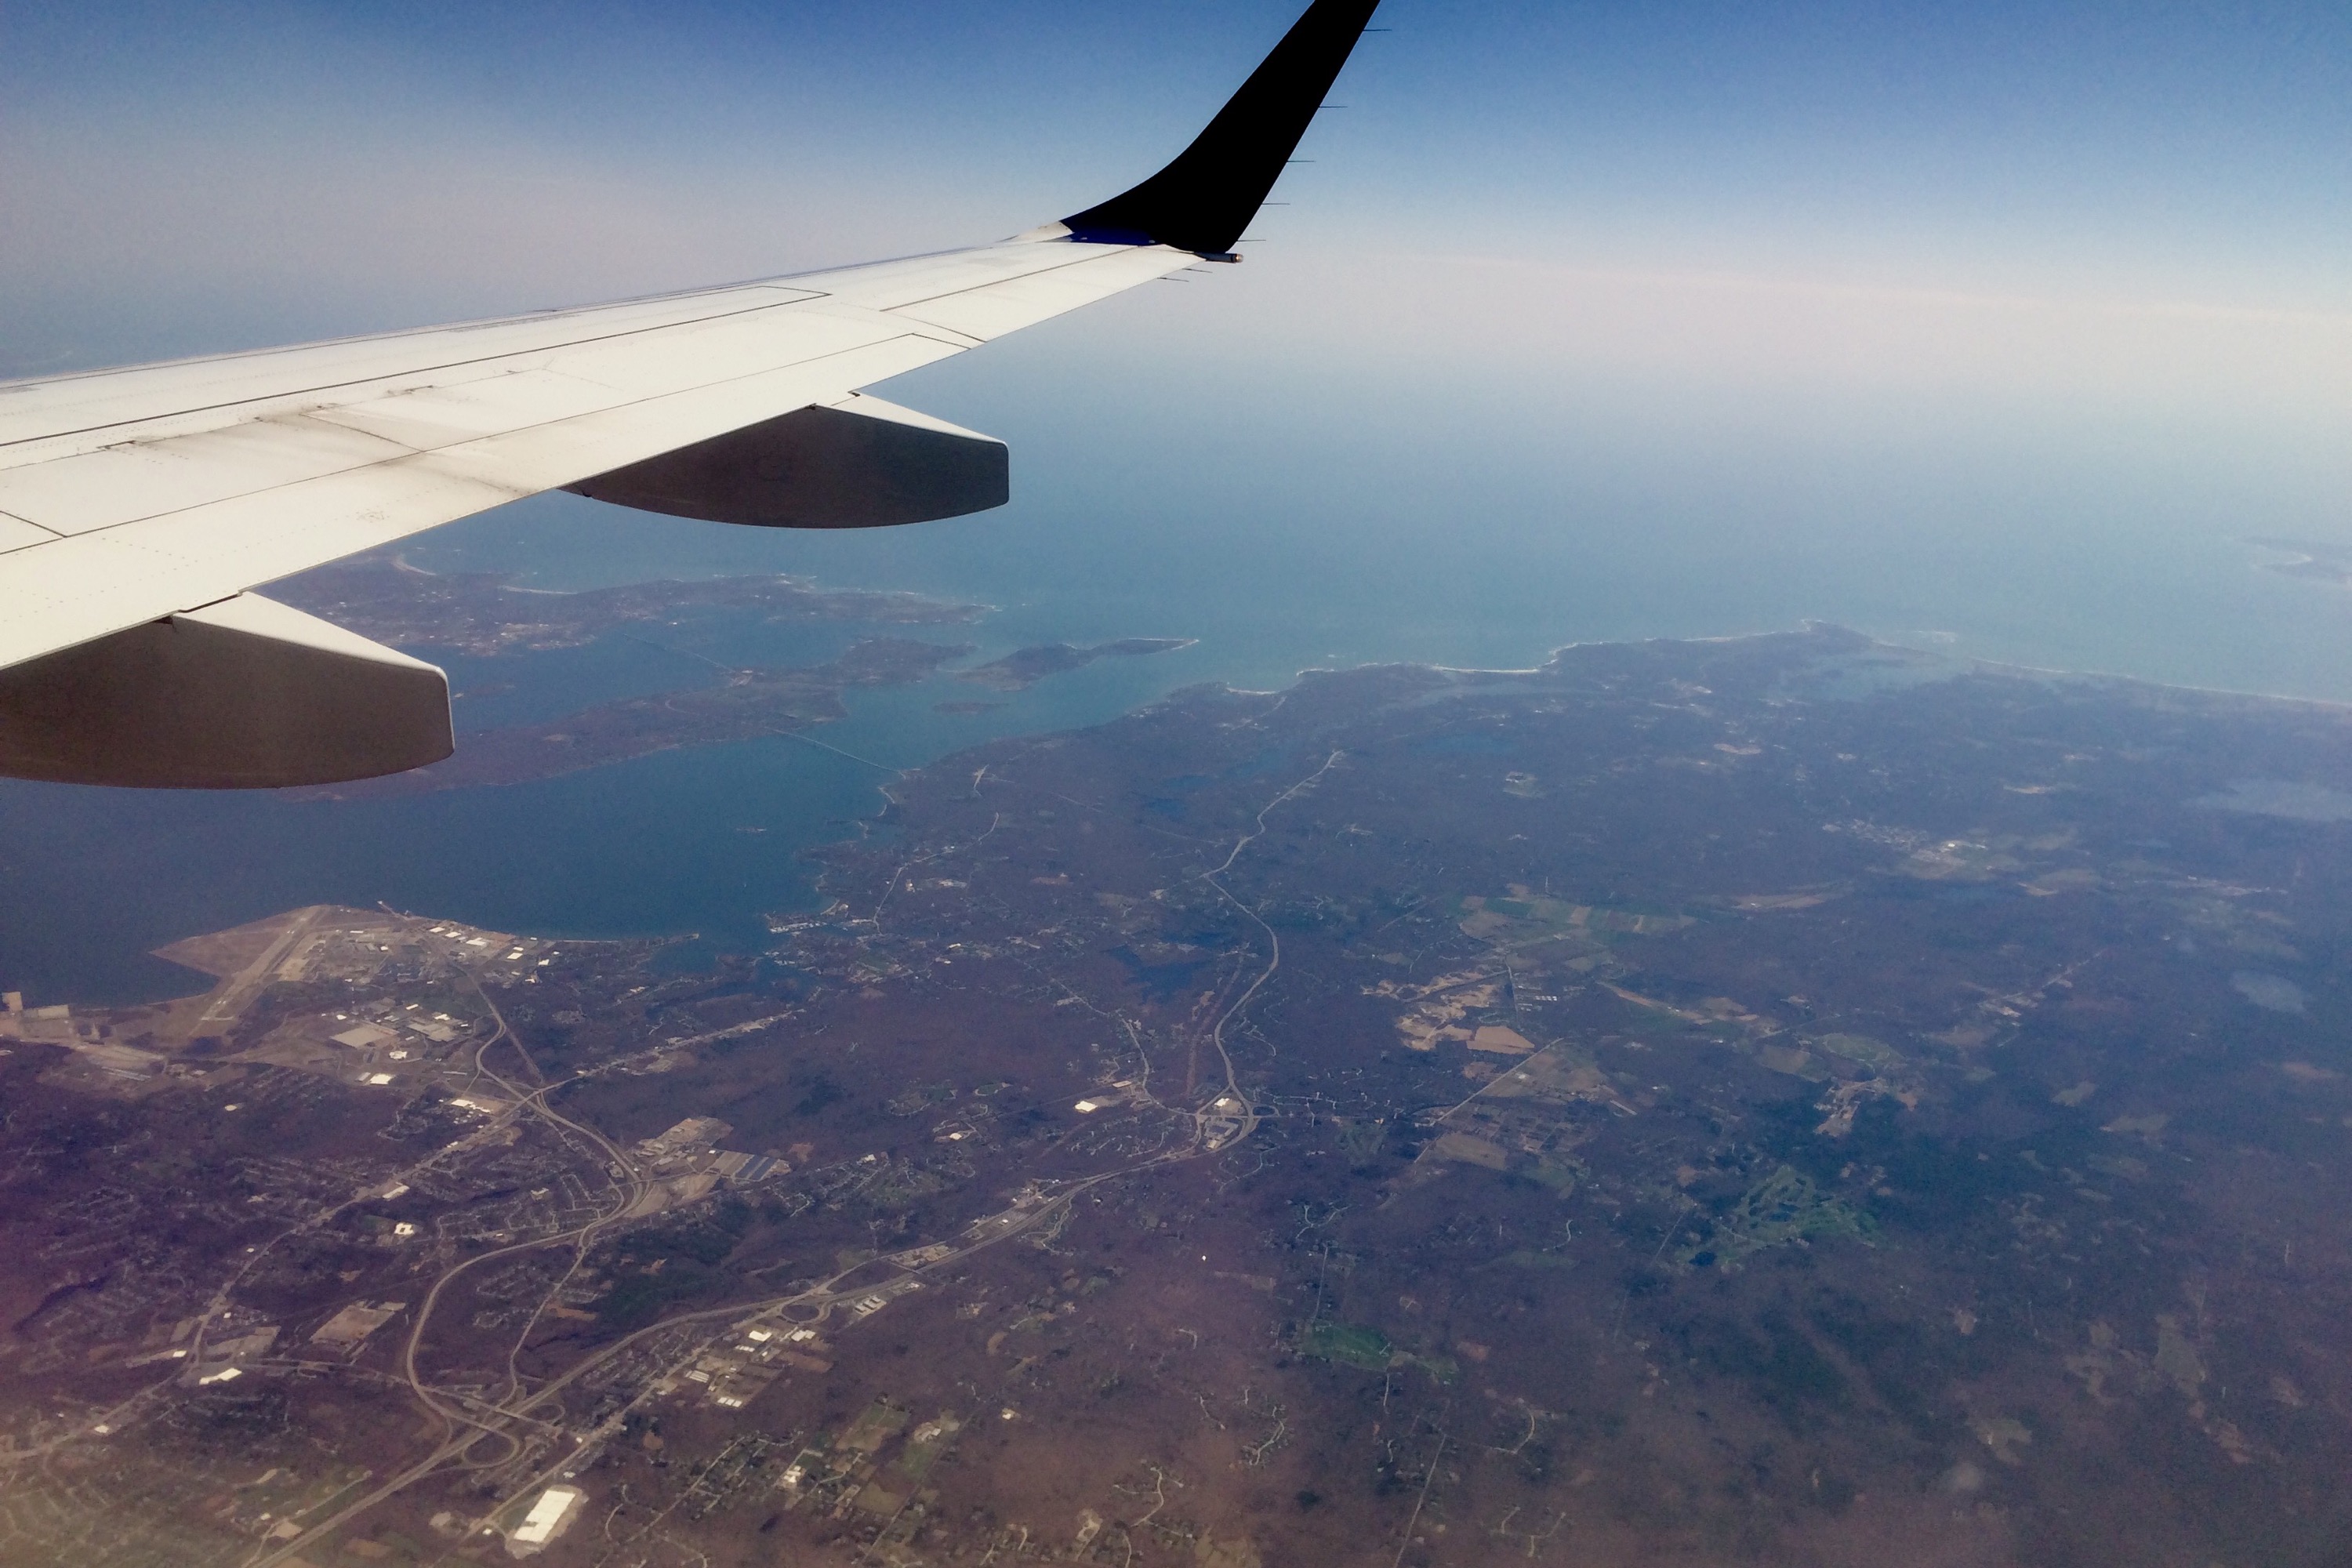
Flying Jet Blue to Boston and although a bit windy and bouncy it’s a beautiful day for flying and aerial sightseeing.

Over Rhode Island
Mickey, Donna, and Patty are on the way in from California and we are having a reunion tonight with Shannon and Peter. (And probably continuing our debate about the pros and cons of Malaria pills!)
For stills and video I brought the Nikon D750 along with the 28-300mm super zoom and the 16-35mm wide angle zoom. I will use the Wi-Fi capabilities of the D750 to upload photos to my phone and then use the WordPress app to post these daily updates.
Tomorrow we leave early for London.
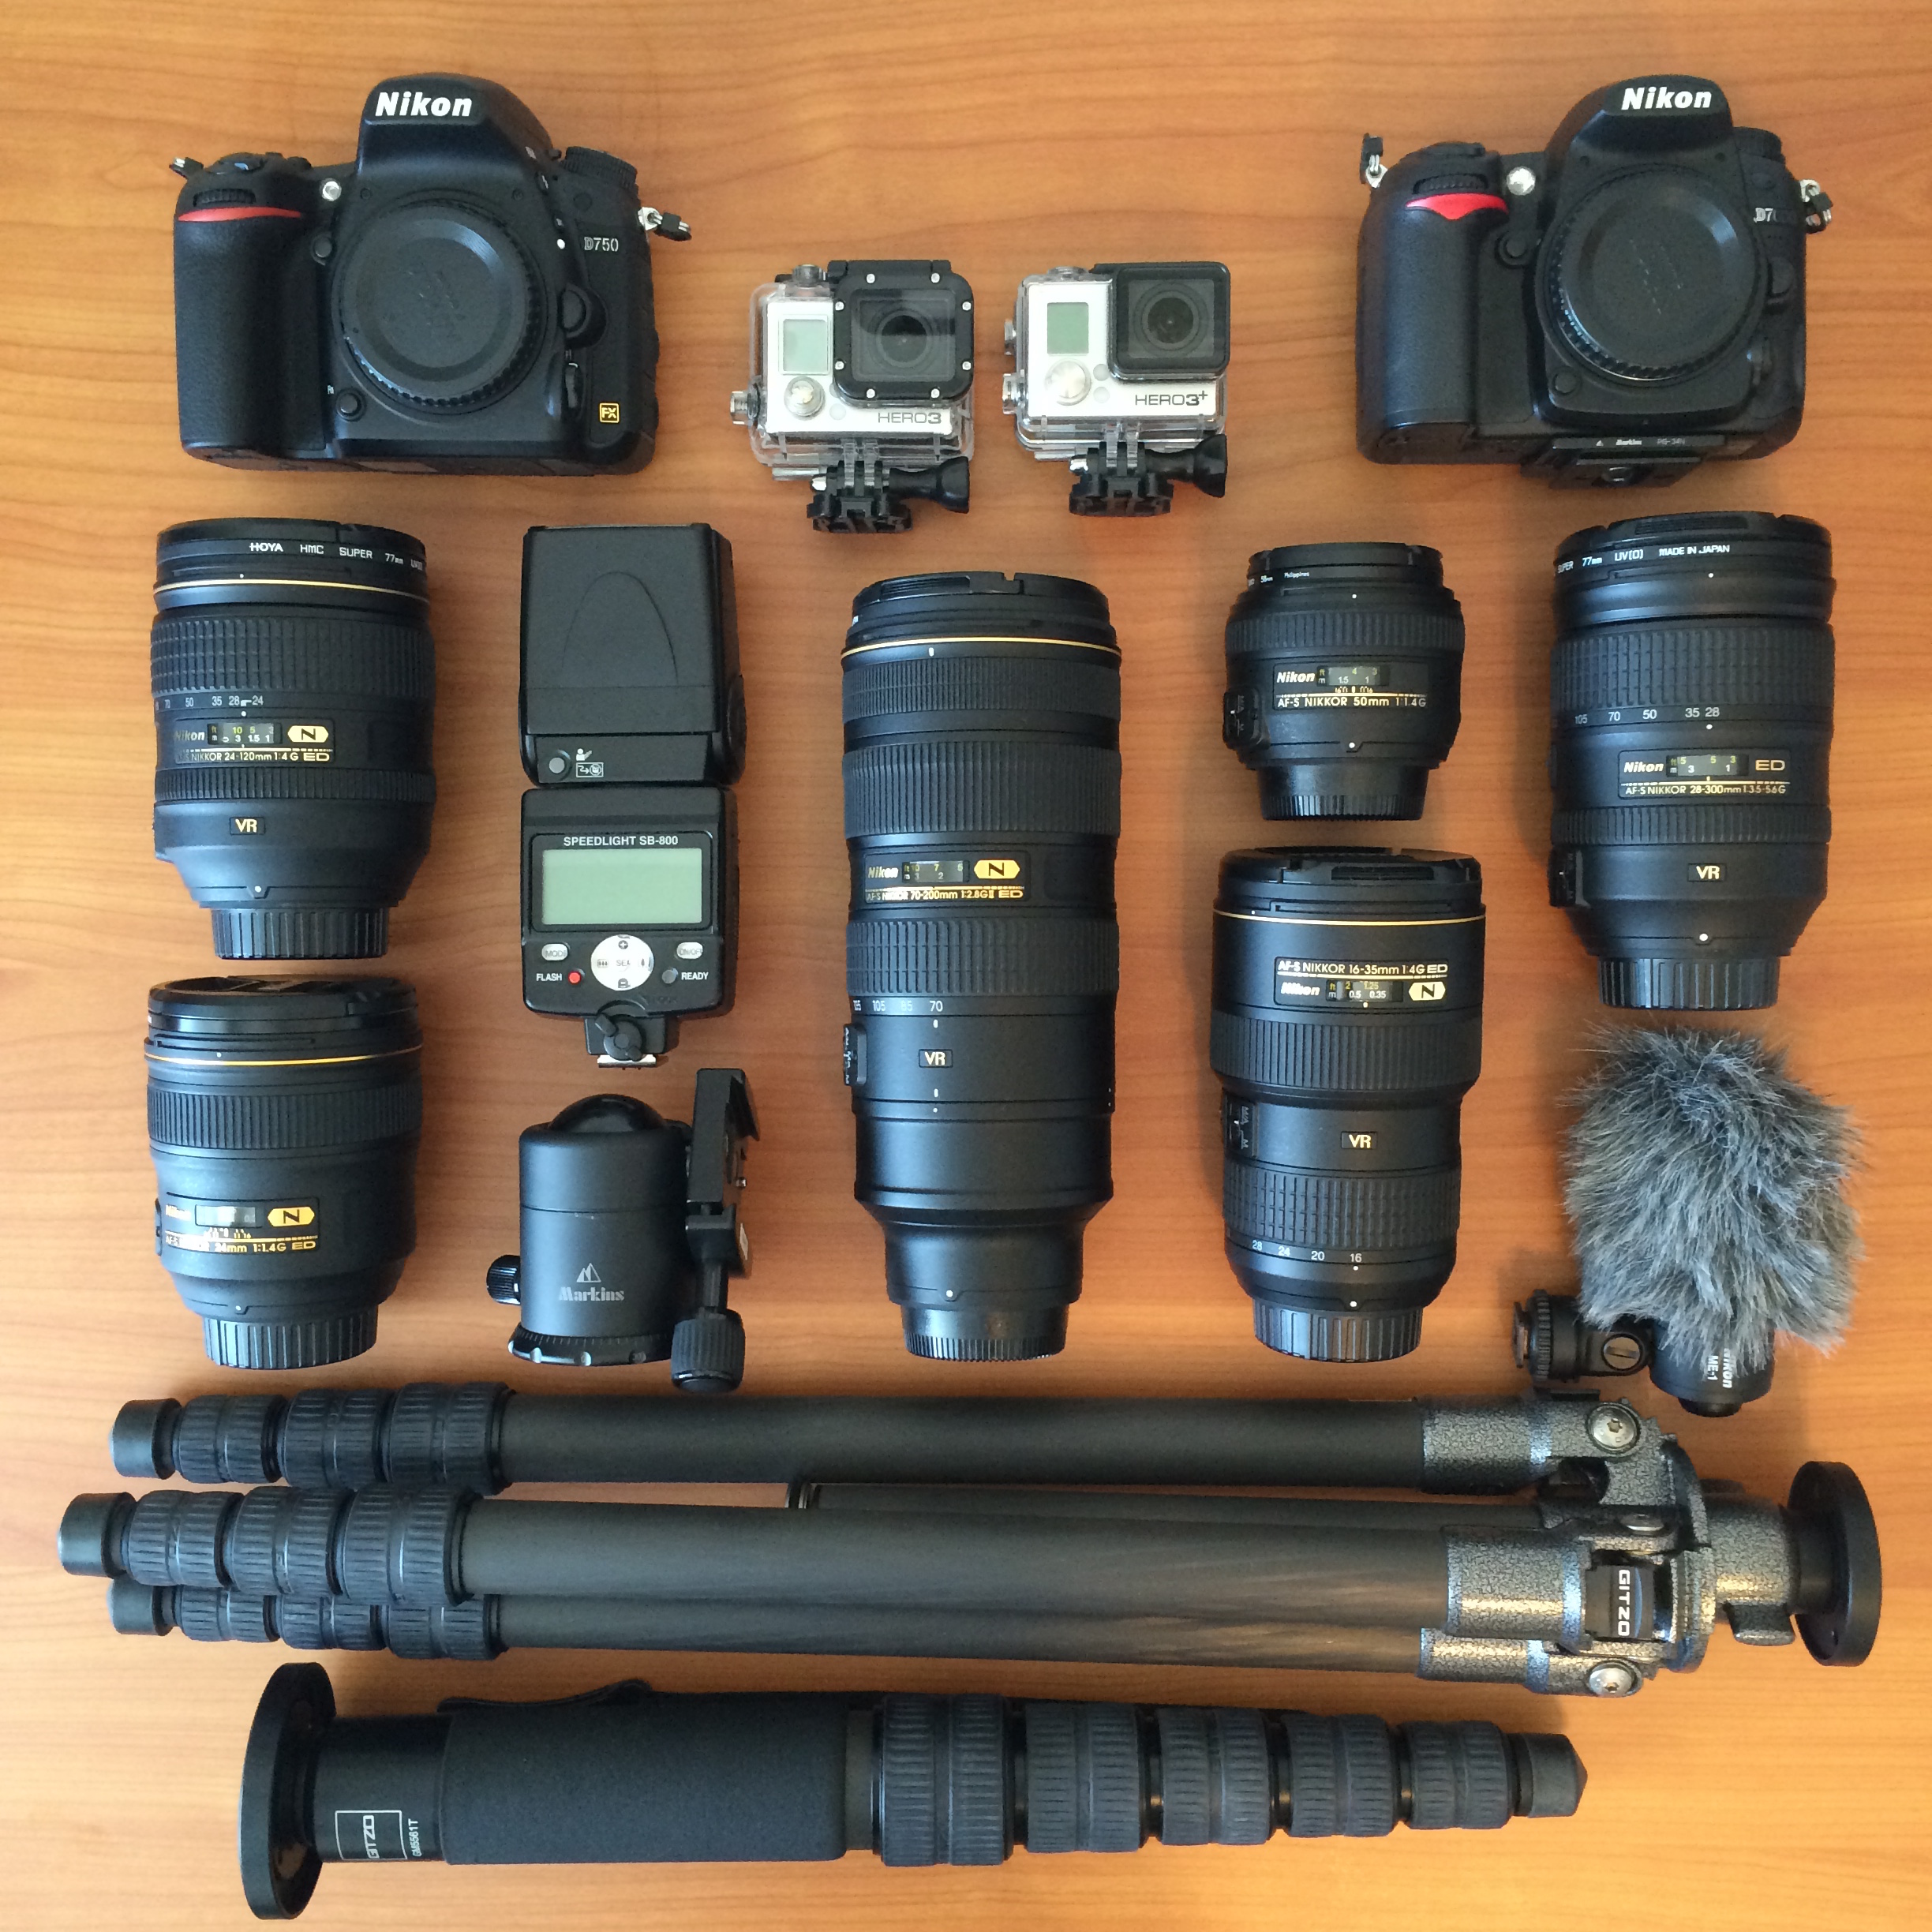
Some changes to the current gear lineup. I sold the Nikon D600 DSLR, the Nikkor 18-35mm f/3.5-4.5D IF-ED, the AF-S DX Nikkor 12-24mm f4G IF-ED, and the AF-S Nikkor 17-55mm f/2.8G IF-ED. And I added the Nikon D750 DSLR, the AF-S NIKKOR 16-35mm f/4G ED VR, and another GoPro. See the updated gear page for more details.
Last week I posted the 2013 Galápagos Islands video and shortly after the trip I posted details of the photo and video workflow. Here is a little more detail about the video shooting and editing workflow for the Galápagos Islands project.
I brought the Nikon D600 DSLR along for this trip and used the AF-S NIKKOR 28-300mm f/3.5–5.6G ED VR zoom lens. The 28-300mm is a great all-round travel zoom – particularly when you need to pack light! Super zooms, like the 28-300mm, are always a compromise. But for all-day, always on-the-move outdoors photo and video, the 28-300mm is a winner. When shooting video I added the Nikon ME-1 microphone to the setup.
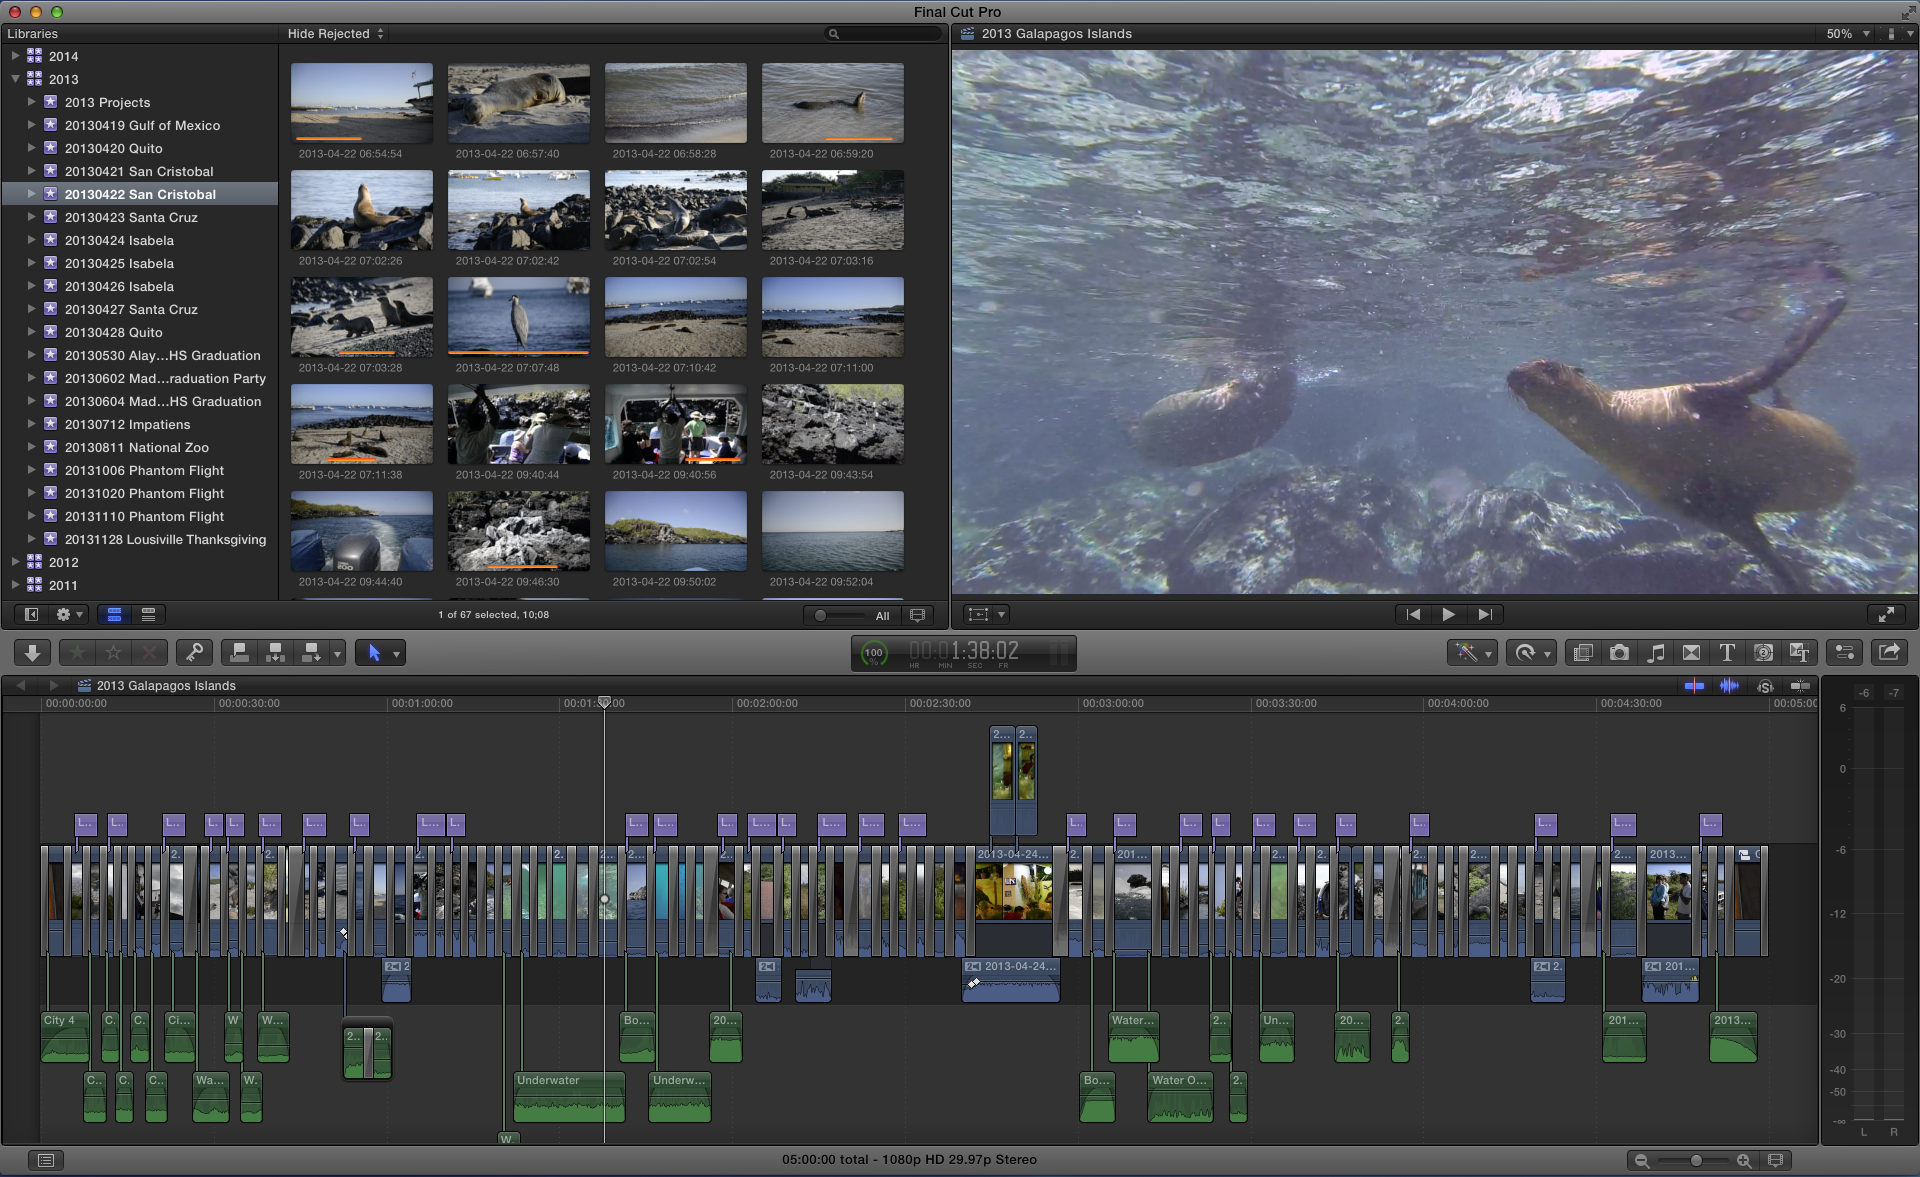
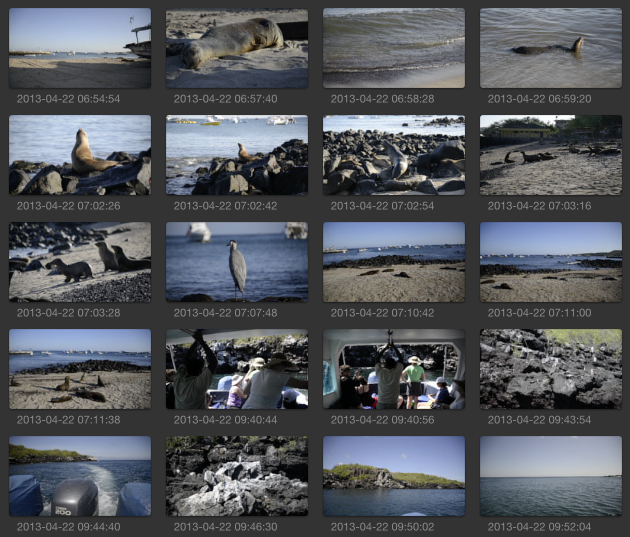
For a travel video I like to feature the highlights in largely chronological order. This matches the natural ebb and flow of the trip and serves as a great video journal. So once the clips are loaded into Events named by day and location (for example 20130422 San Cristobal) I rename the clips by date and time and sort ascending. Here is the Event Browser in FCPX showing the result …
The edit process is pretty straight forward. Put all the clips in the timeline in chronological order, then remove the anything not worth keeping … out of focus shots, bad exposure, missed action, and duplicates. Several passes through the timeline like this gets the original one hour and 11 minutes down to a more manageable number for fine tuning. Next, add dissolves as needed to smooth the transitions between shots, insert the Photo Album Pan Lower Right transition to separate each day of the trip, add lower third titles to identify locations, tweak audio levels, and add sound effects when necessary to replace or supplement existing audio. Then watch the nearly complete project a few times, fine tune, and watch some more. When the edit process is complete – upload to Vimeo, post on Facebook, and post here on the blog as well. Here is a close up of the project timeline …
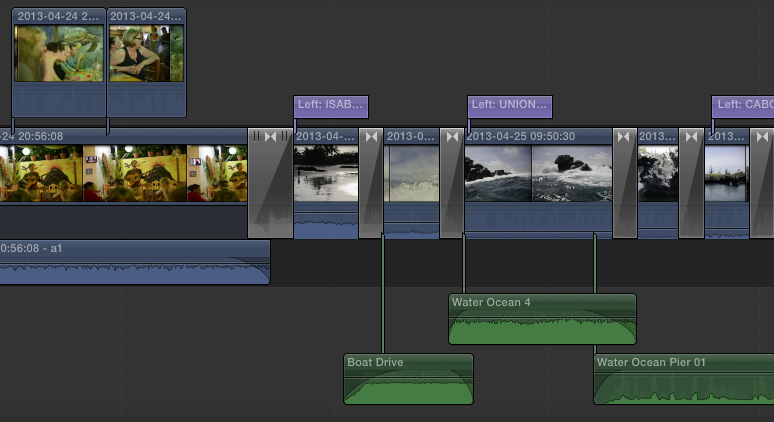
Here is the entire timeline for the finished project …

And here is the finished project …
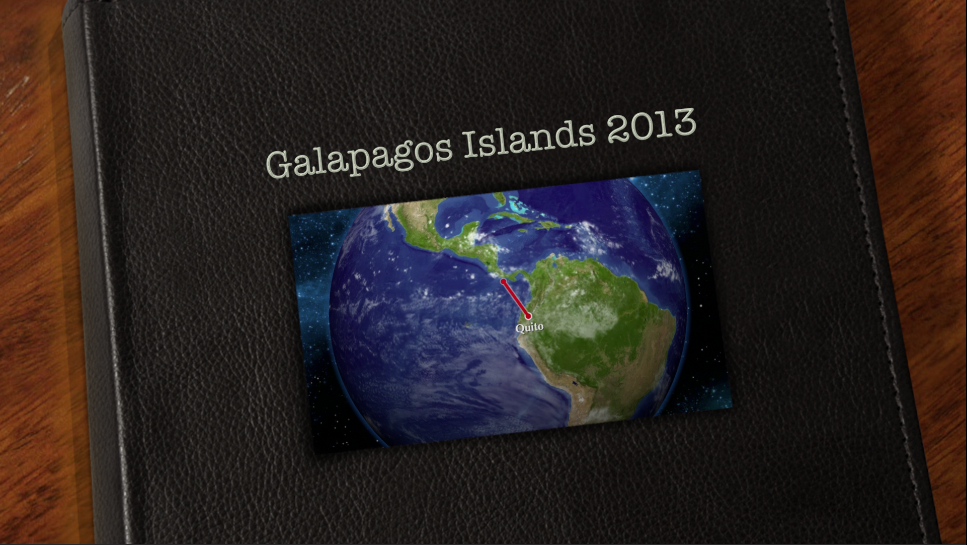
As usual this took too long to finish!! But a year and a half after our trip here is the video for the 2013 Galápagos Islands adventure.
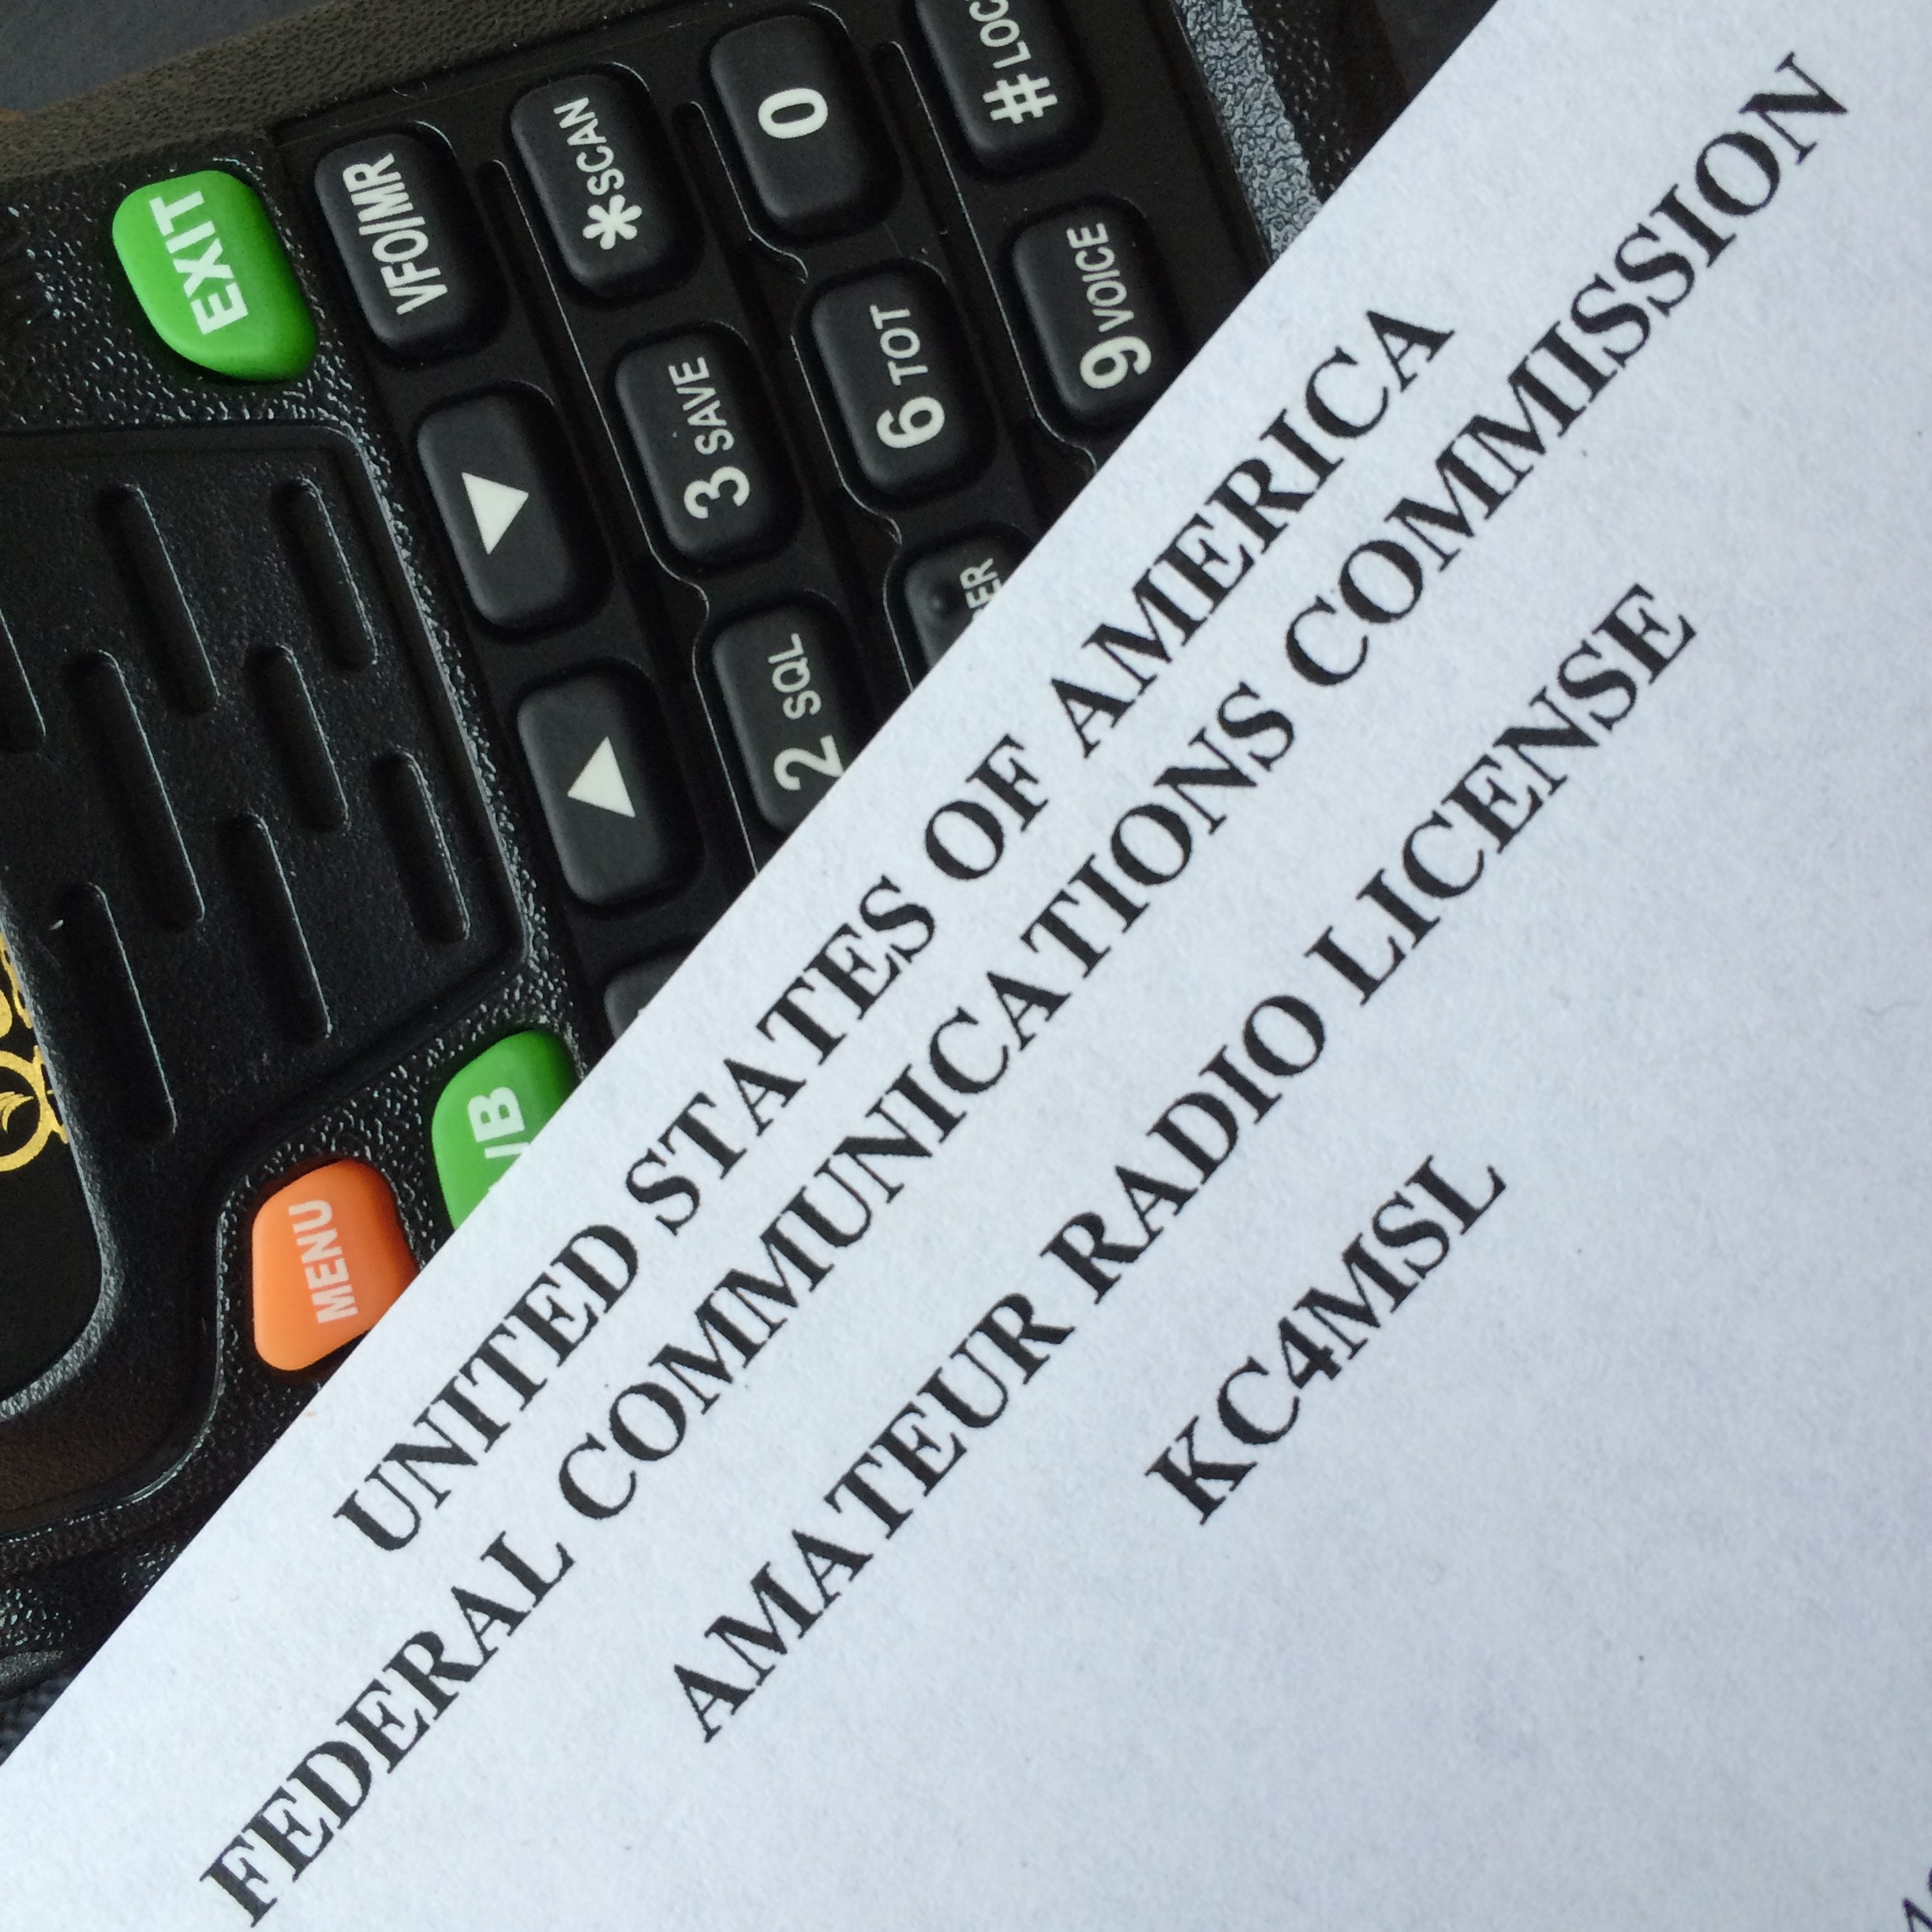
In this case a ticket refers to an FCC amateur radio license. Something I’ve been wanting to do for a while. Thanks to the members of the Sterling Park Amateur Radio Club (SPARC), I participated in a weekend lecture session ending with a Sunday afternoon exam. A couple weeks later my call sign appeared in the FCC database and now I am officially licensed as an Amateur Radio Operator with Technician privileges as KC4MSL.

 Michael S. Liberman