 Michael S. Liberman
Israel Gear and Workflow Overview

It’s been two and a half years since my last international trip to Brazil. From global to personal, those two and a half years were filled with some life changing events – specifically COVID-19 and my retirement, but also some travel related changes. I’m using a new camera, a new phone, and a couple of new apps. And that means some changes to the gear and workflow I’ve been using for a while.
I mentioned in the Israel Day 1: DC to Tel Aviv post that this trip had been postponed from the spring of 2021 due to the COVID-19 global pandemic. COVID-19 changed how we travelled – from vaccination requirements to multiple PCR and antigen tests before and during the trip. But the good news is that were were able to travel and we were able to travel safely. Israel was just opening back up to tourism and in many of the locations we visited we were the only tourists around.

Travel Workflow!
So here is the Israel gear and workflow update. Every trip requires a carefully considered pack list that balances the demands of international shooting locations with the willingness (or ability!) to carry a certain amount of equipment. Despite the tension and hostility that seems to be always ongoing in Israel, the Gaza Strip, and the West Bank, I felt comfortable traveling to Israel with photo gear.
As I did for Brazil, Southeast Asia, India, Cuba, Peru, South Africa, and Galapagos, here is an overview of the gear I carried to Israel followed by the photo and video workflows I used to handle the media files when I returned.
Travel Gear
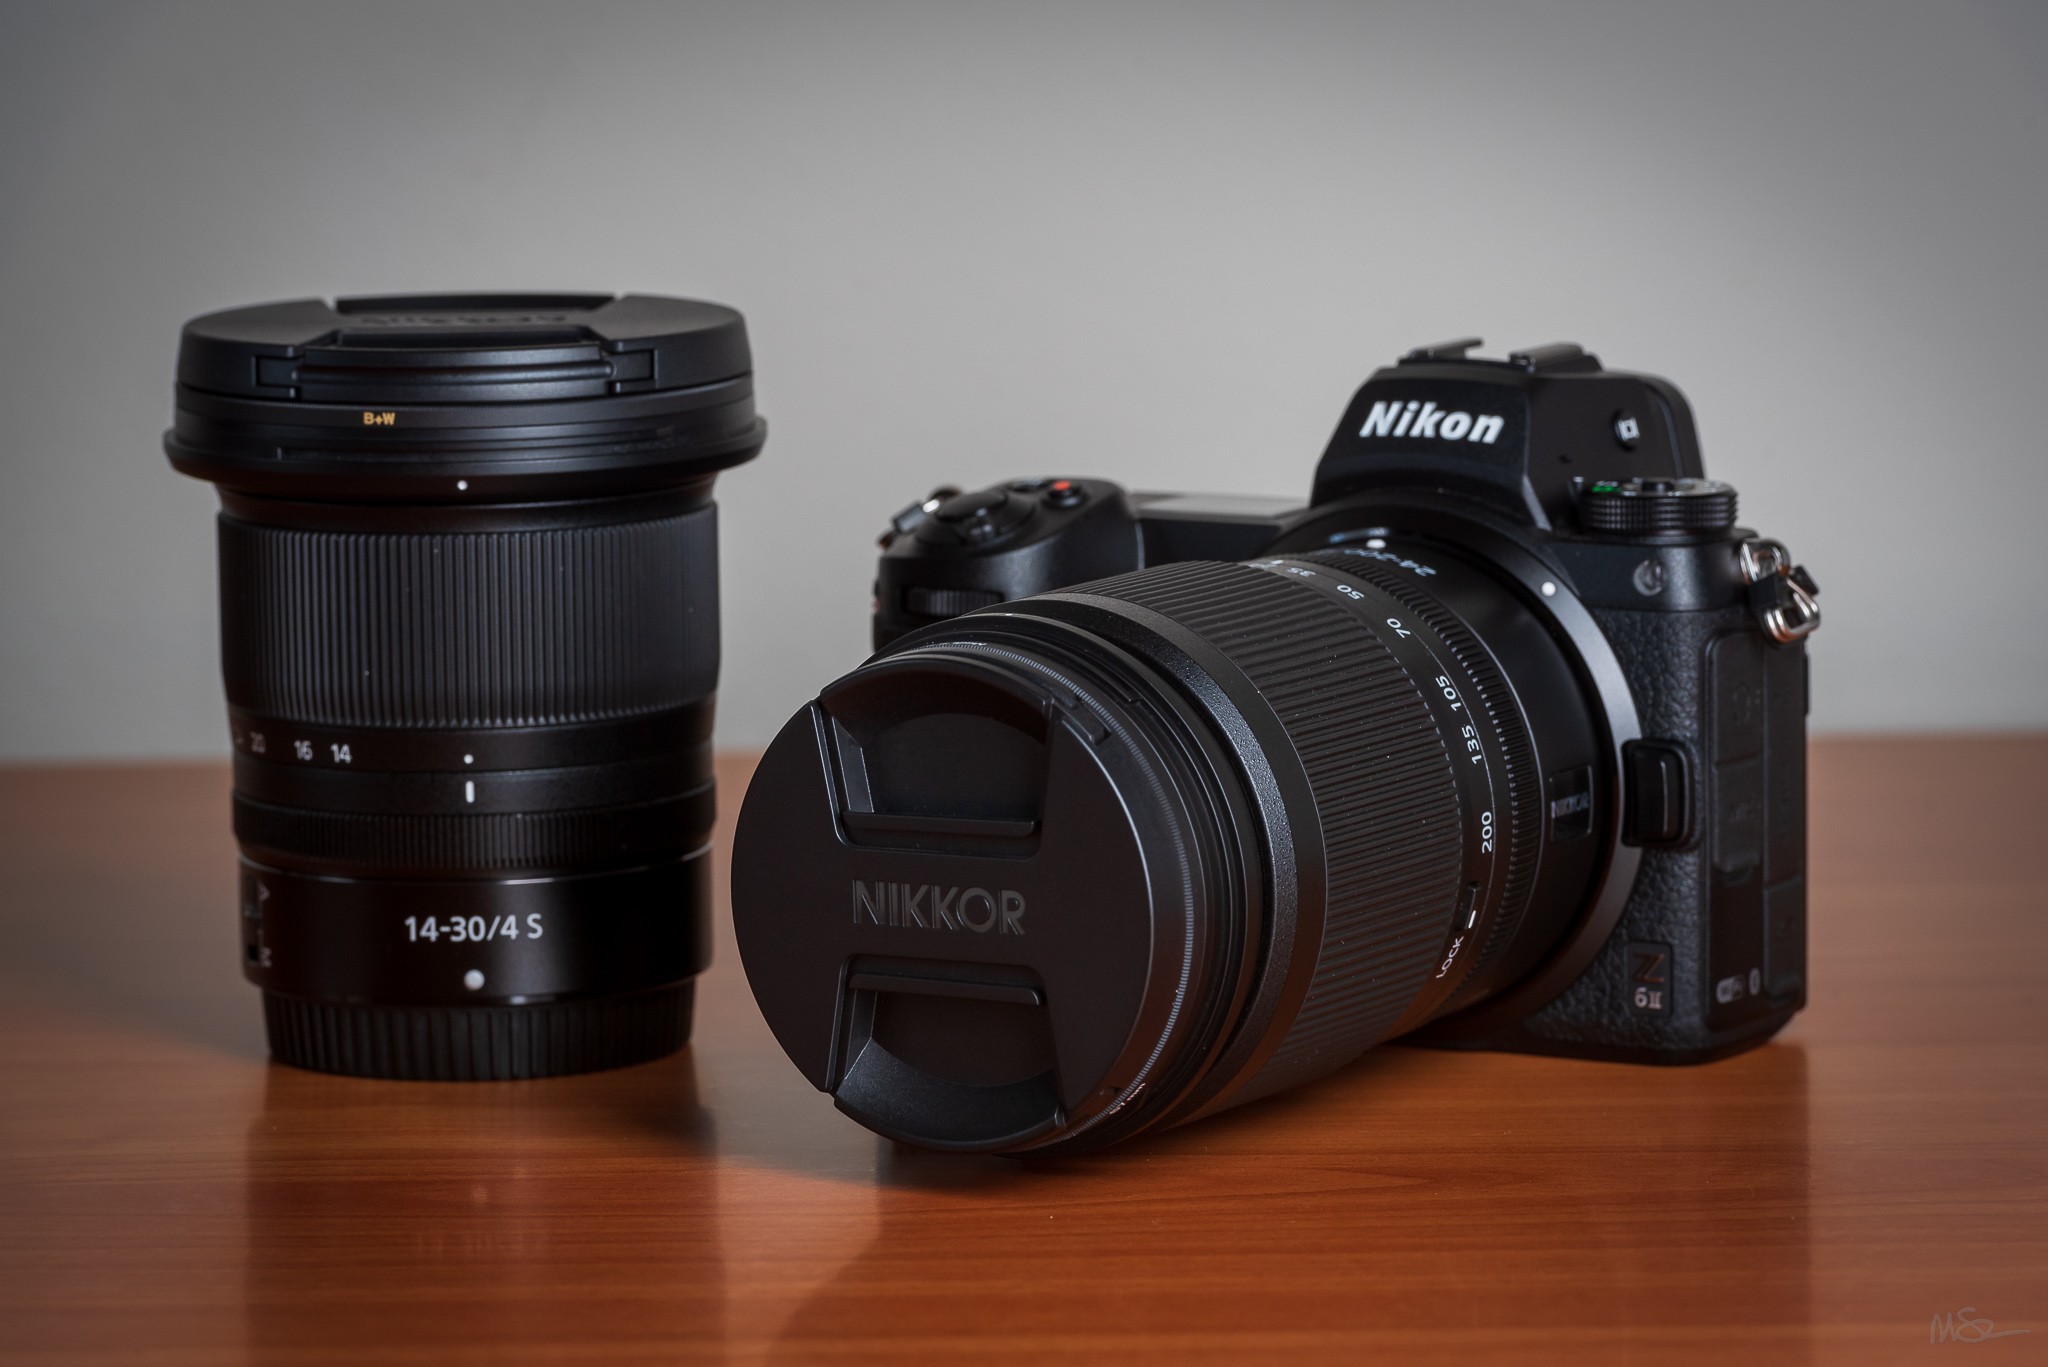
Nikon Z 6II 24.5MP Mirrorless Camera: After bringing the D750/28-300mm combo along to Brazil, Southeast Asia, India, Cuba, Peru, and South Africa, like me, the Nikon D750 is now retired. My DSLR journey started in 2003 with the Nikon D100, then progressed to the Nikon D7000 (used for the Greece and Turkey trip), followed by the Nikon D600 (for the Galápagos Islands trip), then to the Nikon D750 – my travel workhorse since 2015. With each of these cameras I’ve relied on the RAW image file format, instead of JPEGs, to achieve the best image quality. Twenty years ago RAW files were flat, low contrast, and low color. But RAW files possessed greater dynamic range compared to their JPEG counterparts, allowing for more post-processing flexibility for photographers. With each generation of digital camera the quality of RAW image files directly out of the camera improves greatly. Some of this is attributable to improvements in sensor technology, and some is due to improvements the internal processing of RAW files by camera manufacturers. I always thought the D750 RAW files were excellent, but everytime I download RAW files from the Z 6II I am blown away. They look incredible! I will spend significantly less time post-processing photos from the Z 6II. Switching to Mirrorless didn’t result in the weight savings I had initially expected for travel purposes, but the Z 6II does weigh slightly less than the D750 – about 135 grams. After carrying the camera through Israel for a week I can confidently say the Z 6II is a great travel camera! Paired with the 24-200mm the combination of image quality and portability for stills and video is outstanding.
Nikon D750 • Nikon 70-200 mm f/2.8 at 200 mm • ISO 400 • 1/125 sec at f/11
NIKKOR Z 24-200mm f/4-6.3 VR Travel Zoom: After carrying the 28-300mm for many trips I finally switched to another super zoom lens. Compared to the 28-300mm I was looking forward to working with a slightly wider lens for travel, but I was concerned that the limited reach of the 24-200mm might be a problem. But you adjust to what you have and only on a couple of occasions did I find myself wanting a little more on the telephoto end. I really enjoy traveling with this lens. Great image quality and range from a single lens in a size that’s easy to carry on planes, trains, ships, buses, and just walking down the street.
NIKKOR Z 14-30mm f/4 Wide Angle Zoom: For some variety I also brought along the 14-30mm. It was handy to have along to capture dramatic views of the churches. One of my favorites from the 14-20mm in Israel was this view of the stained glass windows in the Basilica of the Annunciation in Nazareth.

Nazareth, Israel • 32°42’7.58″ N 35°17’51.72″ E
Nikon Z6II • Nikon NIKKOR Z 14-30mm f/4 S at 14 mm • ISO 3600 • 1/500 sec at f/4.0
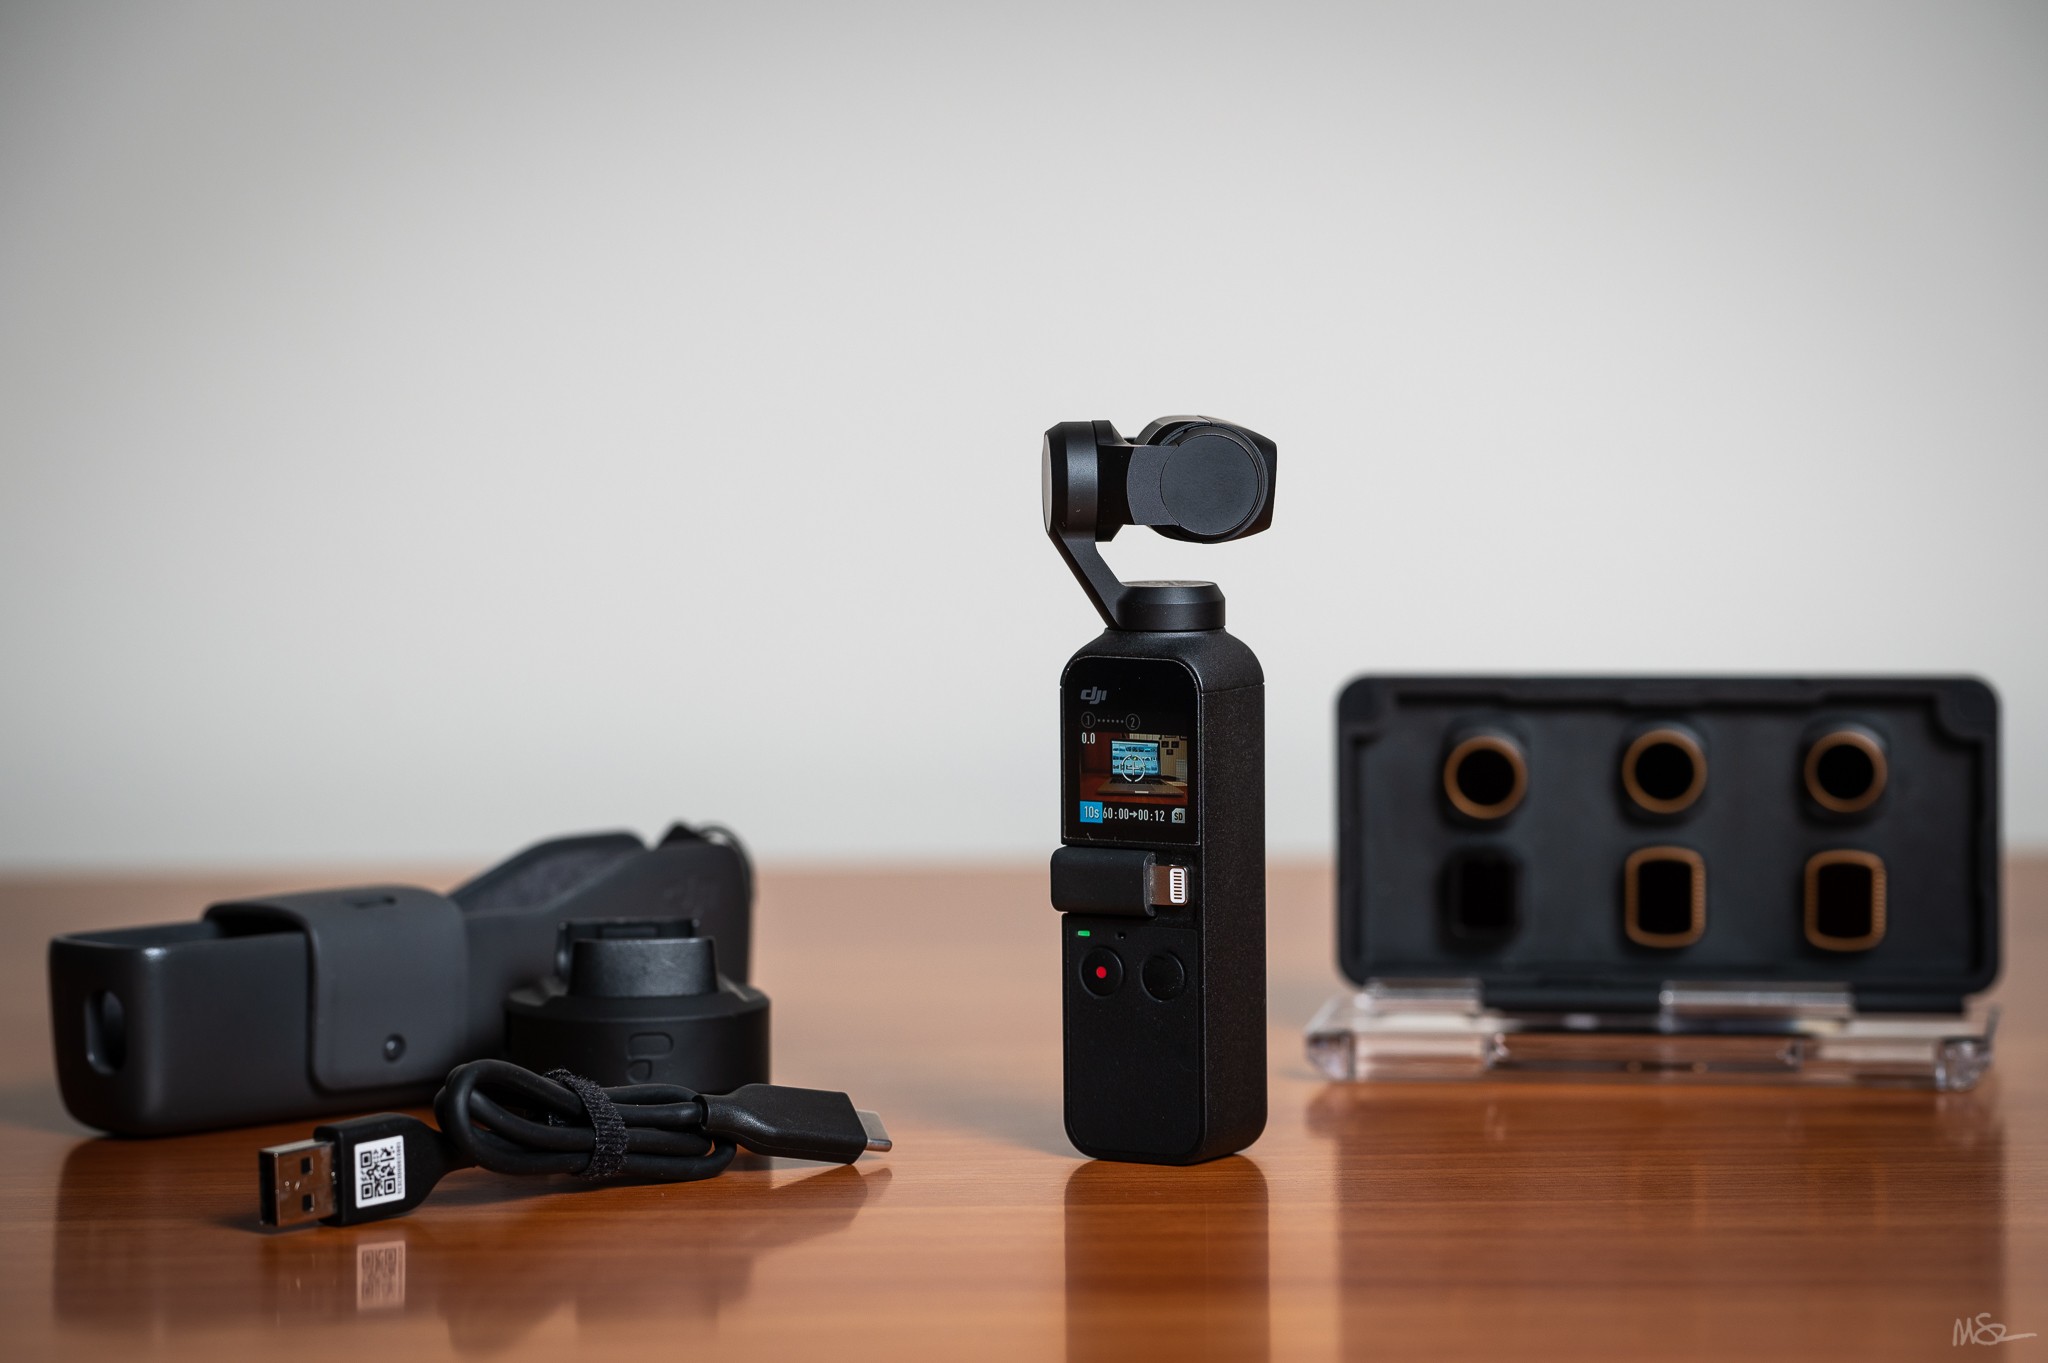
DJI Osmo Pocket: This gimbal/stabilizer provides a great platform for silky smooth video, timelapse, and motionlapse sequences. The tiny size of the Osmo Pocket can’t be beat for travel. It’s great for crowded street scenes, shooting from a vehicle while rolling down a bumpy highway, and getting a different video perspective than a DLSR provides. I carried the Osmo Pocket as my only still and video camera in the City of David Water Systems tunnel. Made sense because the Osmo Pocket is small and light. But in the pitch black darkness of the tunnel, the small LCD screen on the Osmo Pocket turned out to be my only source of light – throwing off just enough light to make out the sides of the rock wall tunnel. Lesson learned … bring a headlamp along on the next trip just in case there are more underground tunnels to traverse!
Nikon Z6II • VR 70-200mm f/2.8G at 160 mm • ISO 100 • 1/125 sec at f/5.6
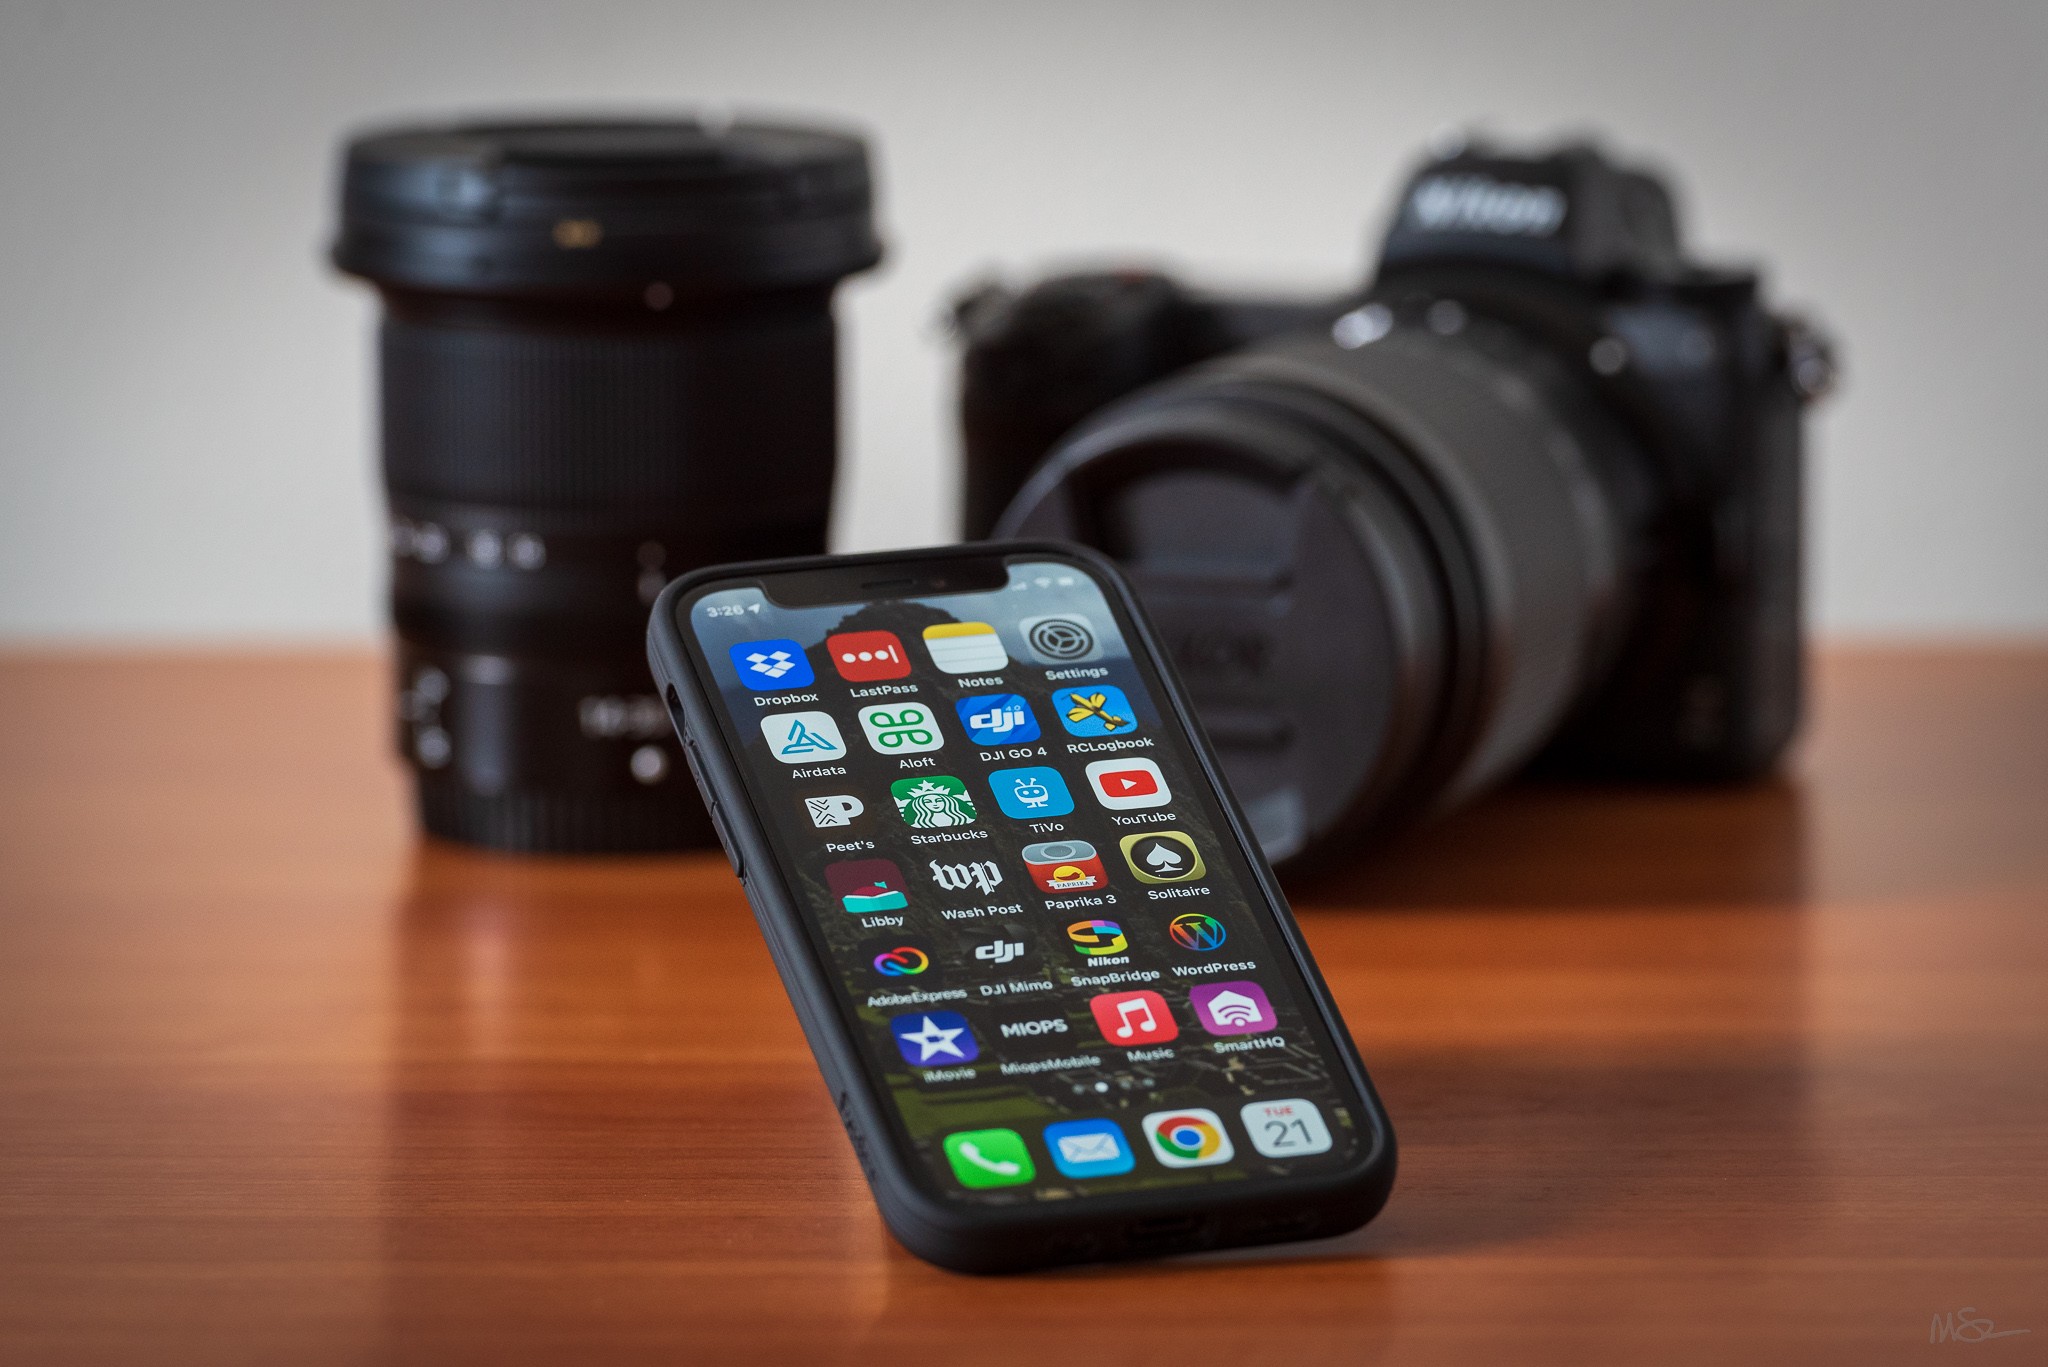
Apple iPhone 12 mini: Purchased in January of 2018, the iPhone 8 had reached the end of its useful life. I had hoped to wait until later this year to purchase a new phone, but the battery life wasn’t going to be reliable on an overseas trip. I couldn’t risk having an iPhone quit while traveling, so I bought an iPhone 12 – saving a little money by purchasing last year’s model. In addition to emails, texts, and phone calls, I used the iPhone for SnapBridge and WordPress apps to write and post blog updates while on the road, the DJI Mimo app for the DJI Osmo Pocket, and Adobe Express to make Facebook and Instagram art cards for each day’s posts.
Nikon D750 • Nikon 70-200 mm f/2.8 at 200 mm • ISO 800 • 1/125 sec at f/5.6
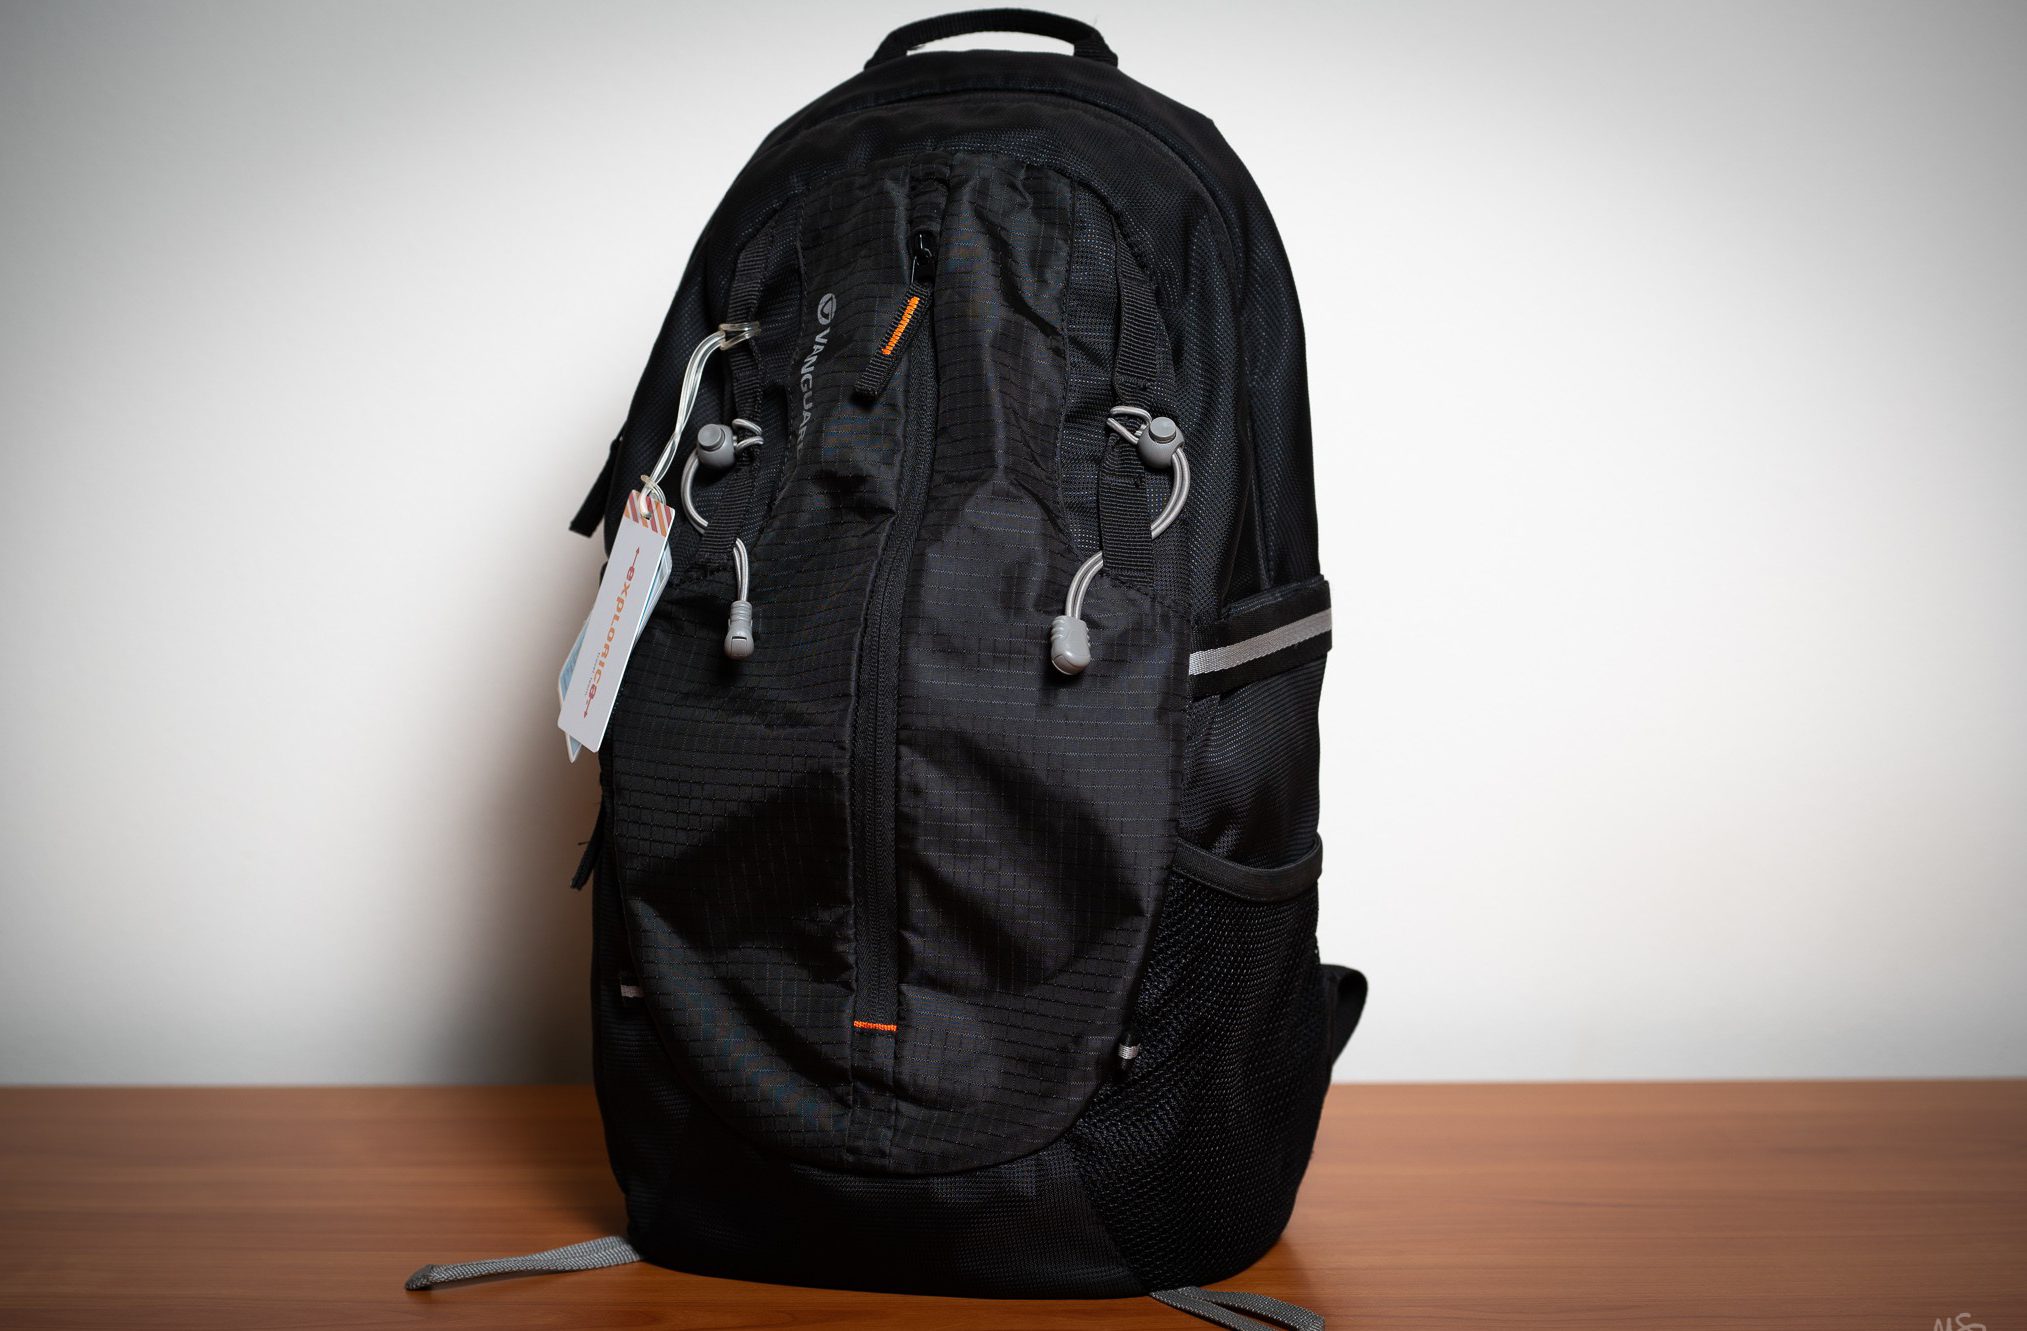
Vanguard Kinray Lite 45 backpack: Holds a full frame or mirrorless camera and a couple of lenses with ease with enough room leftover for a creatively-packed change of clothes. Works for carrying photo gear on a plane and as a daypack moving through the daily itinerary. A great travel bag, but unfortunately no longer made by Vanguard. I’ve been traveling with this bag for a number of years and it’s starting to show a little wear. I’ve been looking for a comparable replacement, but so far nothing fits the bill.
Nikon Z6II • VR 70-200mm f/2.8G at 70 mm • ISO 100 • 1/125 sec at f/5.6
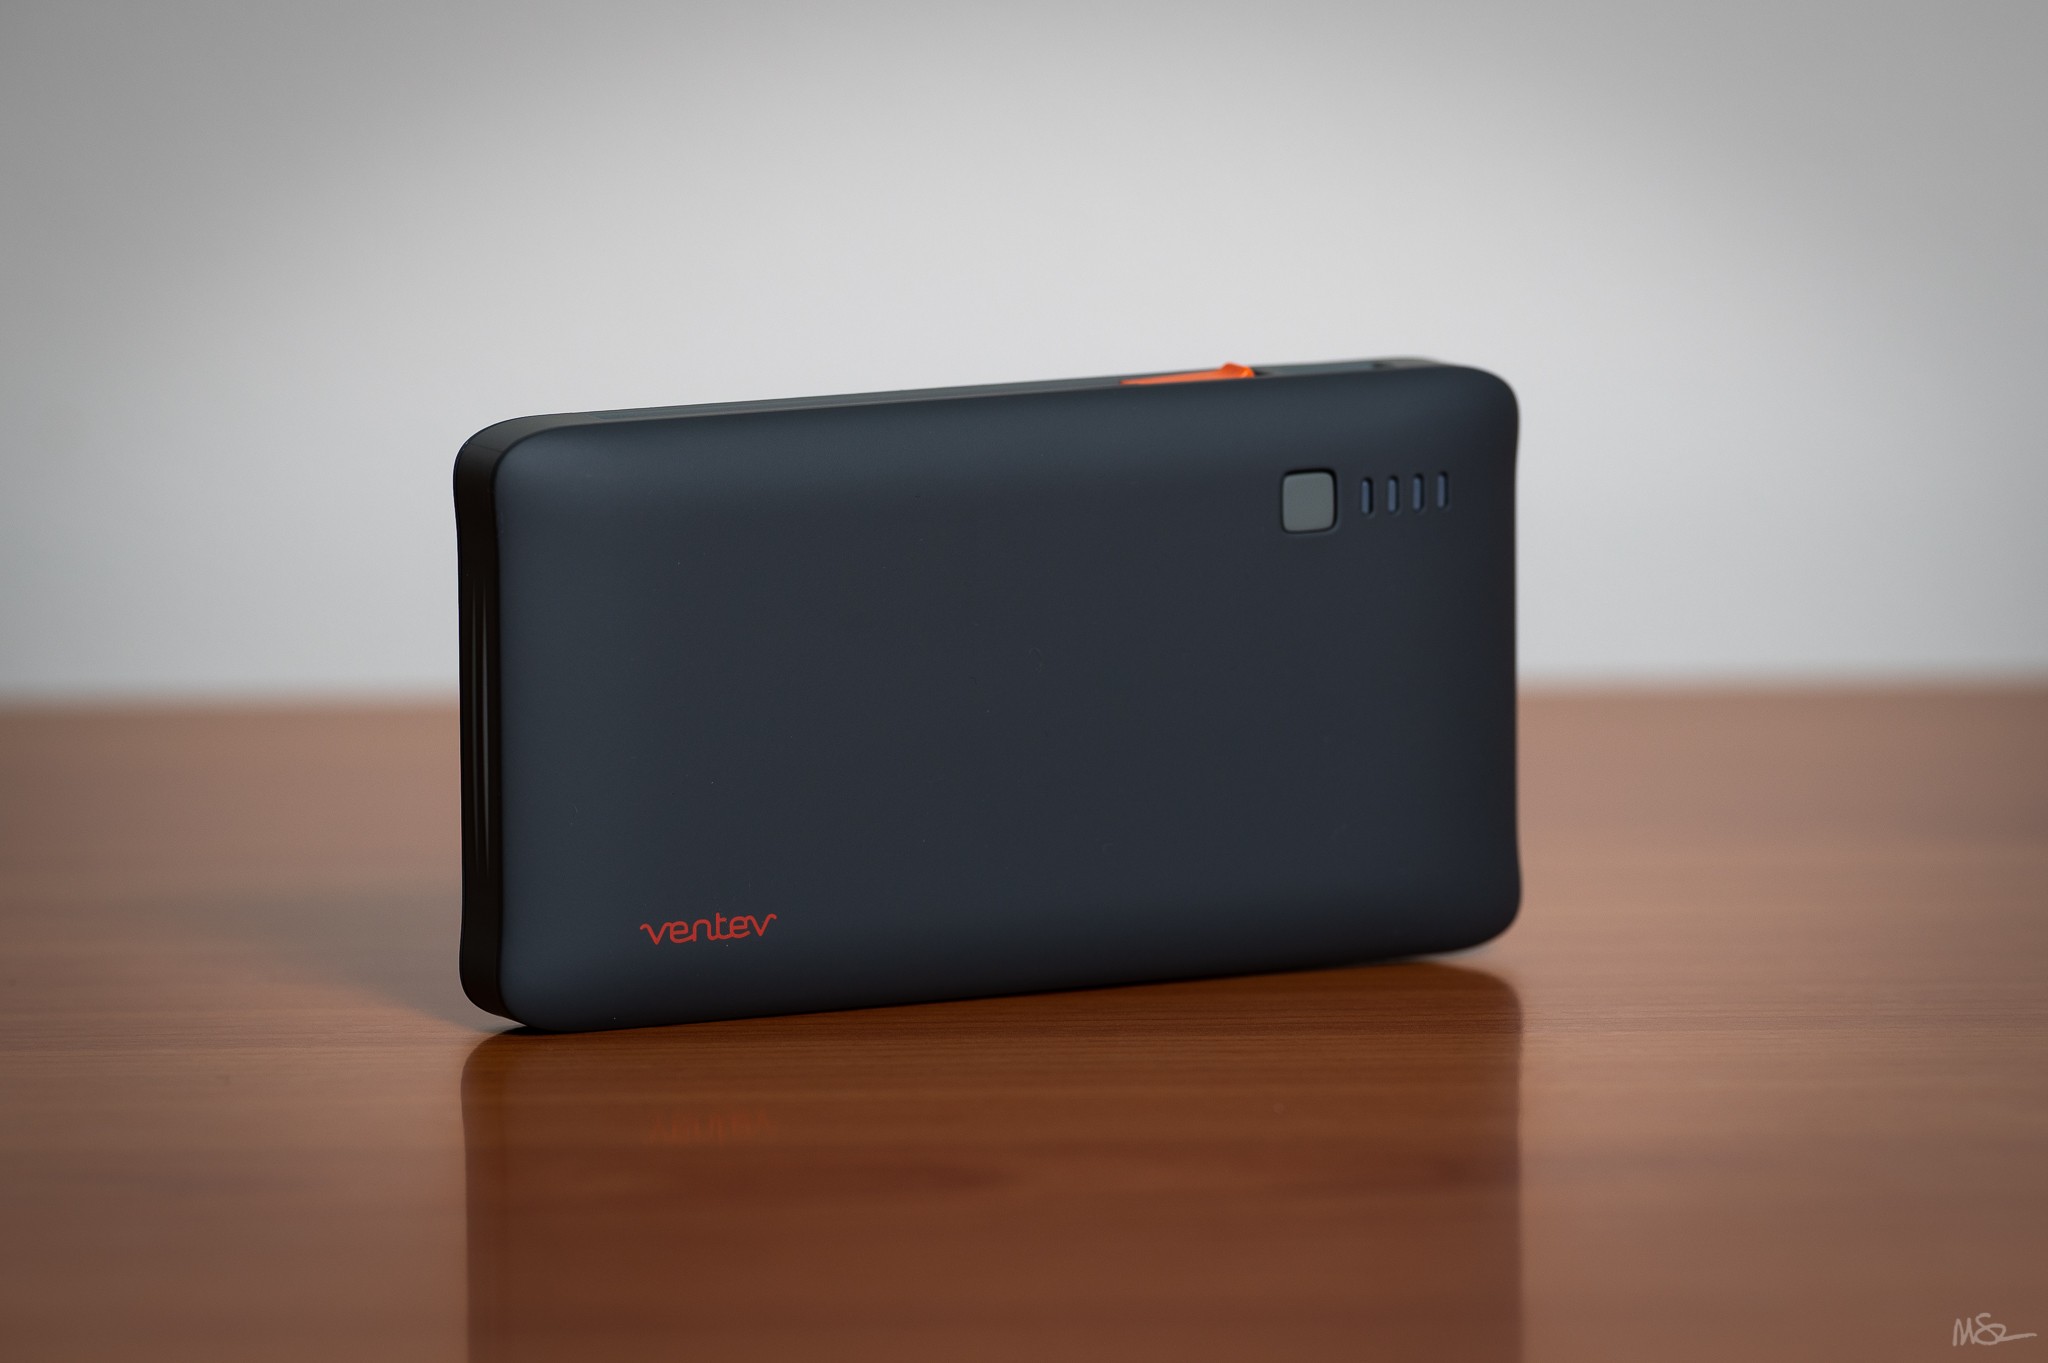
Ventev Powercell 6010+: A great travel battery! It has a foldable plug so that it fits into the bag without snagging on anything. When plugged it charges its own battery – and with charging pass-through capability – can simultaneously charge a connected phone or other USB device.
Nikon Z6II • VR 70-200mm f/2.8G at 200 mm • ISO 100 • 1/125 sec at f/5.6
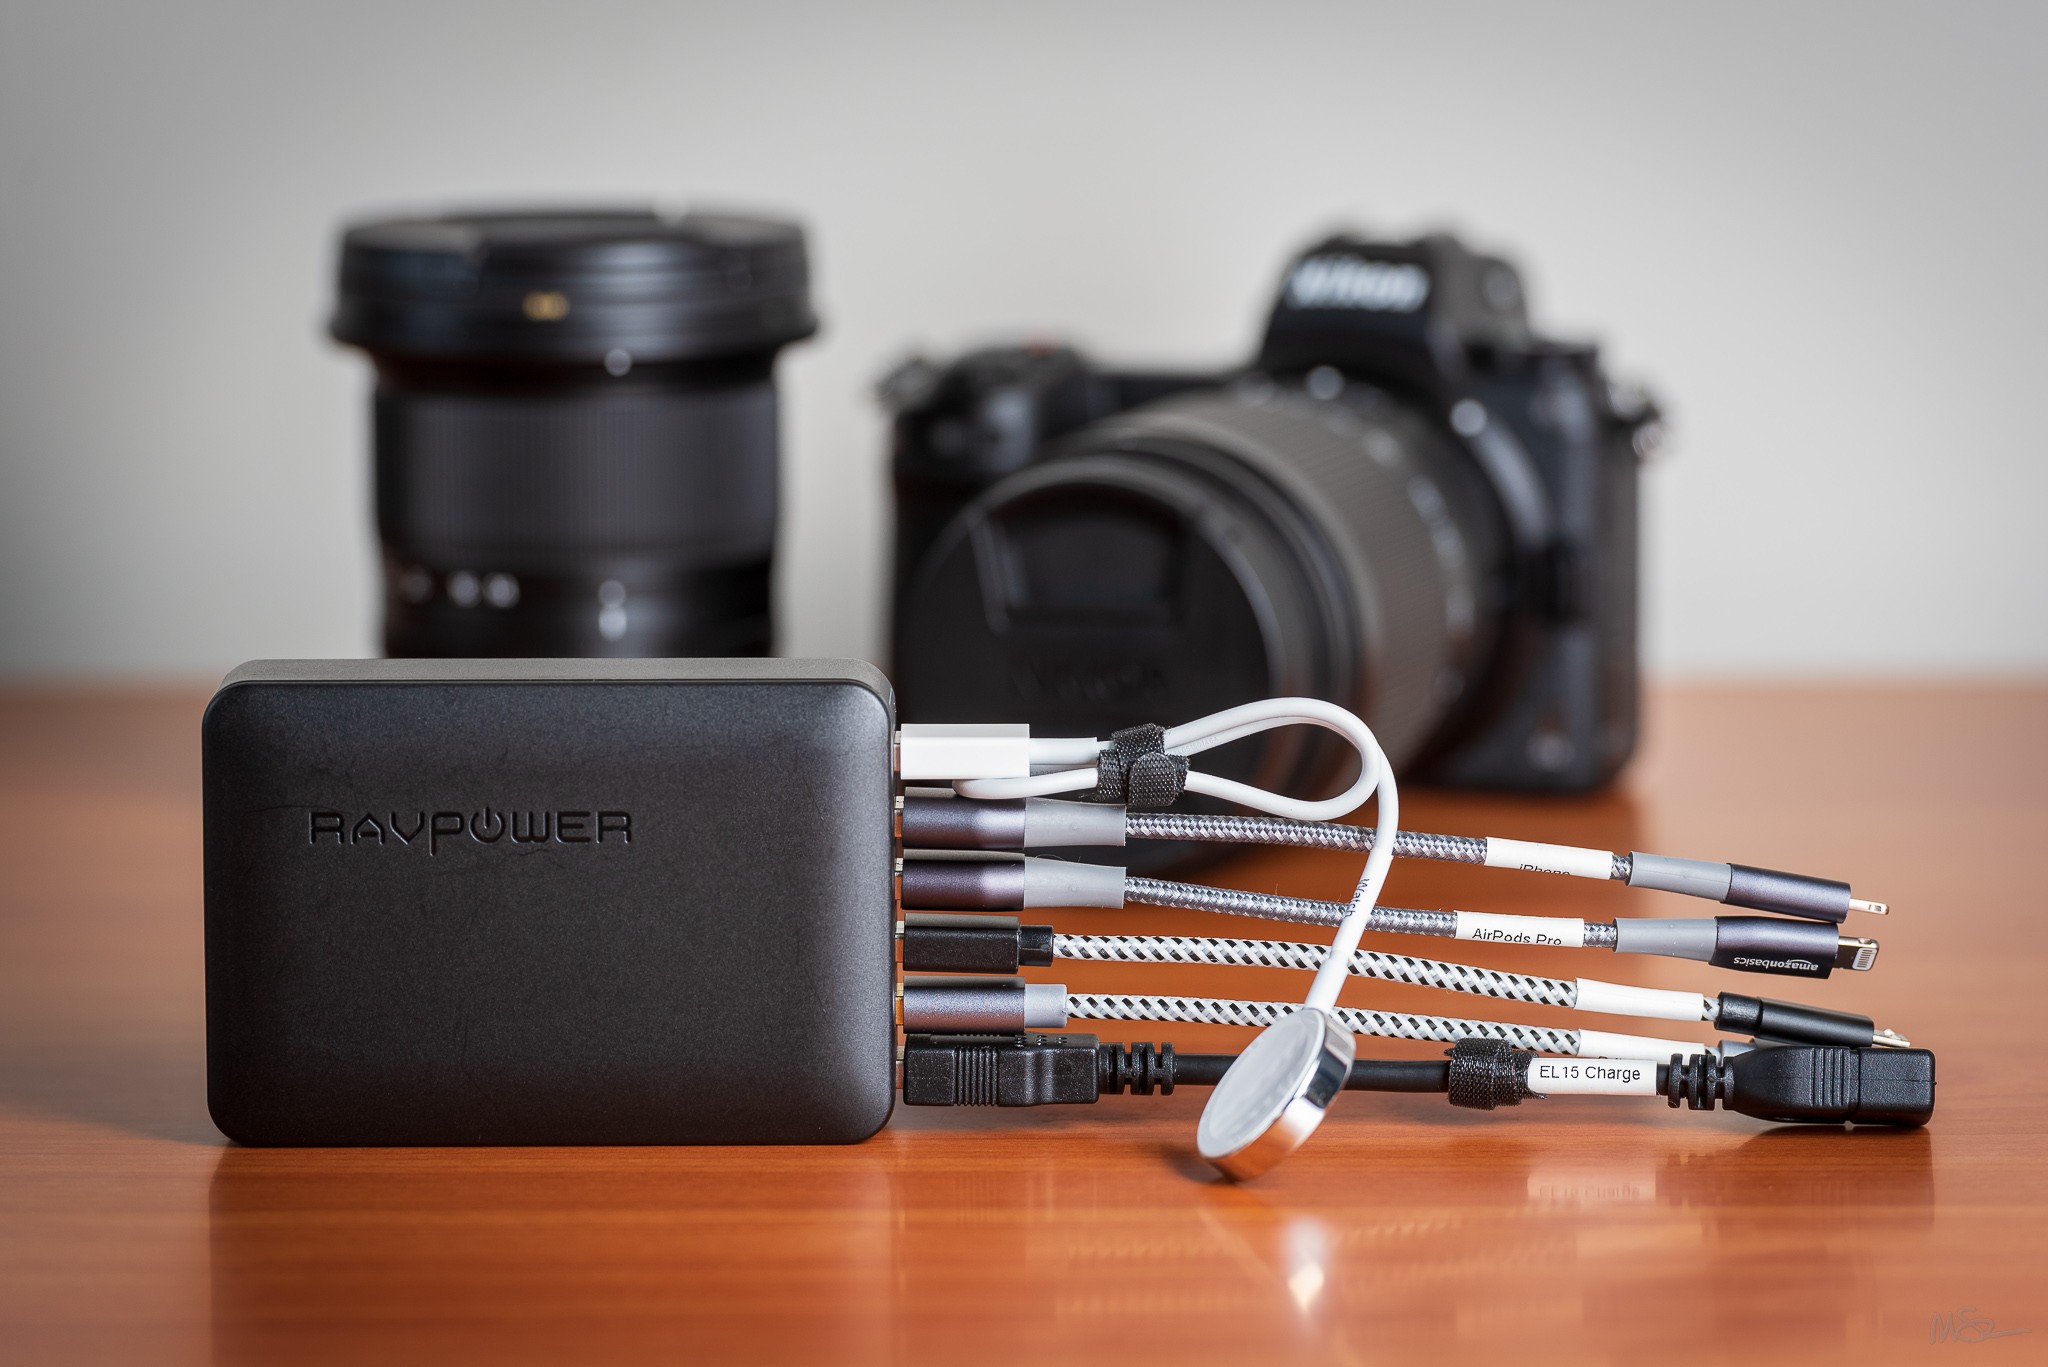
RavPower 60W 6 Port USB Charging Hub: After using the Monster Power Outlets To Go travel extension cord for a number of trips I realized I didn’t need the AC outlets as much as I needed USB ports for charging. With the Outlets To Go extension cord I could plug in two camera battery chargers and the Ventev Powercell, then plug in the iPhone to the Outlets To Go USB port and the Osmo Pocket to the Ventev Powercell USB port. Several hours later everything would be ready to go. But I replaced the older camera battery chargers with the Nitecore UNK2 Dual Slot USB Charger. And now I have an Apple Watch 6 and Apple AirPods Pro that also need USB charging. So I found the USB Charging Hub on Amazon and added a collection of 6″ cables with Lightning, USB C, and Micro USB connectors. The new charging setup is compact and light for travel, and everything is ready to go after a few hours.
Nikon D750 • Nikon 70-200 mm f/2.8 at 200 mm • ISO 400 • 1/125 sec at f/5.6
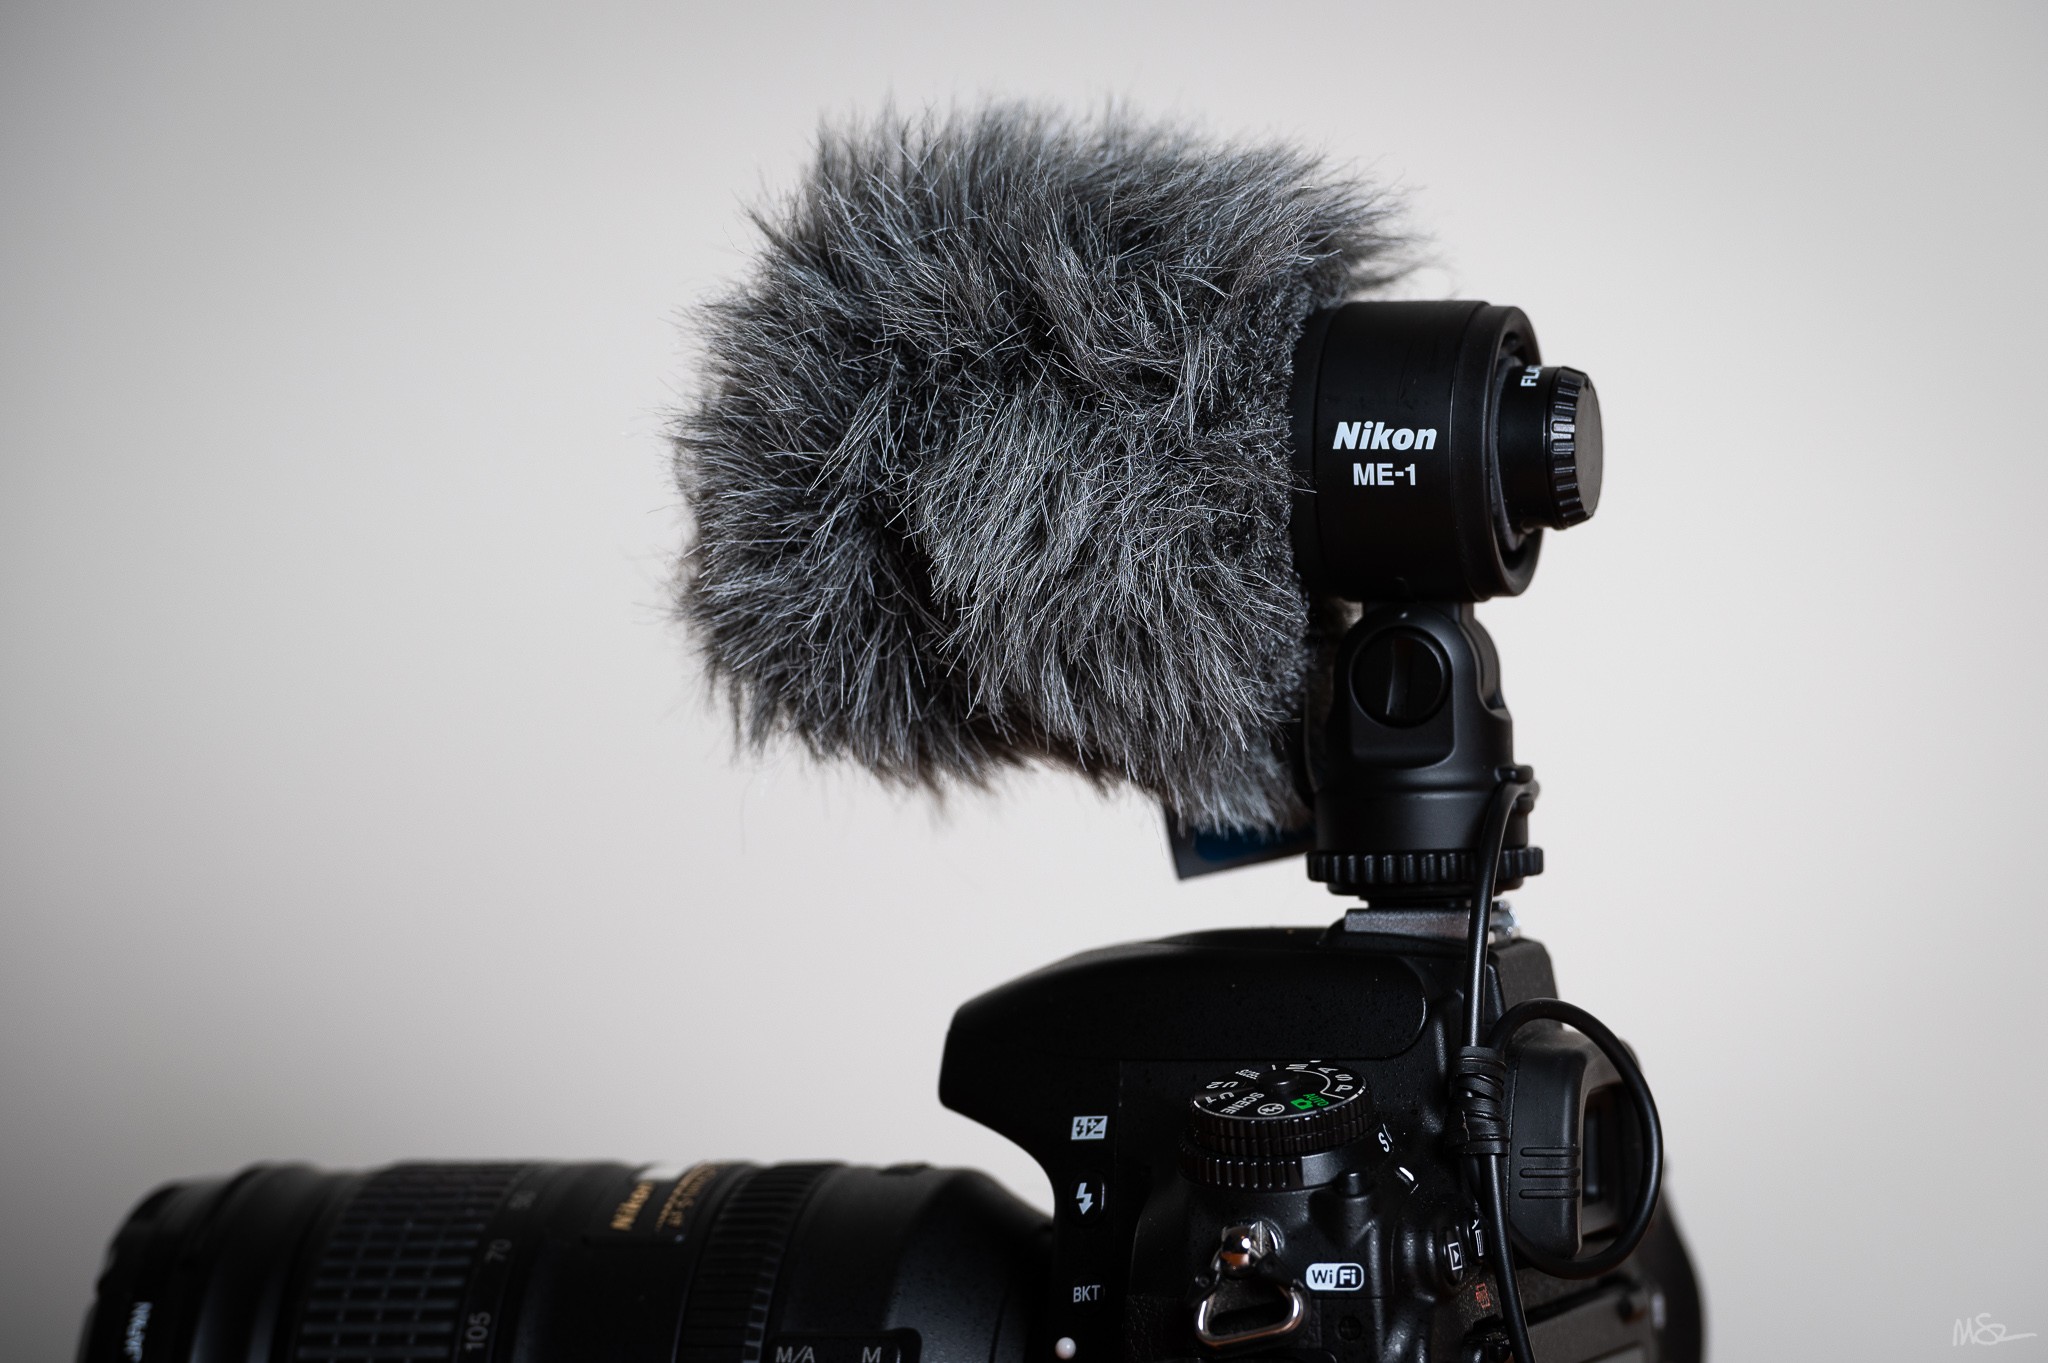
Nikon ME-1 microphone: Once again, brought it, but didn’t use it. It’s much better than the internal mic and great for windy conditions, but I didn’t use it. Also, the Aokatec AK-G750 GPS receiver must be removed from the Z 6II accessory terminal in order to plug in the ME-1 and note that I modified the GPS receiver to flip its plug so the receiver is oriented correctly against the Z 6II.
Nikon Z6II • VR 70-200mm f/2.8G at 200 mm • ISO 100 • 1/125 sec at f/5.6
Memory Card and File Management
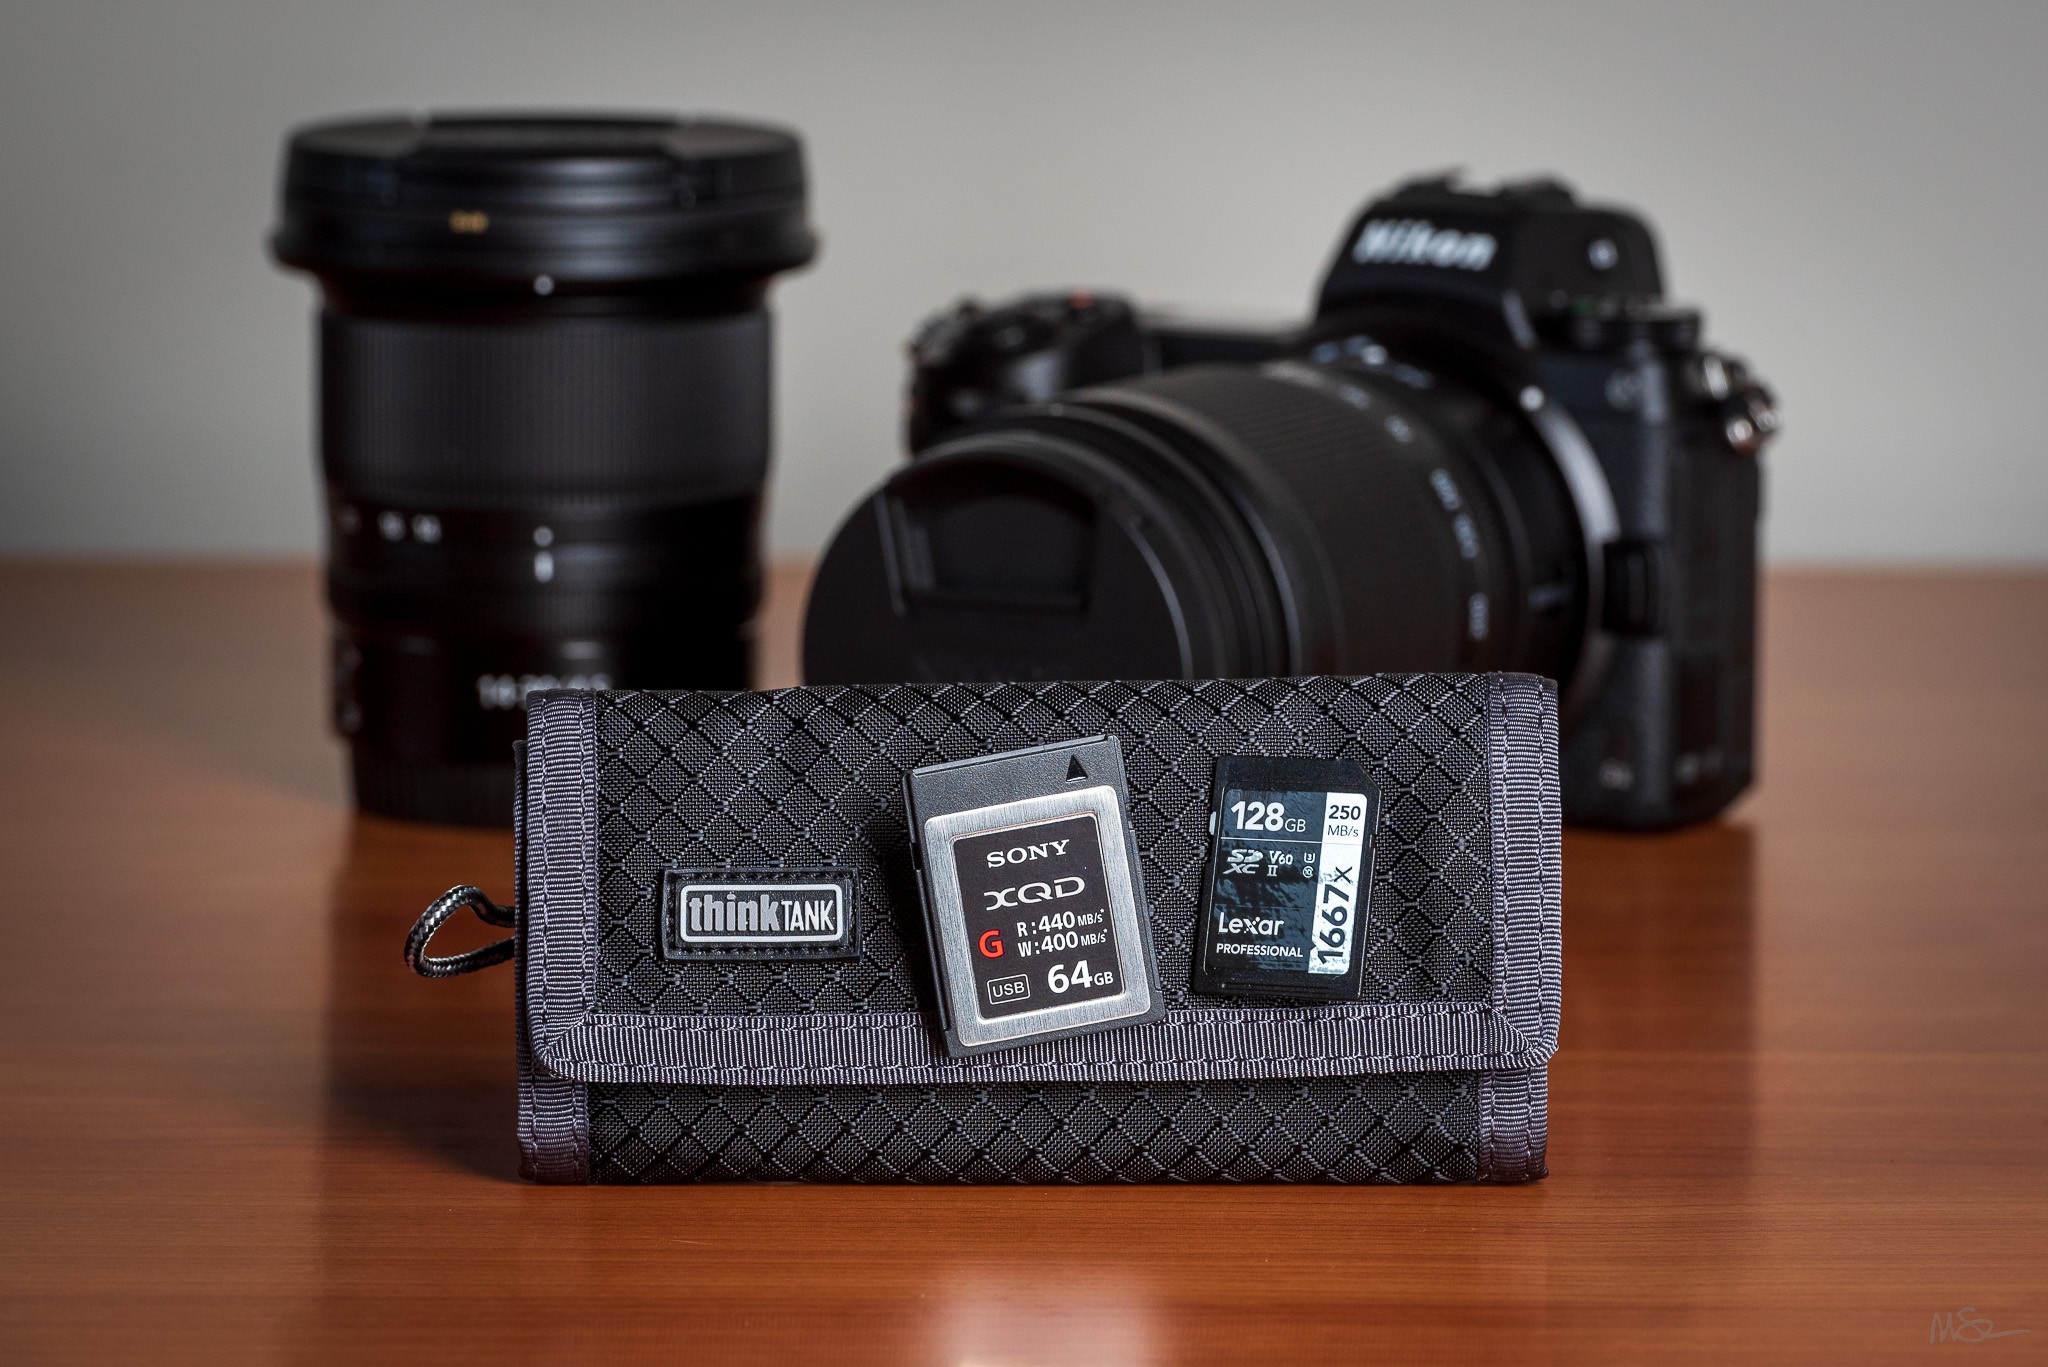
For this trip I brought two 64GB Sony XQD G Series Memory Cards and two 128GB Lexar Professional 1667x SDXC UHS-II Memory Cards.
Nikon D750 • Nikon 70-200 mm f/2.8 at 200 mm • ISO 400 • 1/125 sec at f/11
Each 64GB card holds about 1,100 14-bit NEF files. I used a 64GB XQD card in slot 1 of the Z 6II to store NEF raw photo files. In slot 2 I used a 128GB SDXC card with the Z 6II set to store large size JPEG normal quality backups at about 10MB per image. The slot 2 card is also set as the destination for the 4k 30fps MOV files.
About halfway through the trip, as is my usual practice, I swapped out the initial set of memory cards for the second set. At the end of the trip, between the Z 6II, the iPhone 12 mini, and the DJI Osmo Pocket, I ended up with 1025 picture files totaling 30.87GB. That’s a shooting rate of about 102.5 per day – right on my average of about 100 photos per day on international trips.
| Photo | Files | Gigabytes |
| Nikon Z 6II NEF | 958 | 29.44 |
| DJI Osmo Pocket DNG | 51 | 1.18 |
| iPhone 12 mini DNG | 16 | 0.25 |
| TOTAL | 1025 | 30.87 |
Between the Z 6II and the Osmo Pocket I ended up with 420 movie files totaling 72.86GB.
| Video | Files | Gigabytes |
| Nikon Z 6II MOV | 343 | 62.87 |
| DJI Osmo Pocket MOV | 77 | 18.87 |
| TOTAL | 420 | 72.86 |
WordPress Blog Updates
For the daily trip blog updates I used the Z 6II’s built-in Wi-Fi to connect via the SnapBridge app installed on the iPhone 12 mini. Once connected it’s easy to select pictures to transfer to the phone, and then incorporate those photos in the daily trip blog updates using the WordPress Mobile App. Snapbridge is a big improvement over the old Nikon Wireless Mobile Utility. It’s easier to connect, provides faster downloads, and the connection is more reliable. Several times a day while travelling, I open the app, browse through the available pictures, and download a couple for use in that day’s post. The old app was a series of dropped connections and reconnections. Always frustrating. Equally frustrating was creating a blog post using previous versions of the WordPress mobile app. It was difficult to get spacing correct between photos and paragraphs and occasional crashes meant lost work. The new version of the app fully implements block editing and it works great when drafting new text, making edits, moving paragraphs, and inserting photos! Internet access in Israel was good, with fairly consistent wireless coverage except for the Negev desert. Between uploading photos, drafting the content, and finding someone to proof – the daily blog updates take about an hour each day to complete.
Photo Workflow
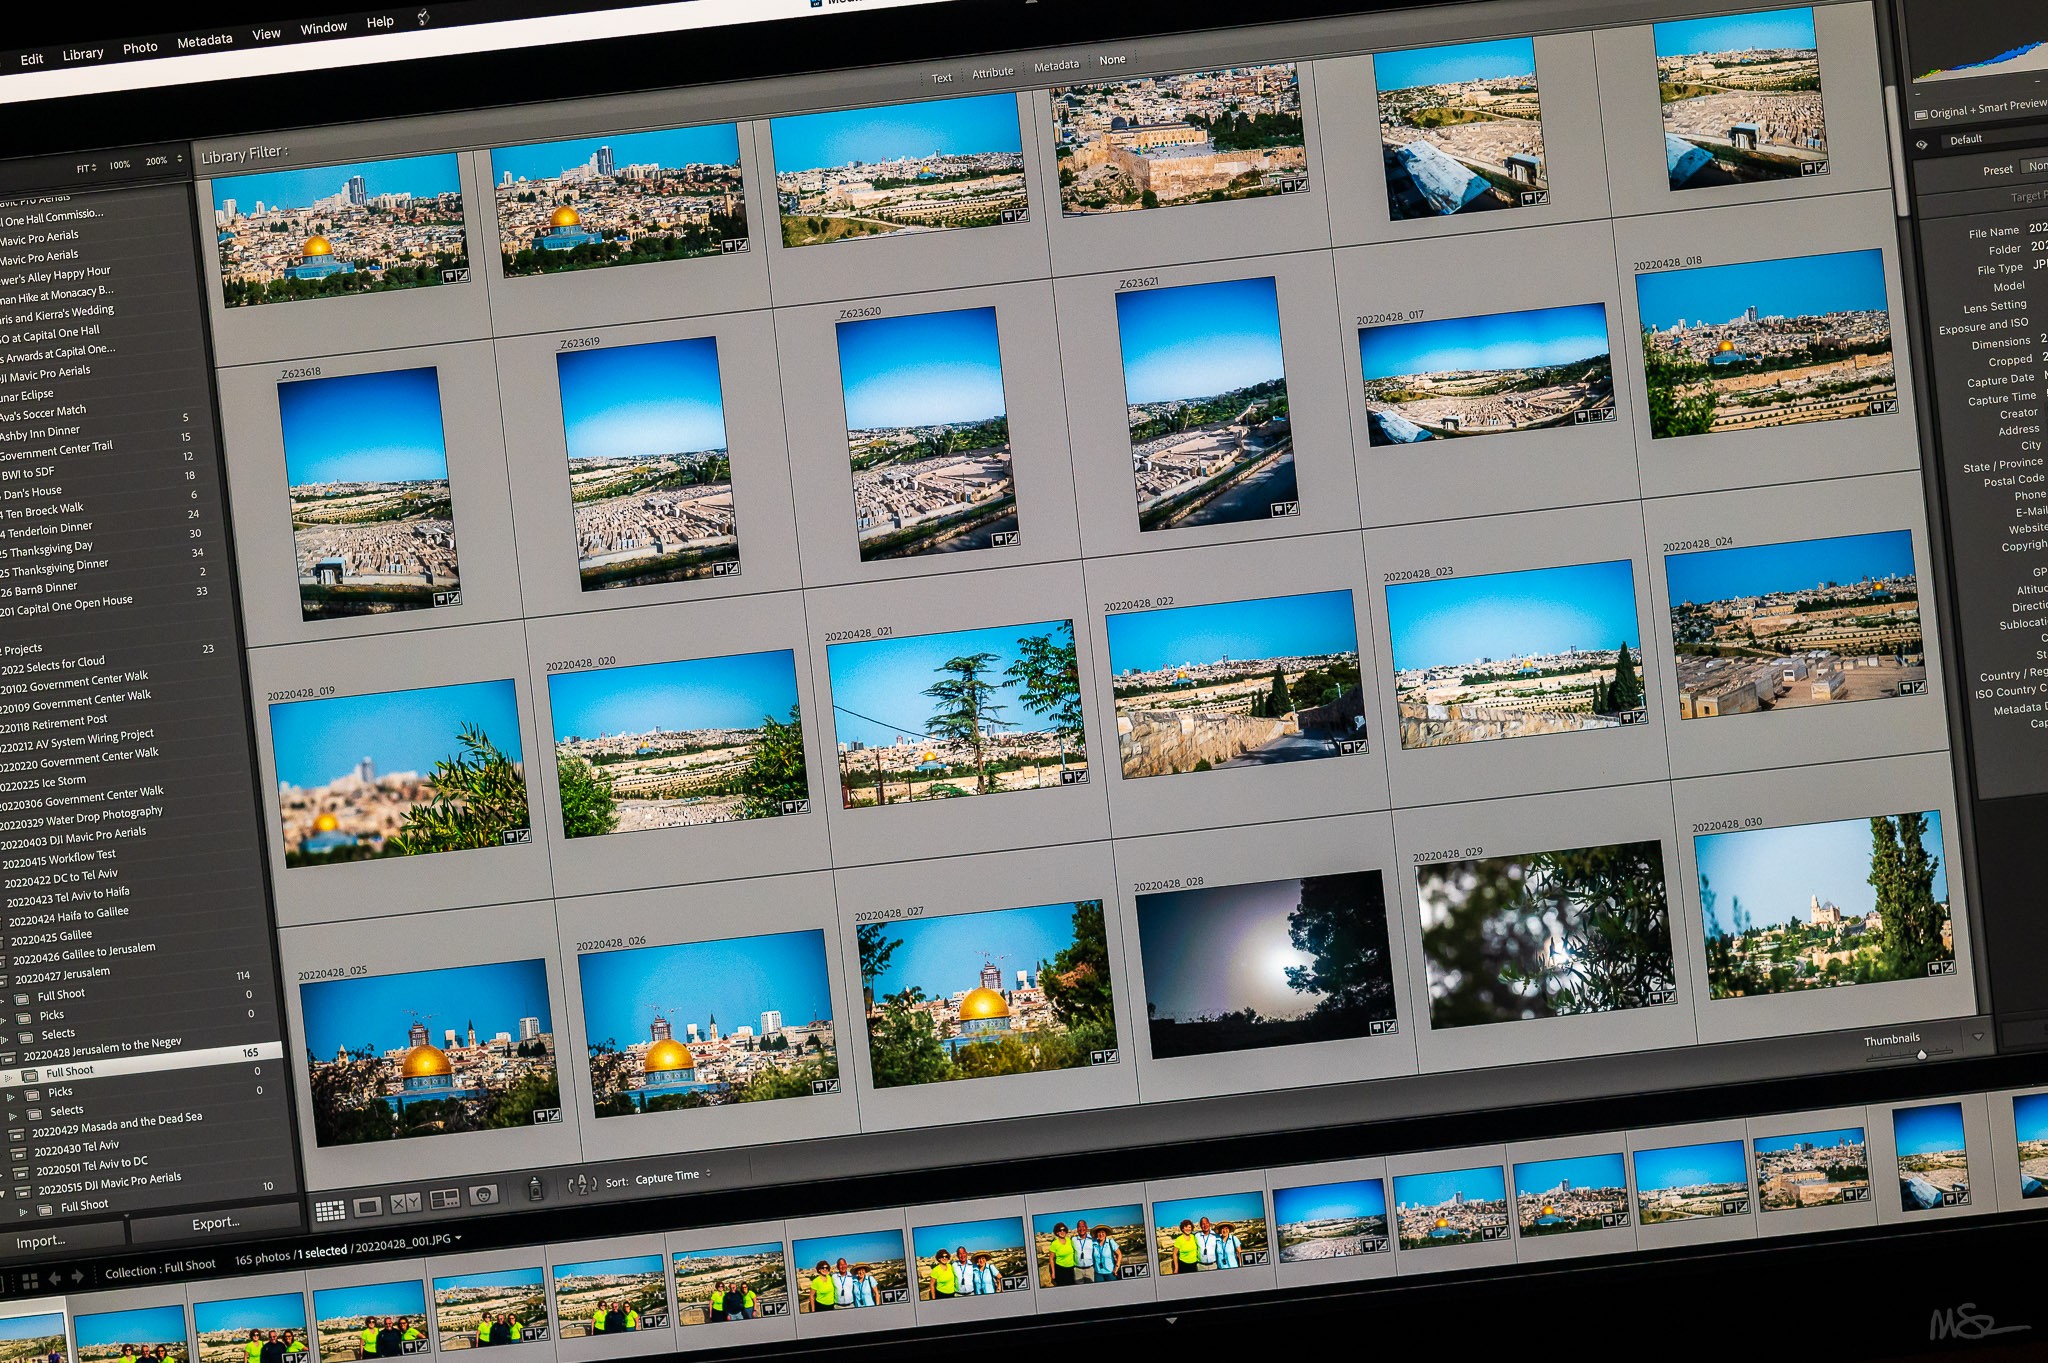
My standard workflow for photos and video remains the same. I’m working with Adobe Photoshop Lightroom Classic for photo management and editing – using the Creative Cloud Photography plan.
Nikon Z6II • Nikon NIKKOR Z 85mm f/1.8 S • ISO 4000 • 1/500 sec at f/4.0
Several years ago I dropped keywording as a workflow step and substituted sorting into collections. I wasn’t really using the keywords and it wasn’t worth the time it was taking to add them. And I find using collections really helps to identify the best images – those I want to focus on for post-processing. The revised simplified version of the workflow is:
- Import as DNG to folders named by date and location
- Delete duplicates and rejects … photos that are out of focus or the inevitable inadvertent photos of the ground
- Rename by date with sequential numbers
- Collections for Full Shoot, Picks, and Selects
- Geoencode
- Post-process
- Caption
- Output using Jeffrey Friedl’s Metadata Wrangler Lightroom Plugin to format captions to include caption text along with city, country, GPS location, camera, lens, and exposure information
- Import to WordPress with Katsushi Kawamori’s Upload Media Exif Date so that uploads to the Media Library are sorted chronologically by date and time captured.
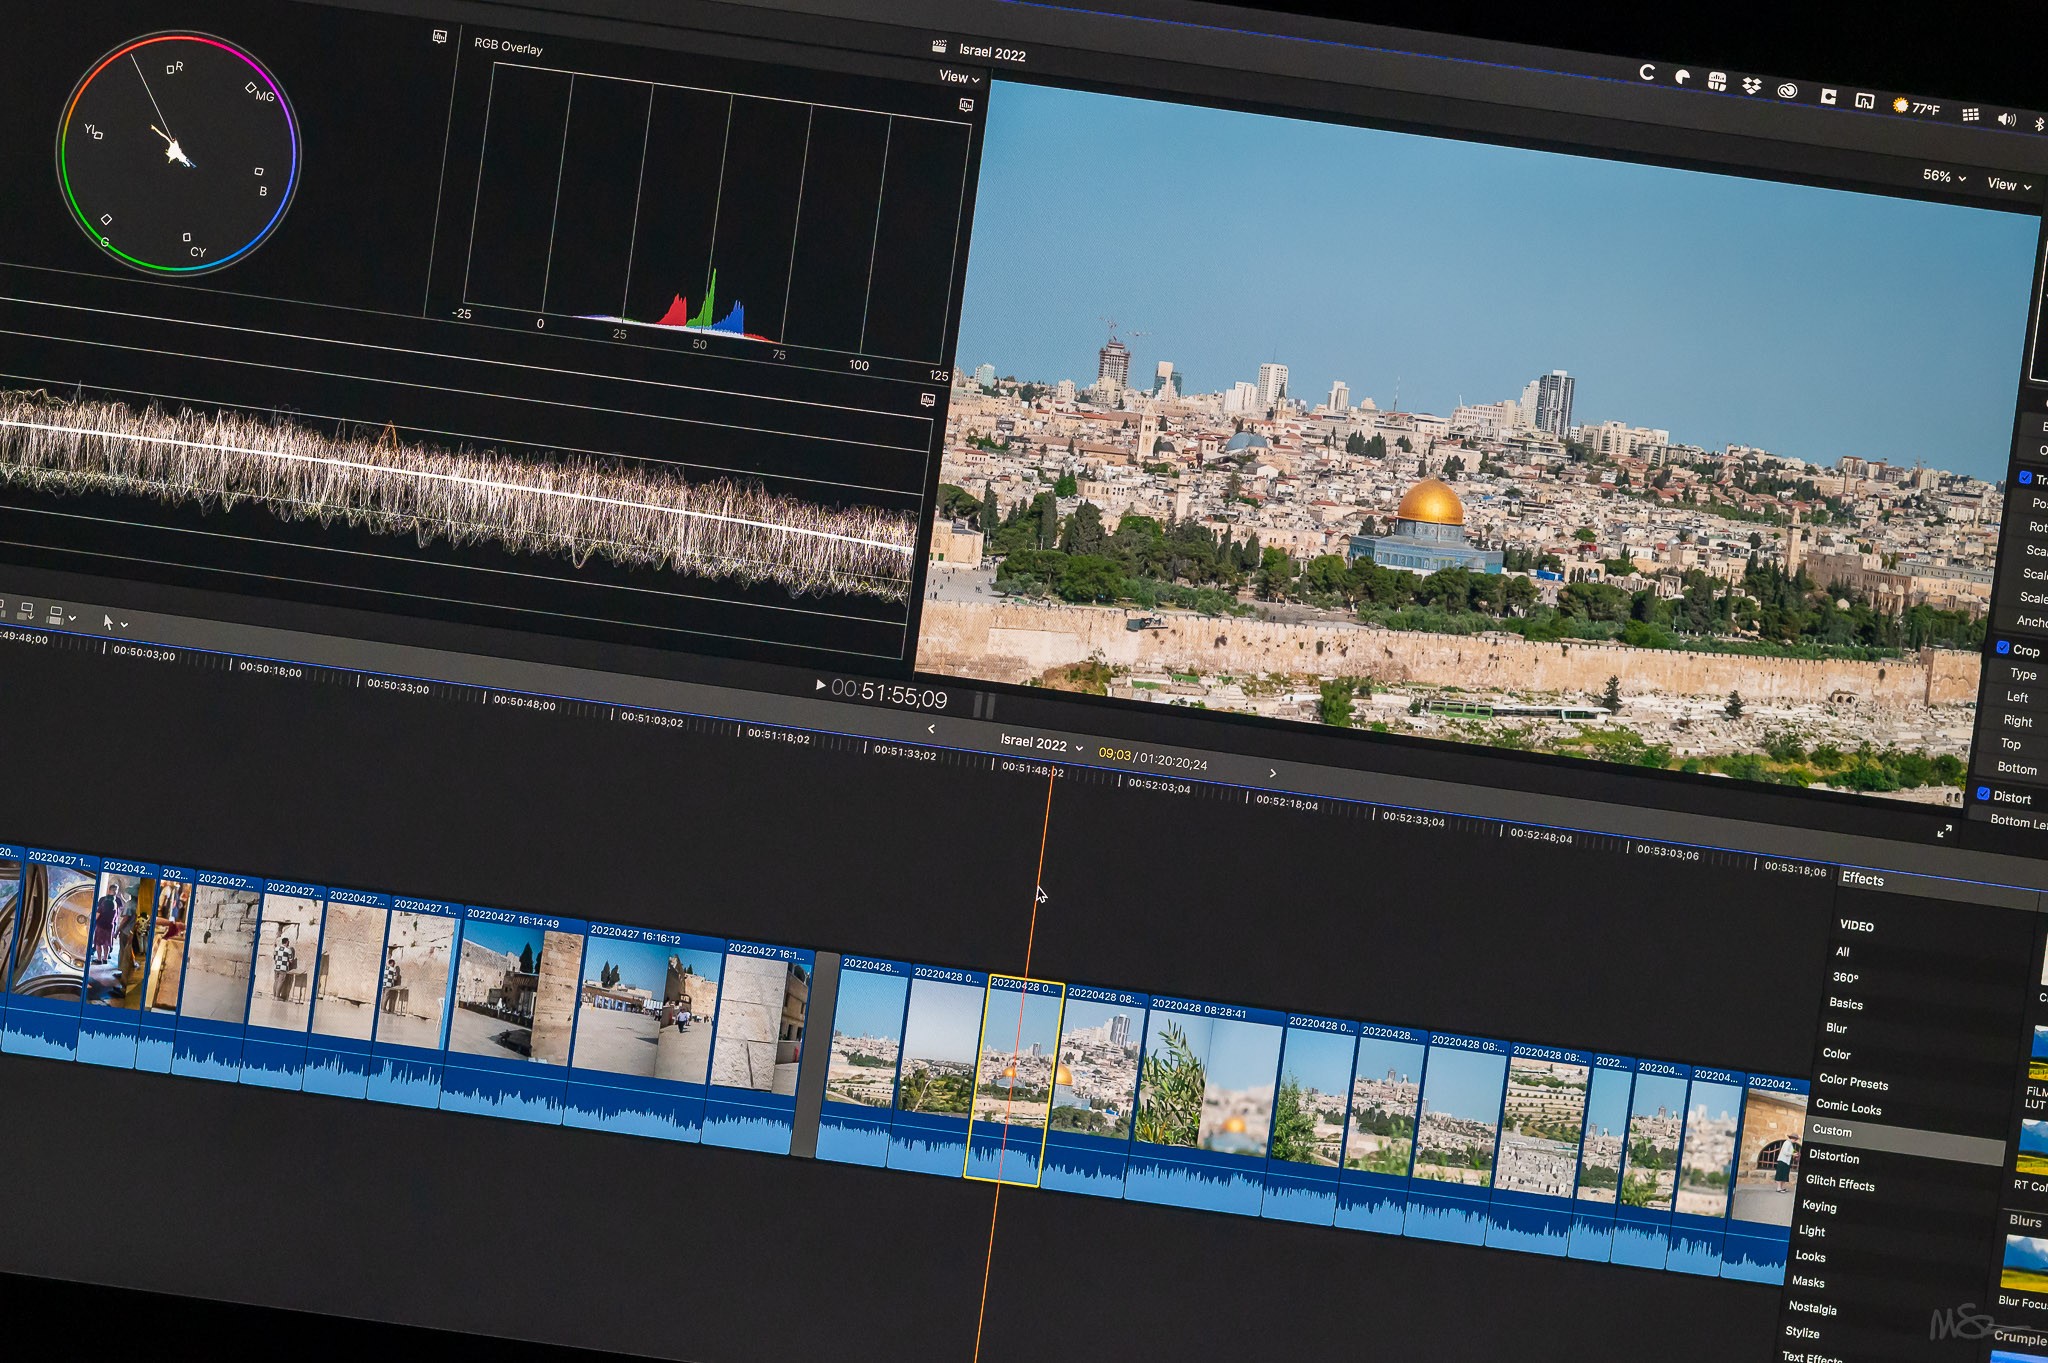
Video Workflow
Video files are digitized using Apple Final Cut Pro to events named by date and location. After import files are renamed by date and time.
Nikon Z6II • Nikon NIKKOR Z 85mm f/1.8 S • ISO 6400 • 1/400 sec at f/4.0
With all trip photo and video files transferred I confirm onsite and offsite backups are complete (using CrashPlan for Small Business to manage both backups) and then reformat the SDXC and SDHC cards for use on the next project. Next? Editing the India 2018 video and maybe, finally, getting to the South Africa 2015 photos!