 Michael S. Liberman
Essential Travel Gear for Iceland
Usually, these post-trip gear and workflow overviews begin with a recounting of the number of years since the previous international trip. But in this case, it’s only been nine months since the Italy and Greece trip. Not surprisingly the gear I traveled with remains similar to what I brought on that prior trip, but there have been some changes. Read on for details …
Skagafjörður, Iceland
NIKKOR Z 24-120mm f/4 S at 59 mm • ISO 64 • 1/500 sec at f/4.0
Travel Gear and Workflow
So here is the Iceland gear and workflow update. Every trip requires a carefully considered pack list that balances the demands of international shooting locations with the willingness (and ability!) to carry a certain amount of equipment. At just one week this would my shortest international trip, but I spent a lot of time before the trip considering what to bring, how to carry it, and what I needed to do to ensure I came back from the trip with the photos and video I planned for.
As I did for Italy and Greece, Israel, Brazil, Southeast Asia, India, Cuba, Peru, South Africa, and Galapagos, here is an overview of the gear I carried to Iceland followed by the photo and video workflows I used to handle the media files when I returned.
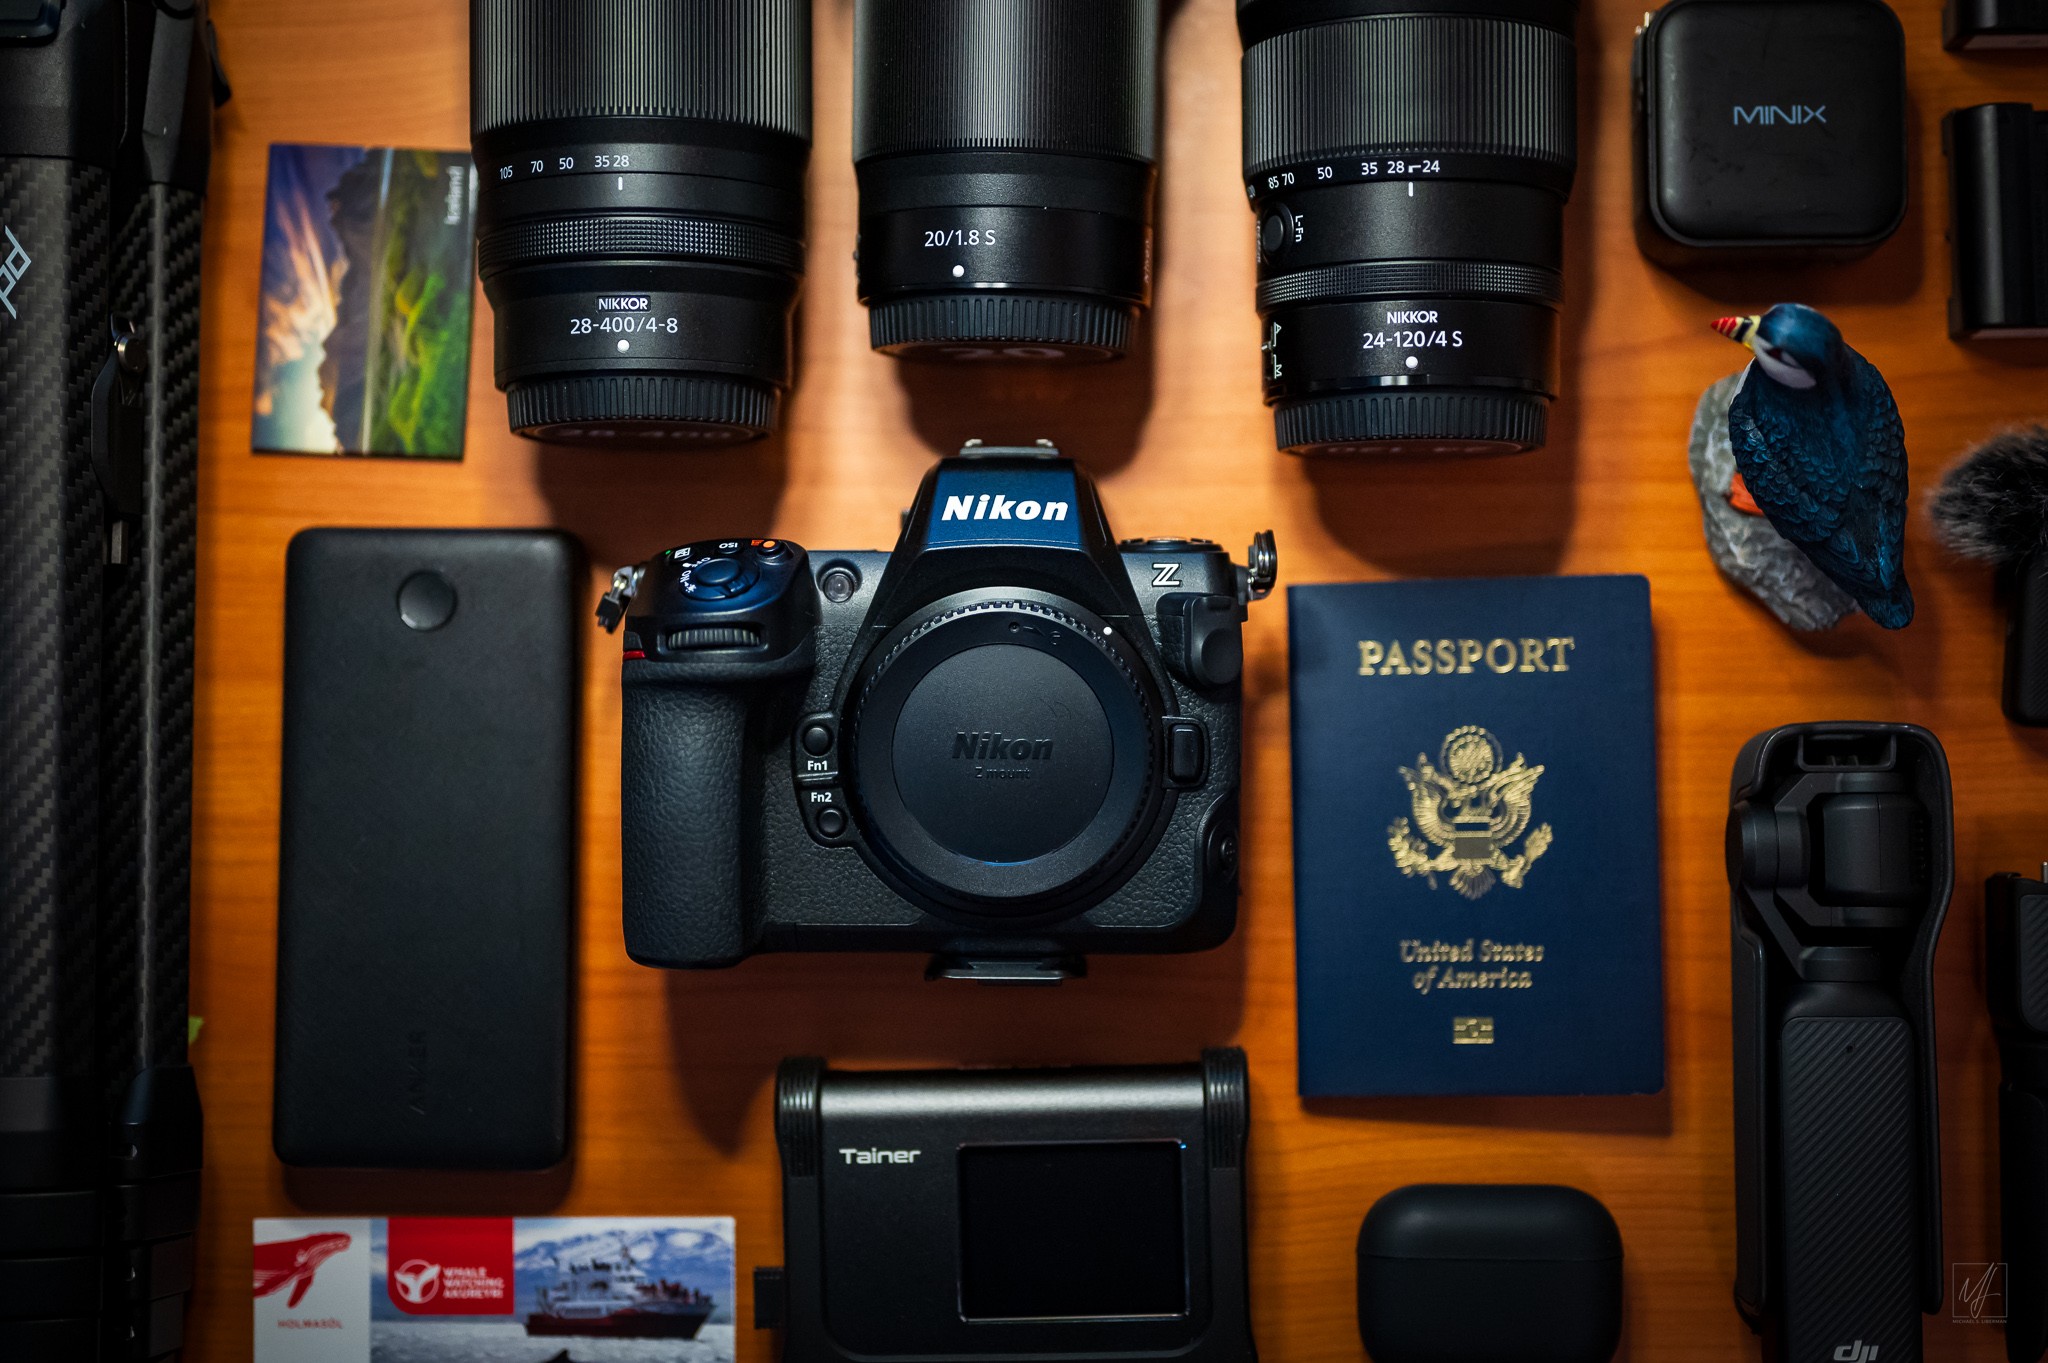
Travel Gear
Nikon Z8 45.7MP Mirrorless Camera: My DSLR journey started in 2003 with the Nikon D100, then progressed to the Nikon D7000 (used for the Greece and Turkey trip), followed by the Nikon D600 (for the Galápagos Islands trip), then to the Nikon D750, with me in Brazil, Southeast Asia, India, Cuba, Peru, and South Africa. But I finally made the shift to Mirrorless with the Nikon Z6 (which never travelled) and then the Nikon Z6ii (used for the Israel trip). With each of these cameras I’ve relied on the RAW image file format to achieve the best image quality. I always thought the D750 RAW files were excellent, but everytime I download RAW files from the Z8 and the Z6ii, I am blown away. They look incredible! I spend significantly less time post-processing photos from these cameras. Switching to Mirrorless didn’t result in the weight savings I had initially expected for travel purposes. While the Z6ii weighed slightly less than the D750 – about 125 grams, the Z8 weighs 80 grams more than the D750 and 205 grams more than the Z6ii. But after carrying the Z8 through Italy and Greece for 3 weeks, and now Iceland for a week and numerous domestic trips I can confidently say the Z8 is a great travel camera! And paired with the 28-400mm the image quality for stills and video is outstanding, even if it’s a bit heavier!
In Nikon’s camera lineup I’ve always owned one of the “prosumer” models and not one of the “professional” or “flagship” cameras. Seemed right for my capabilities and budget. But over the years as my photographic skills have improved I’ve become more interested in stepping up in the lineup. When the Z9 was released I knew it wasn’t for me. Too big and too heavy. In the Spring of 2023 when the Nikon Z8 was announced I took notice. Most of the capabilities of the Z9 in a smaller and lighter form factor. I made the leap in the summer of 2023 and the Z8 is easily the best camera I have ever owned!
NIKKOR Z 50mm f/1.8 S • ISO 4000 • 1/15 sec at f/8.0
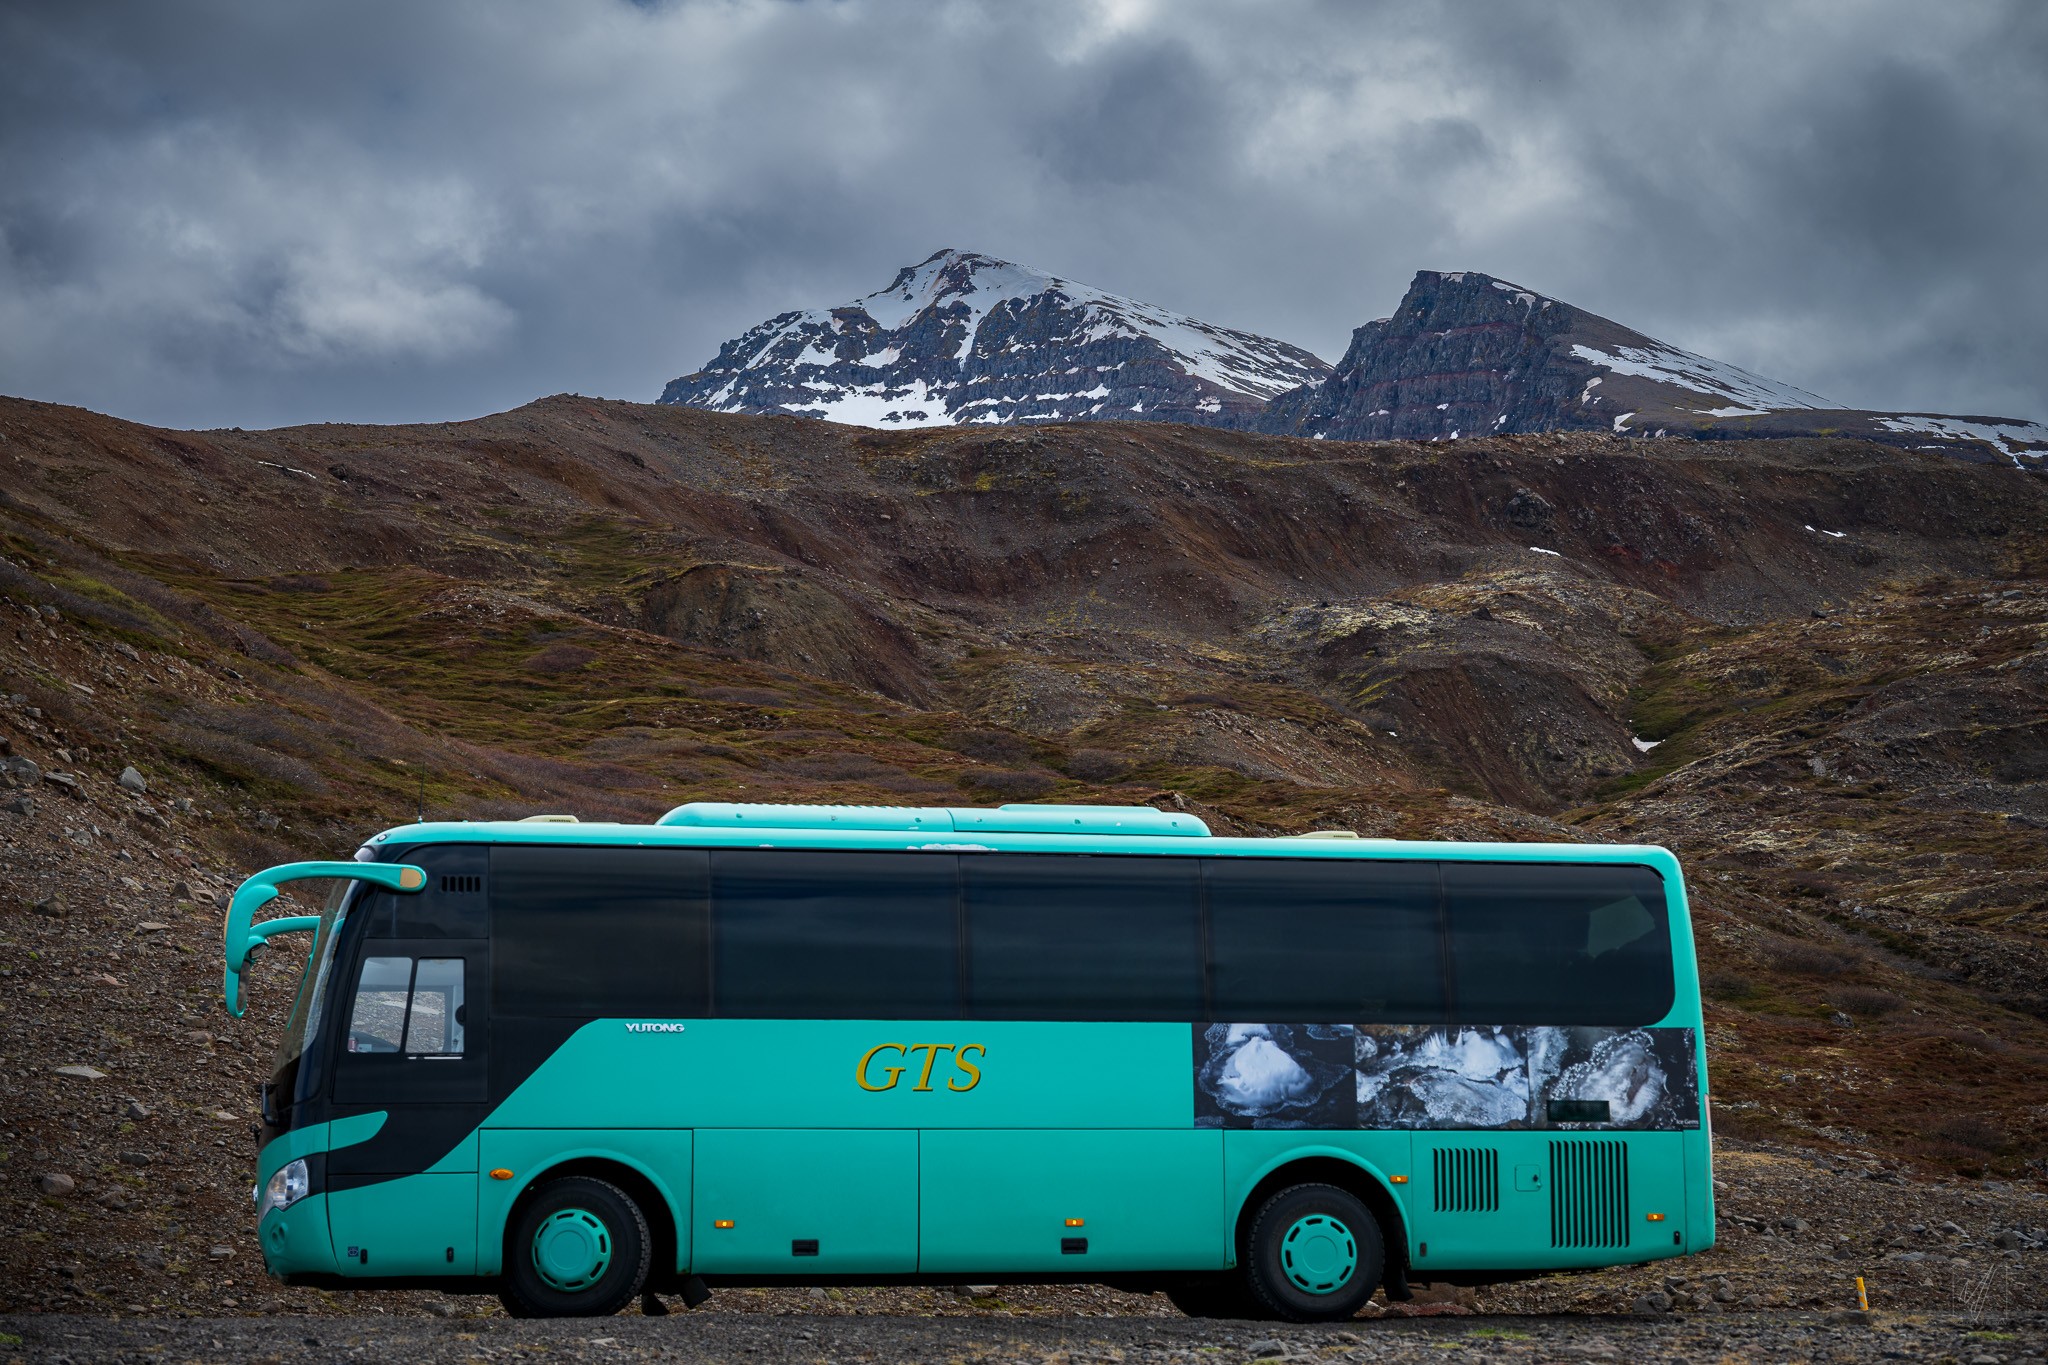
NIKKOR Z 28-400mm f/4-8 VR Travel Zoom: After carrying the 28-300mm for many trips I finally switched to the 24-200mm for the Israel trip. Compared to the 28-300mm I was looking forward to working with a slightly wider lens for travel, but I was concerned that the limited reach of the 24-200mm might be a problem. Several months before the Italy and Greece trip Nikon announced the 28-400mm f/4-8 super telephoto lens. I immediately placed an order. There is no question that super zooms are compromise lenses, but this lens is superb for travel. When traveling a lot of photos are in strong daylight, so working with f/8 on the telephoto end isn’t much of a compromise. I really enjoy traveling with this lens. Great image quality and range from a single lens in a size that’s easy to carry on planes, buses, boats, and just walking down the street.
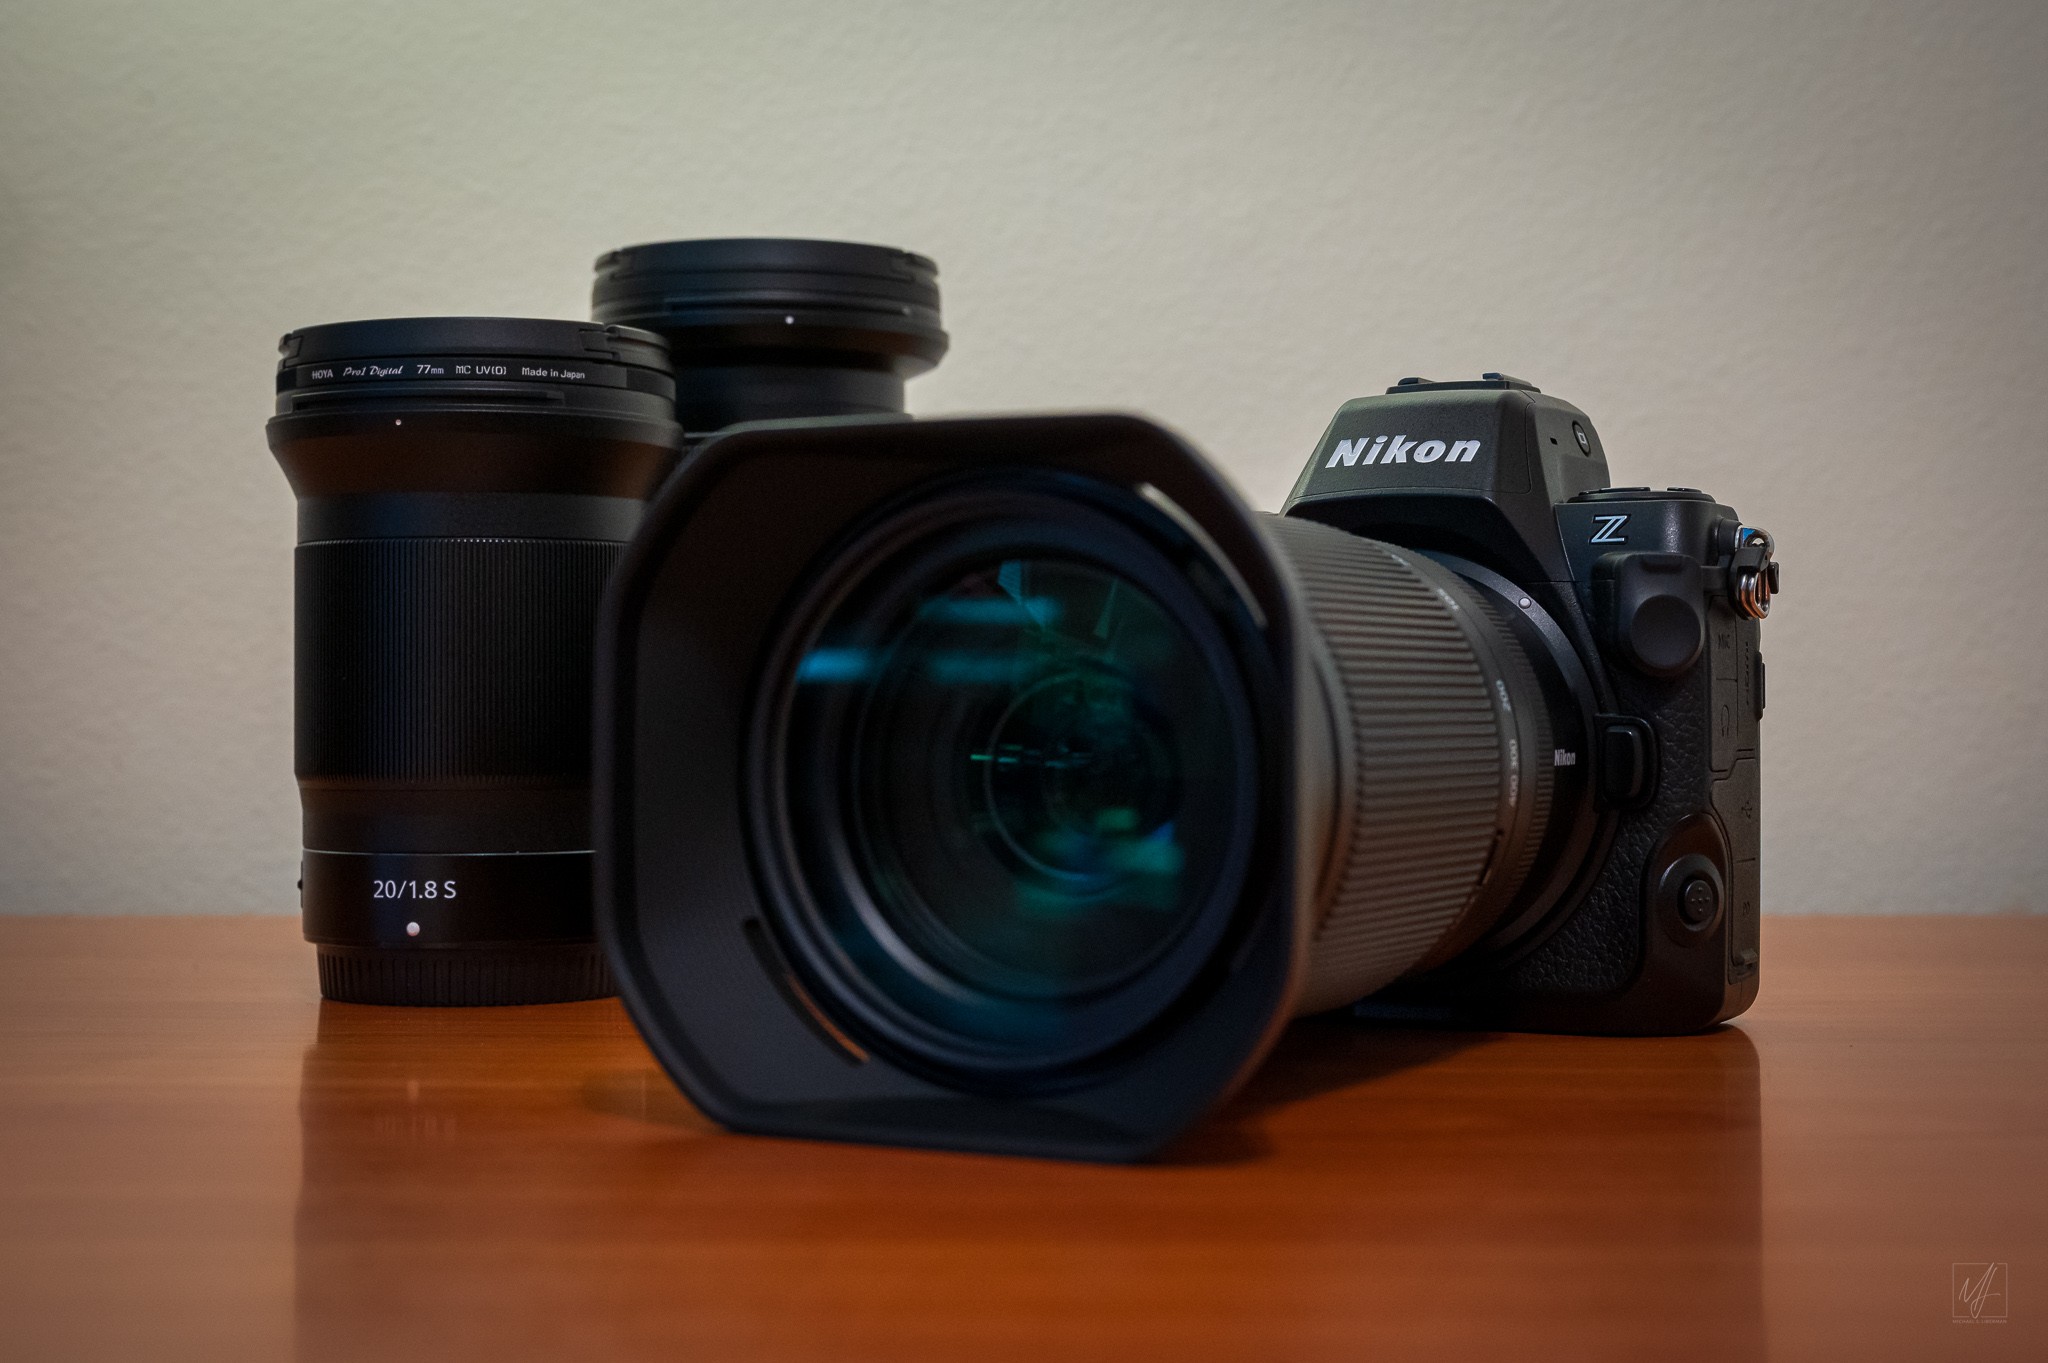
NIKKOR Z 24-120mm f/4 S All-Purpose Zoom: I had the previous F Mount version of this lens and didn’t really care for its image quality. Despite my previous experience, I purchased the Z Mount version several months before the Iceland trip. It is a significantly better lens! And although there was a lot of redundancy bringing this together with the 28-400mm, as a bit of an experiment, I packed the 24-120mm to see if it could serve as a lighter travel zoom on a future trip. For me the answer is no. I still needed the longer zoom on many occasions, but this might be an excellent option on a different kind of trip paired with the 100-400mm telephoto.
NIKKOR Z 20mm f/1.8 S Wide Angle Prime: I also packed the 20mm hoping to use it for astrophotography or the northern lights. Unfortunately too much daylight at this time of year, but I did use the 20mm at the Kolugljúfur Canyon waterfall for some variety, and I was pleased with the results …
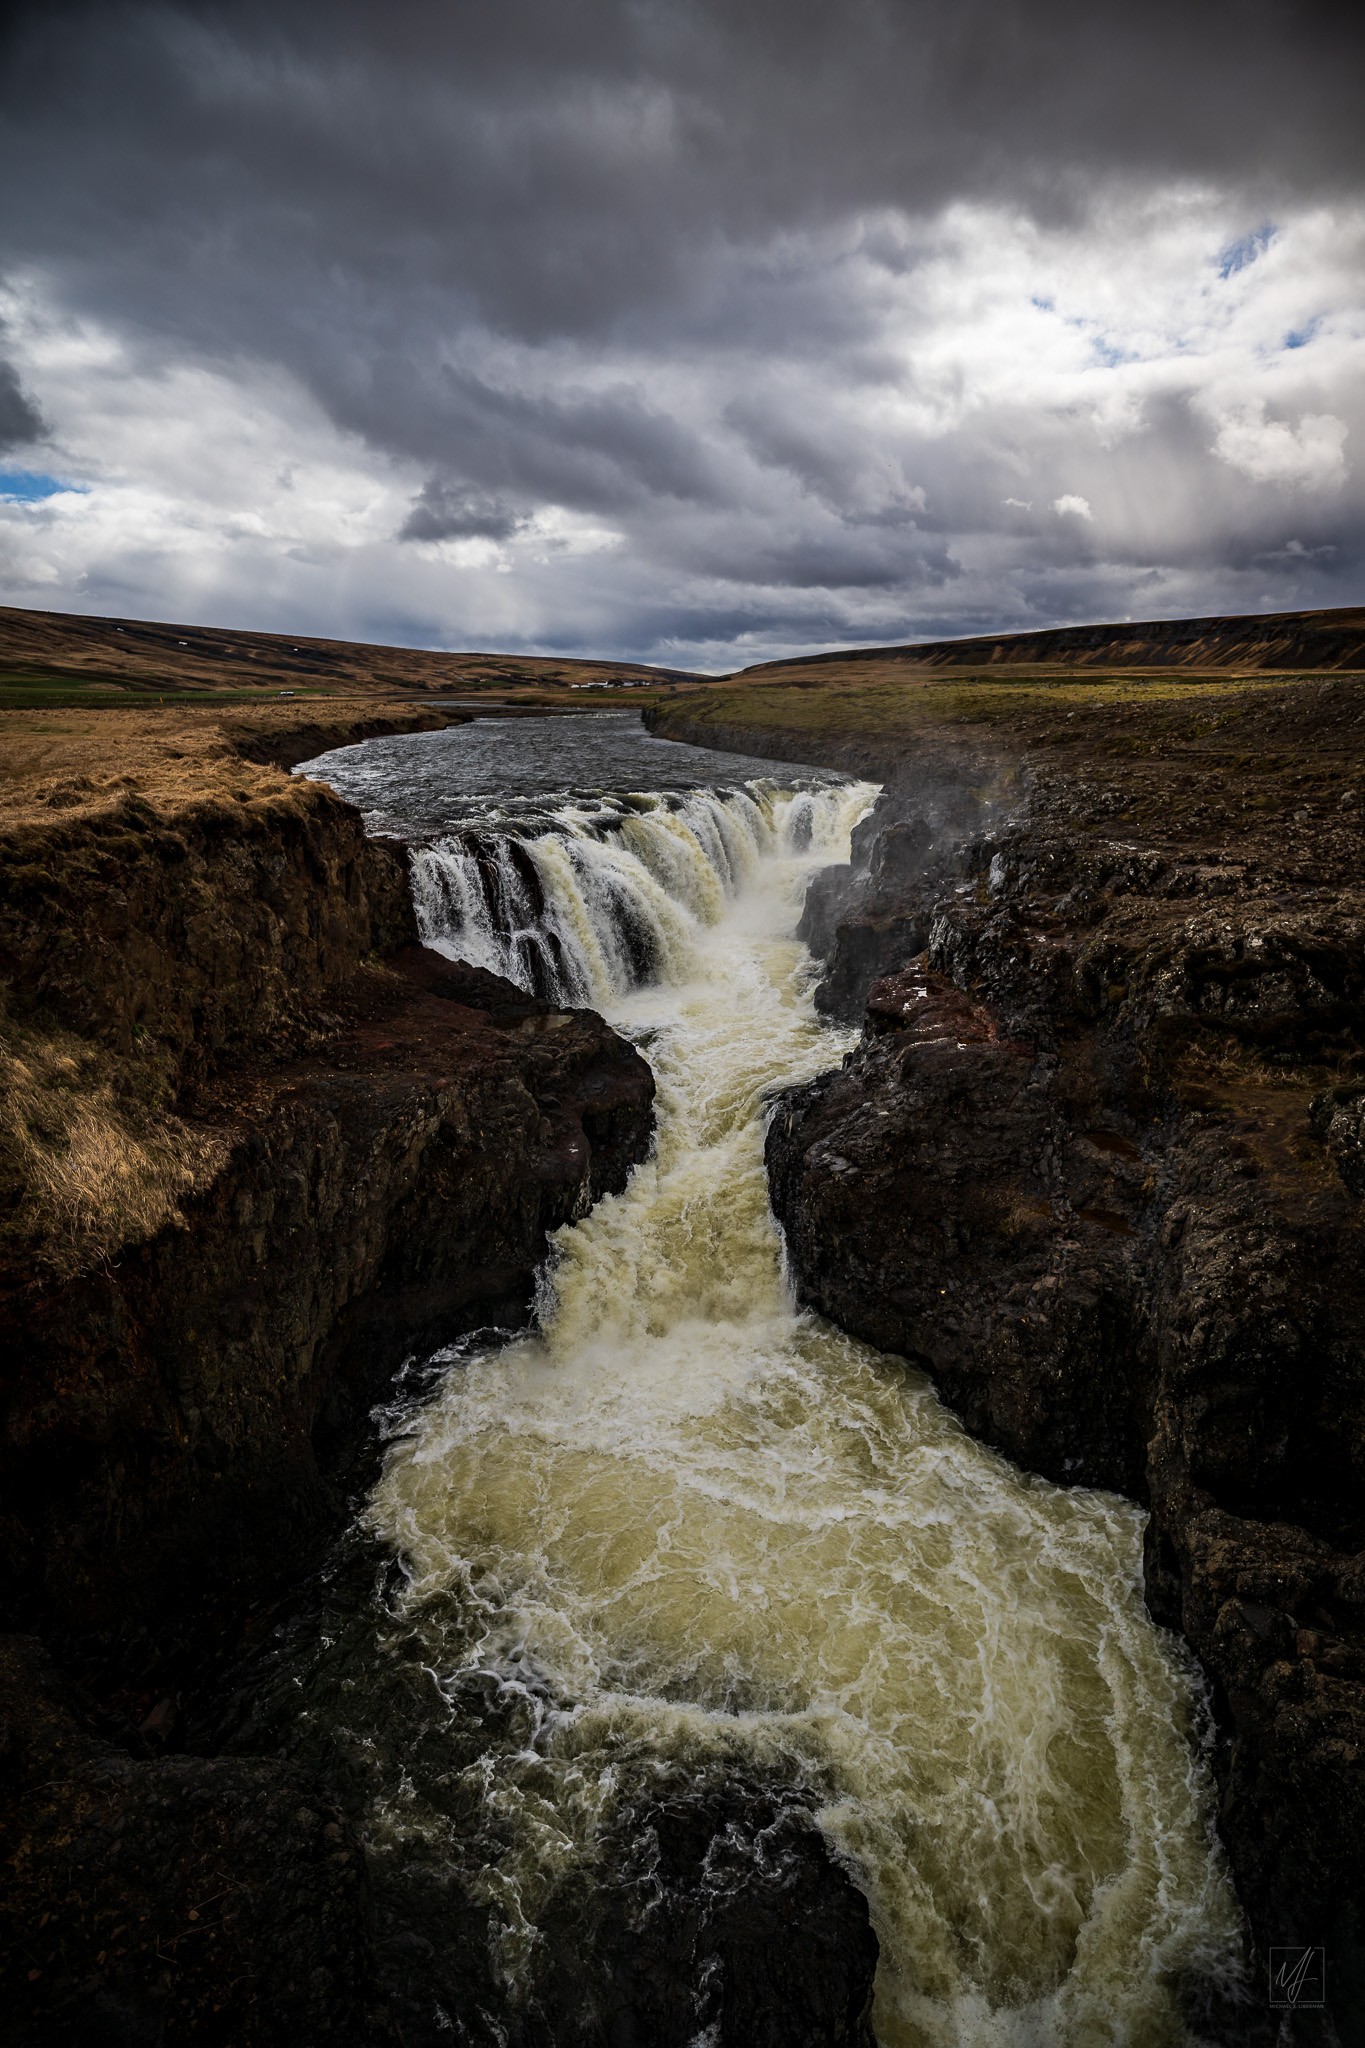
Víðidalstunga, Iceland
NIKKOR Z 20mm f/1.8 S • ISO 64 • 1/1600 sec at f/1.8
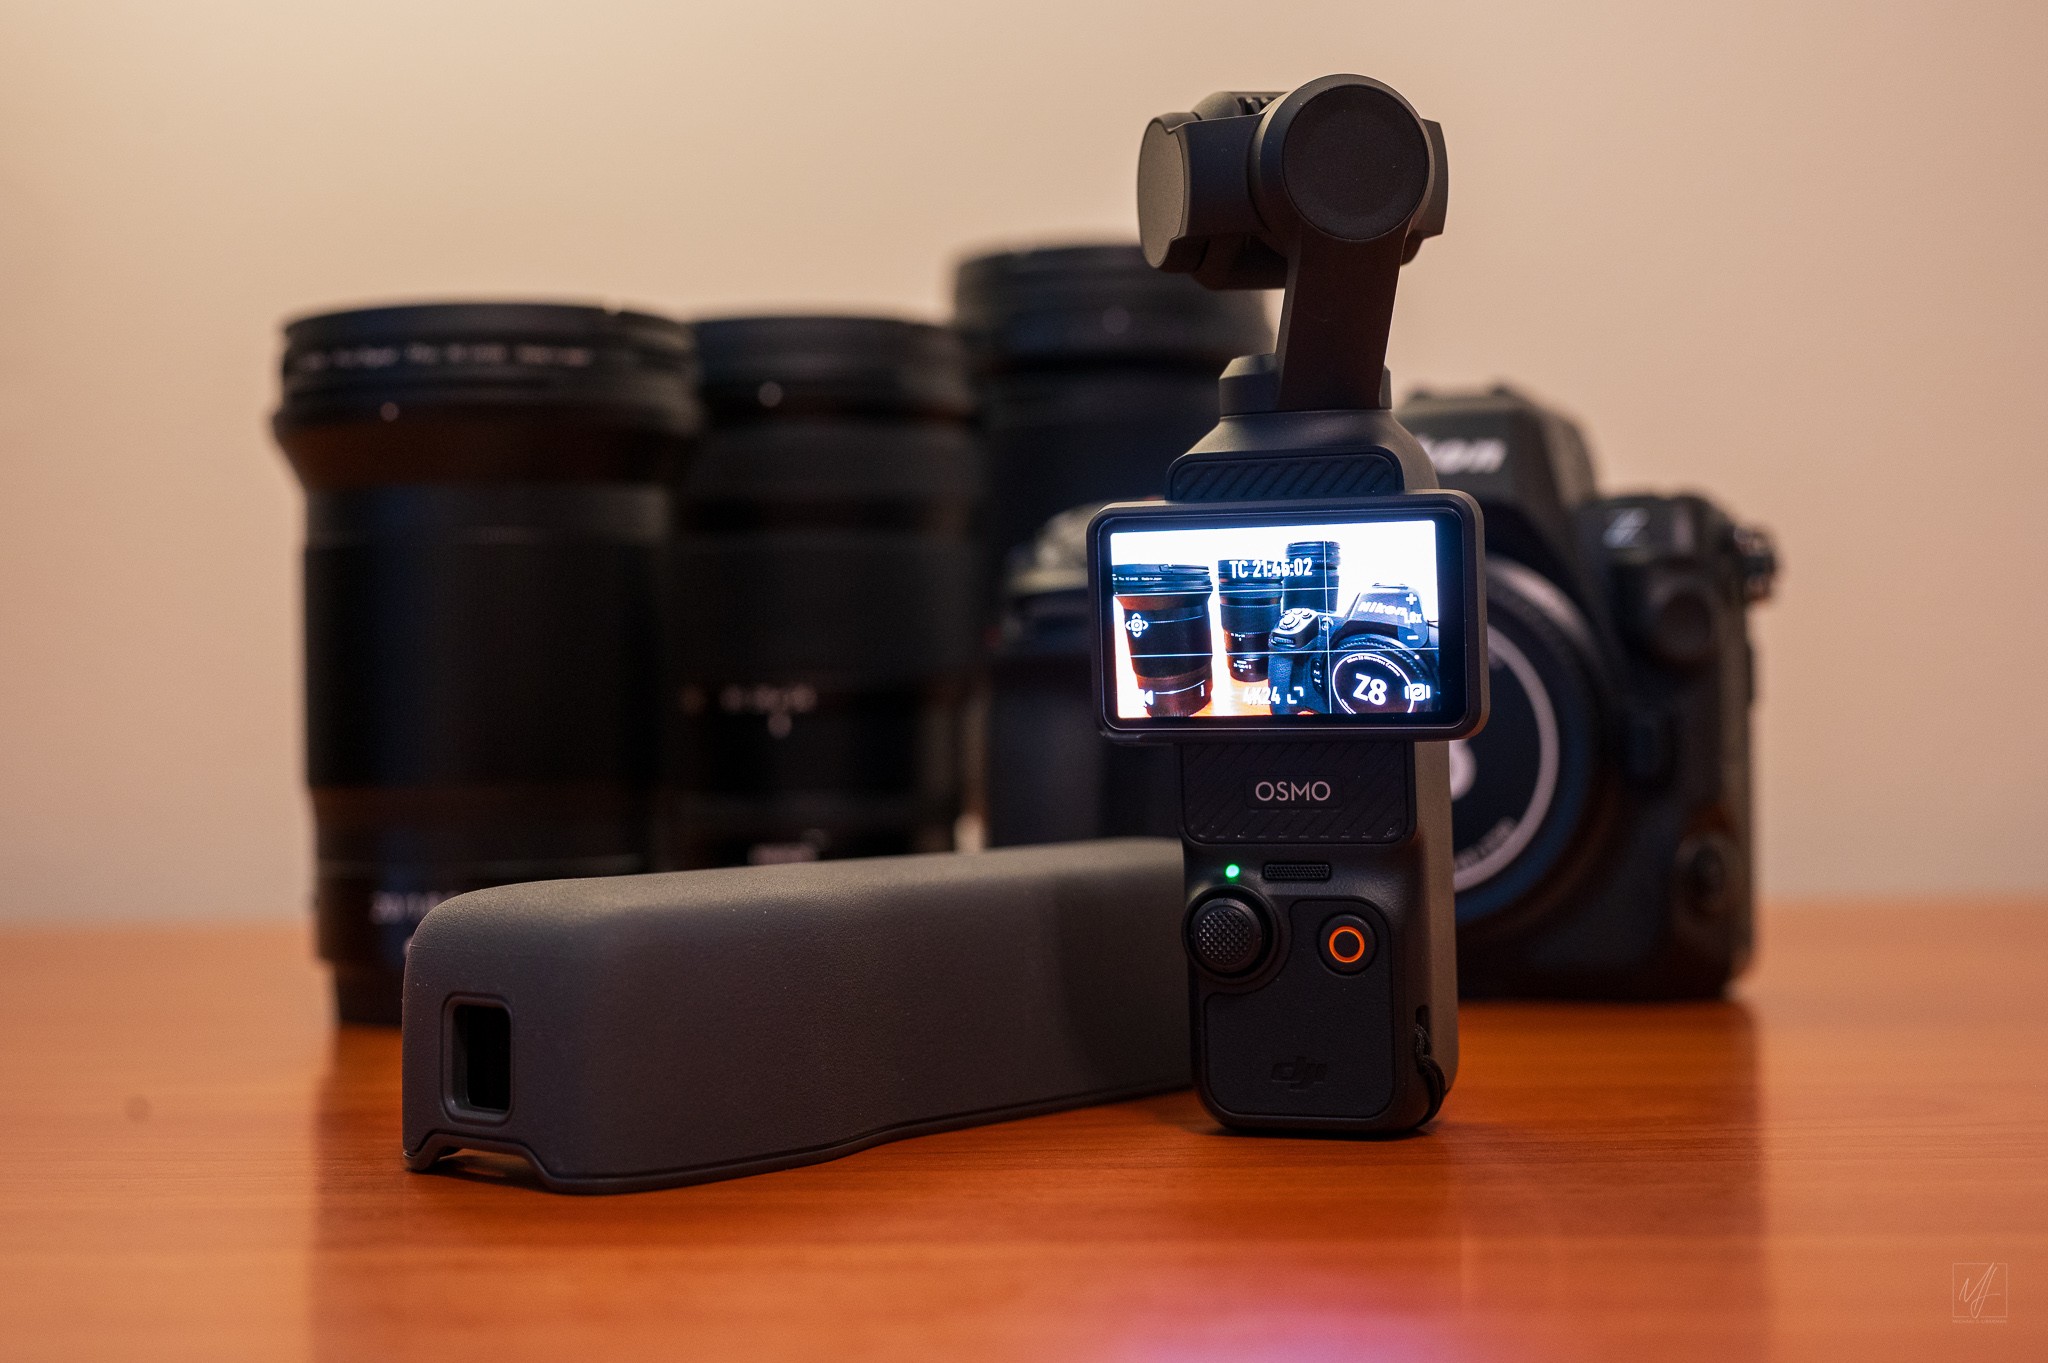
DJI Osmo Pocket 3: I previously carried the original OSMO Pocket but upgraded to the newest iteration in the fall of 2023. This gimbal/stabilizer provides a great platform for silky smooth video, timelapse, and motionlapse sequences. The tiny size of the Osmo Pocket 3 can’t be beat for travel. It’s great for crowded street scenes, shooting from a vehicle while rolling down a bumpy highway, and getting a different video perspective than a mirrorless camera provides. I used the OSMO Pocket 3 for a couple of timelapse sequences and also our visit to the Víðgelmir Cave lava tunnel. The tight squeeze and damp conditions were perfect for the OSMO Pocket 3.
NIKKOR Z 50mm f/1.8 S • ISO 2000 • 1/15 sec at f/5.6
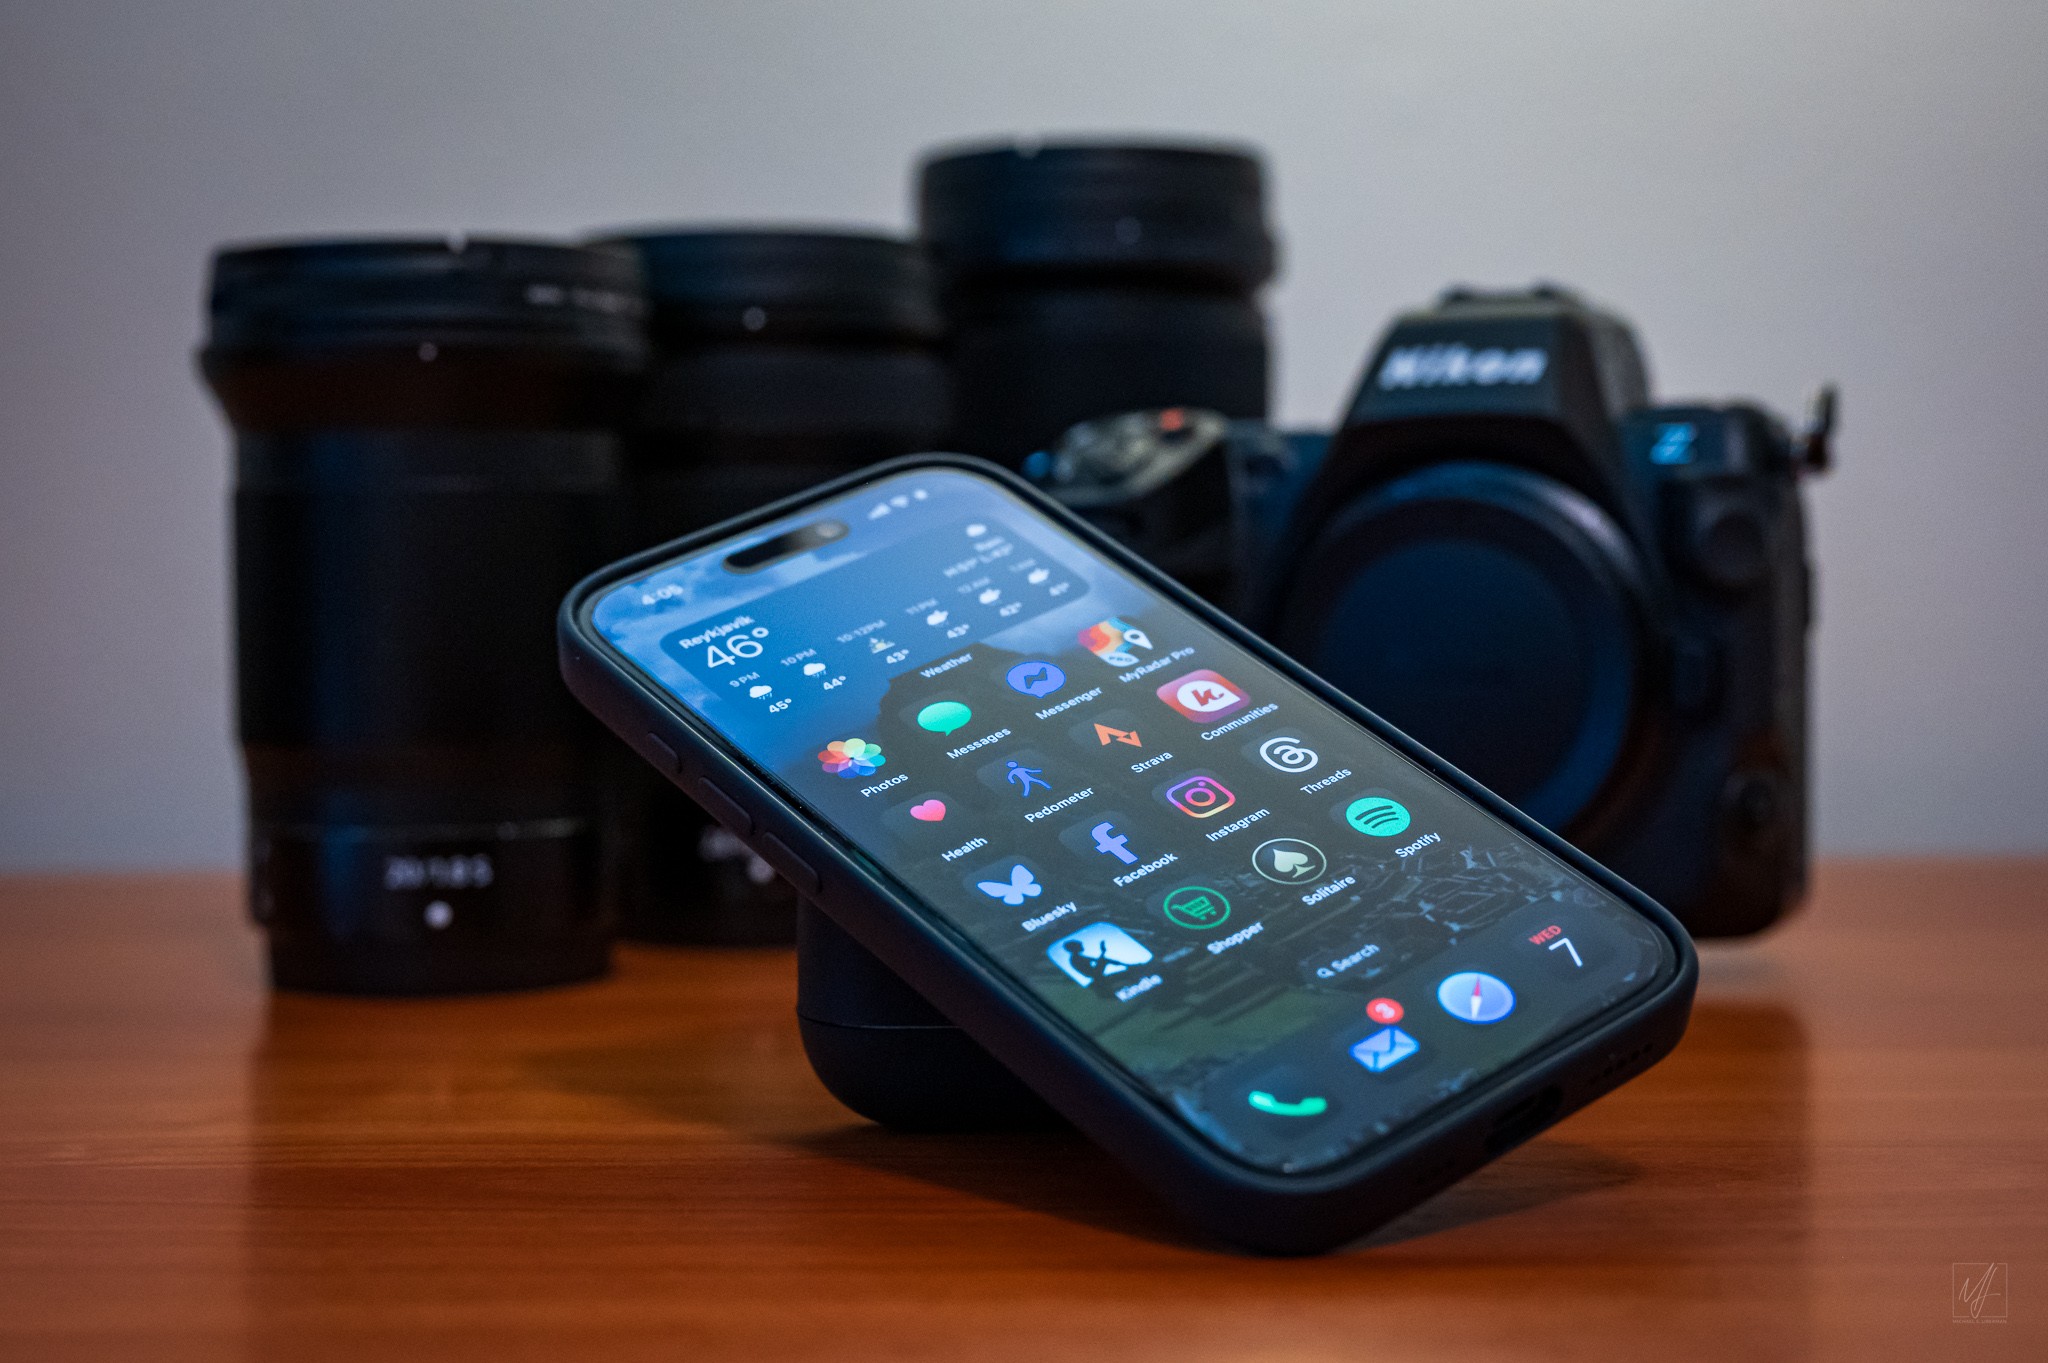
Apple iPhone 16: I replaced the iPhone 12 mini with the iPhone 16 a few months before the Iceland trip. In addition to emails, texts, and phone calls, I use the iPhone with the Nikon SnapBridge app to download photos from the camera to the phone, the WordPress Jetpack app to write and post blog updates while on the road, and the DJI Mimo app for the DJI OSMO Pocket 3. While I really liked the smaller size of the iPhone 12 mini form factor, the smaller phones don’t have the battery life of their larger counterparts. Plenty of juice for every day use, but there is a lot of phone use while traveling. The larger battery of the iPhone 16 meant I never had to recharge during the day! And while I previously used an Aokatec AK-G2 GPS Receiver to add location data to photos, with the Nikon Z8 I connected to the SnapBridge app on the iPhone for GPS data on this trip. Works extremely well, with accurate GPS data captured on all but two photos from the trip.
NIKKOR Z 50mm f/1.8 S • ISO 6400 • 1/60 sec at f/5.6
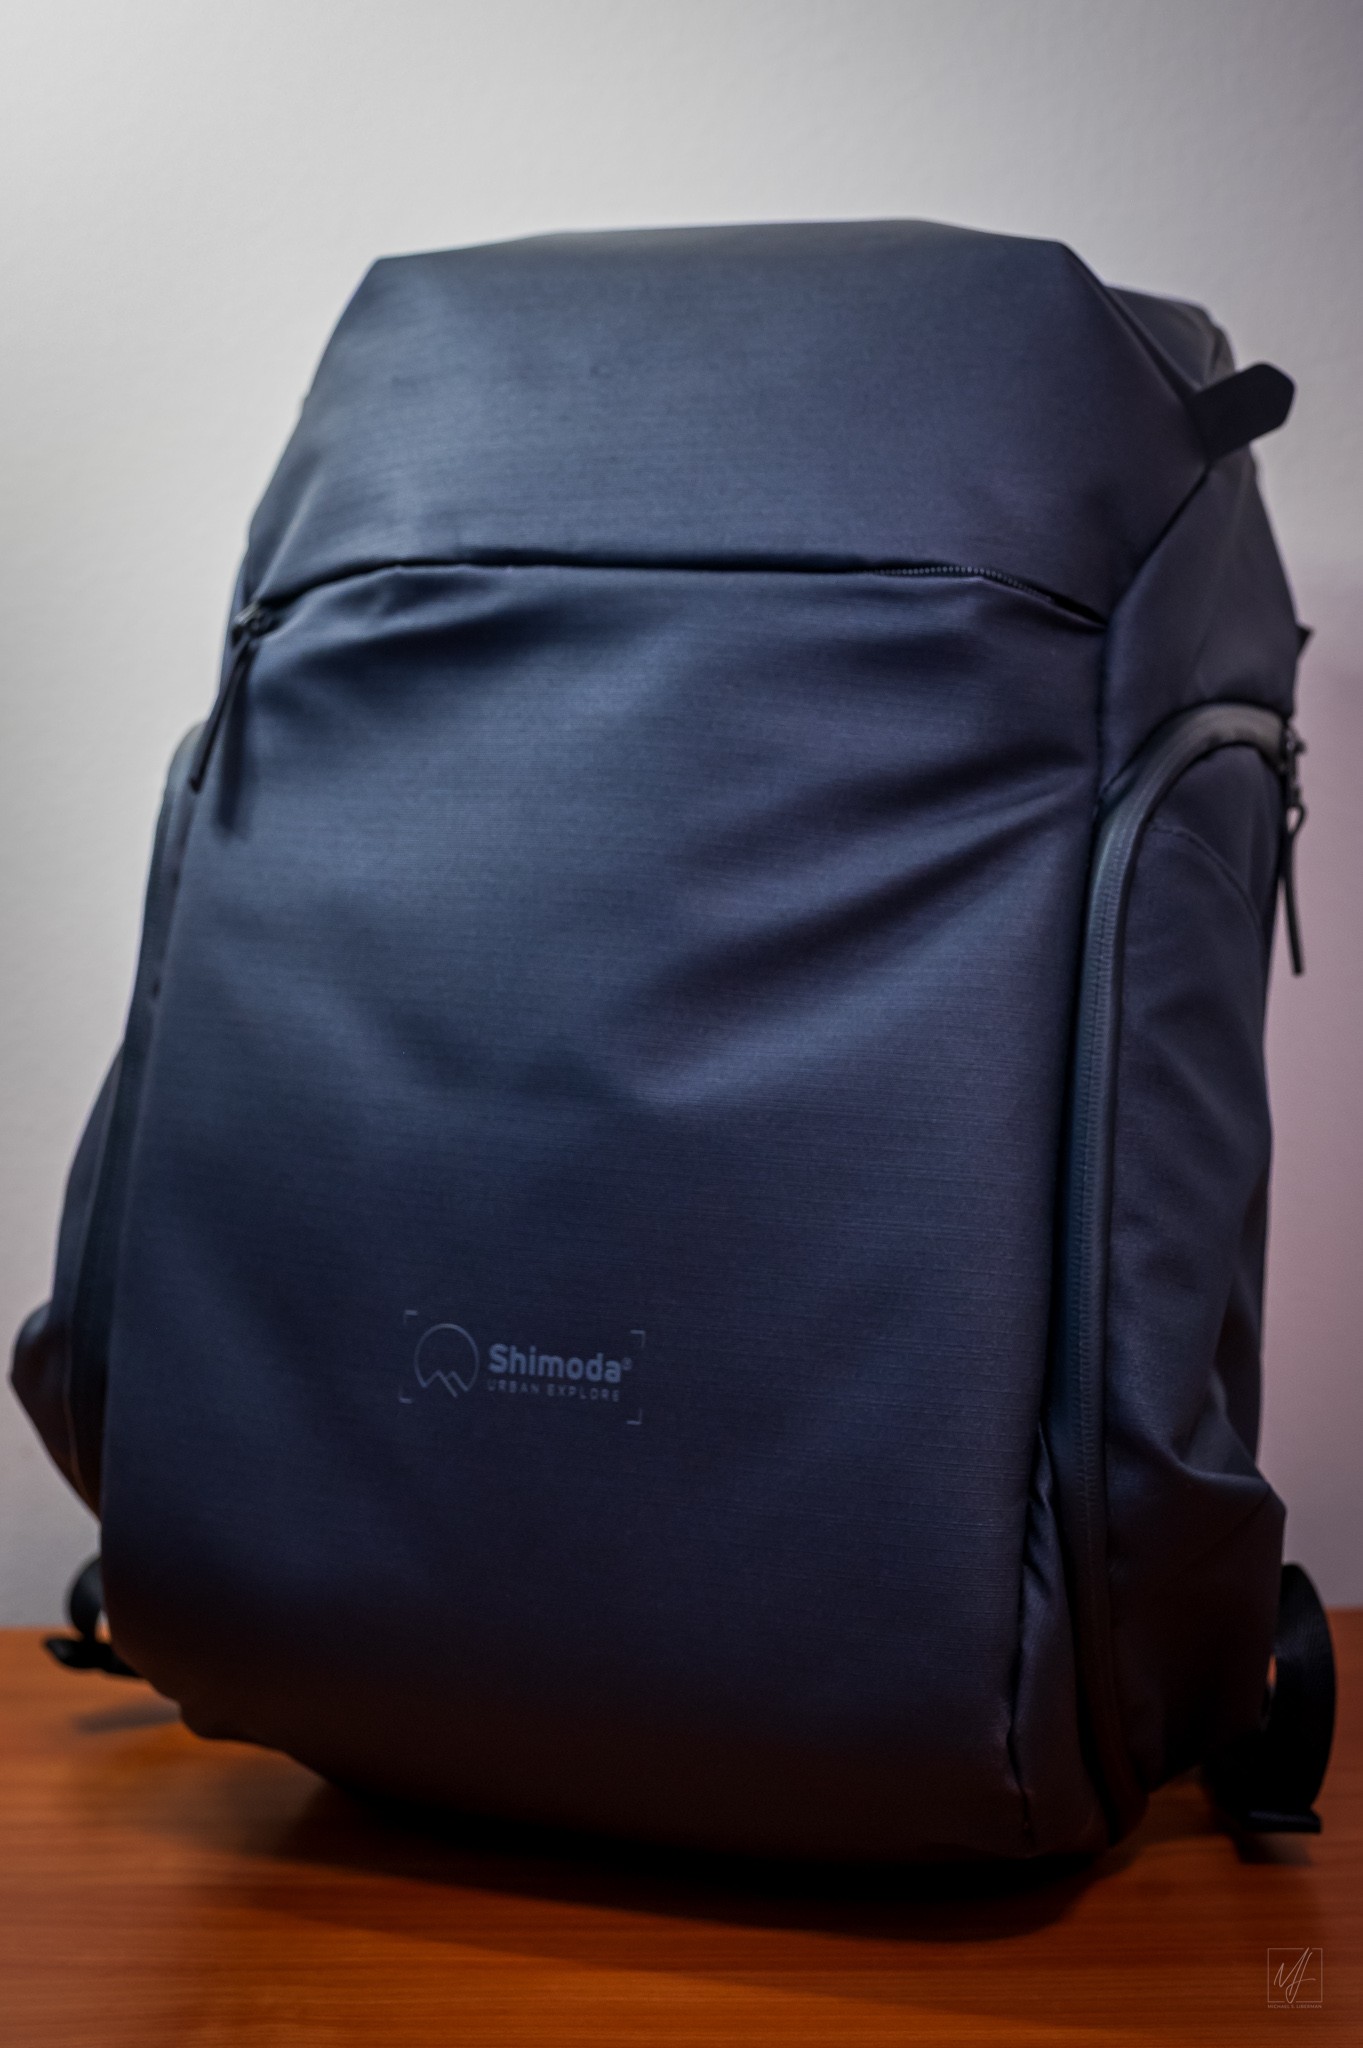
Shimoda Designs Urban Explore 25 Camera Backpack: After years of traveling with the brilliant Vanguard Kinray Lite 45 backpack it was time to make a change as the Kinray was showing signs of wear. I tried the GuraGear Kiboko City Commuter 18L on the Italy and Greece trip, but found the bag to be too bulky and the roll-top access to be too inconvenient. I researched a number of possible replacements from all the major photo backpack manufacturers before settling on the Urban Explorer 25. It’s not perfect. It was tricky to fit the Z8 and three lenses. The 24-120mm ended up in the top compartment, but realistically I will rarely travel with anything other than a camera and two lenses. I had intended to use the side access for removing the Z8 from the bag, but found the rear camera compartment access very convenient with the bag on the bus seat next to me and rear of the bag facing up.
NIKKOR Z 50mm f/1.8 S • ISO 1600 • 1/15 sec at f/5.0
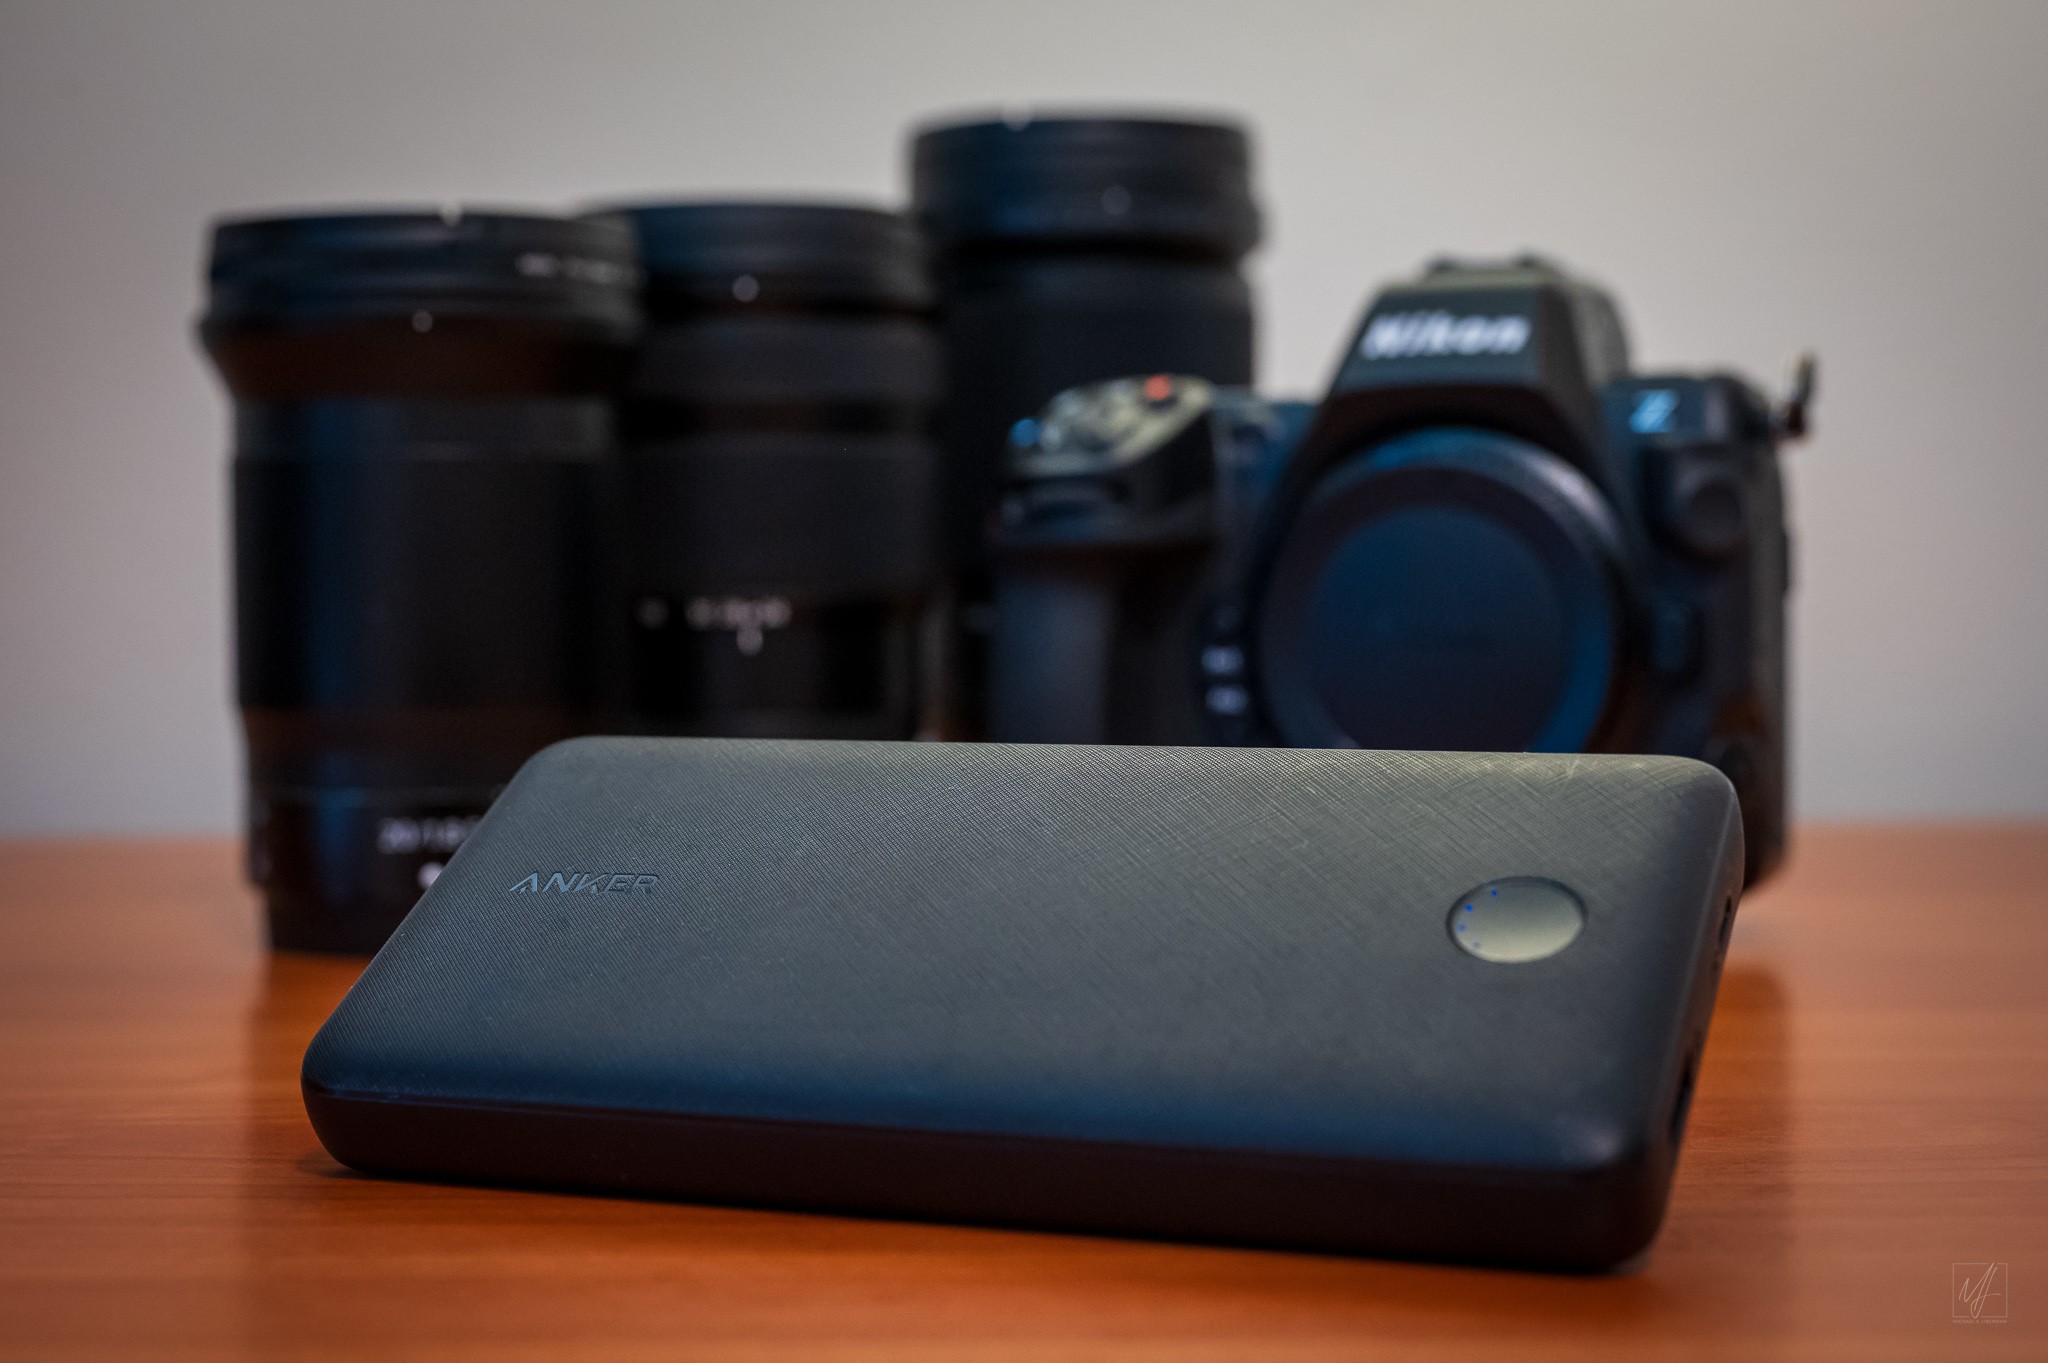
Anker 525 PowerCore Essential PD: I bought this power bank with PD capability (Power Delivery USB charging technology) that can directly charge the Nikon Z8. At 20,000 mAh, it has enormous capacity and can fully charge the iPhone, Watch, Air Pods, and Z8 several times. The Anker is a great addition to the traveling kit and other instances when I need portable power.
NIKKOR Z 50mm f/1.8 S • ISO 6400 • 1/25 sec at f/5.6
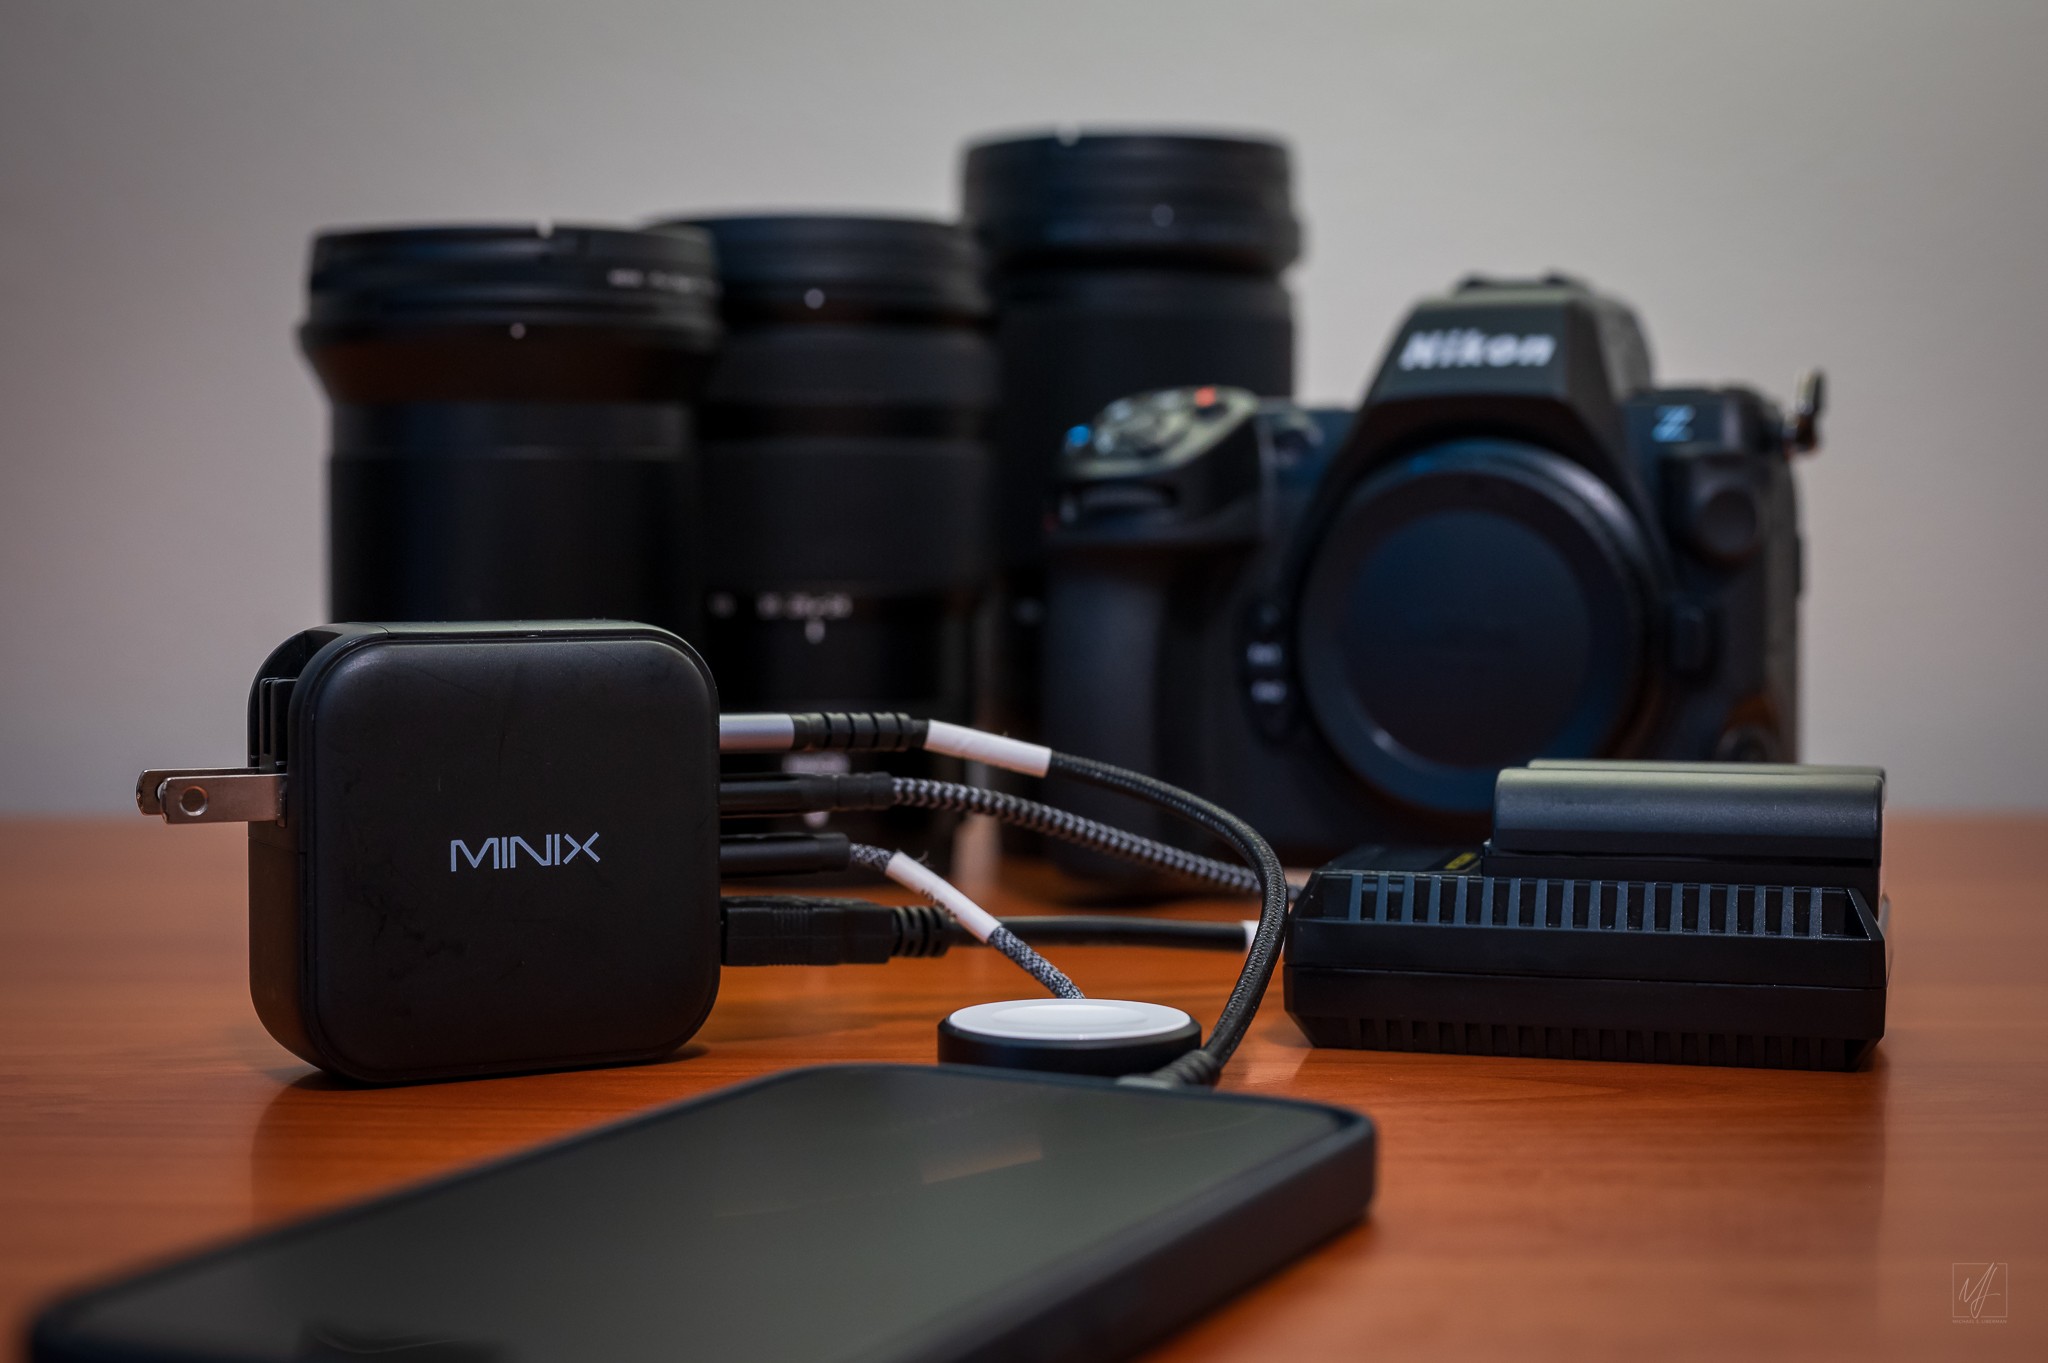
MINIX NEO P3 100W GaN Wall Charger: The MINIX NEO P3 is a 4 port charger that features a couple of 100w ports, supports PD charging, includes a foldable plug, and supports 100-240V voltage for worldwide use. With a collection of 6-inch USB cables I can easily setup an overnight charging station in a hotel room to quickly charge the Nikon Z8 EN-EL15 batteries with the Nitecore UNK2 Dual Slot USB Charger, the iPhone 16, Apple Watch 8, Apple AirPods Pro 2, the Anker 525 PowerCell, and the DJI OSMO Pocket 3. This charging setup is compact and light for travel, and everything is recharged after a few hours.
NIKKOR Z 50mm f/1.8 S • ISO 1600 • 1/10 sec at f/5.6
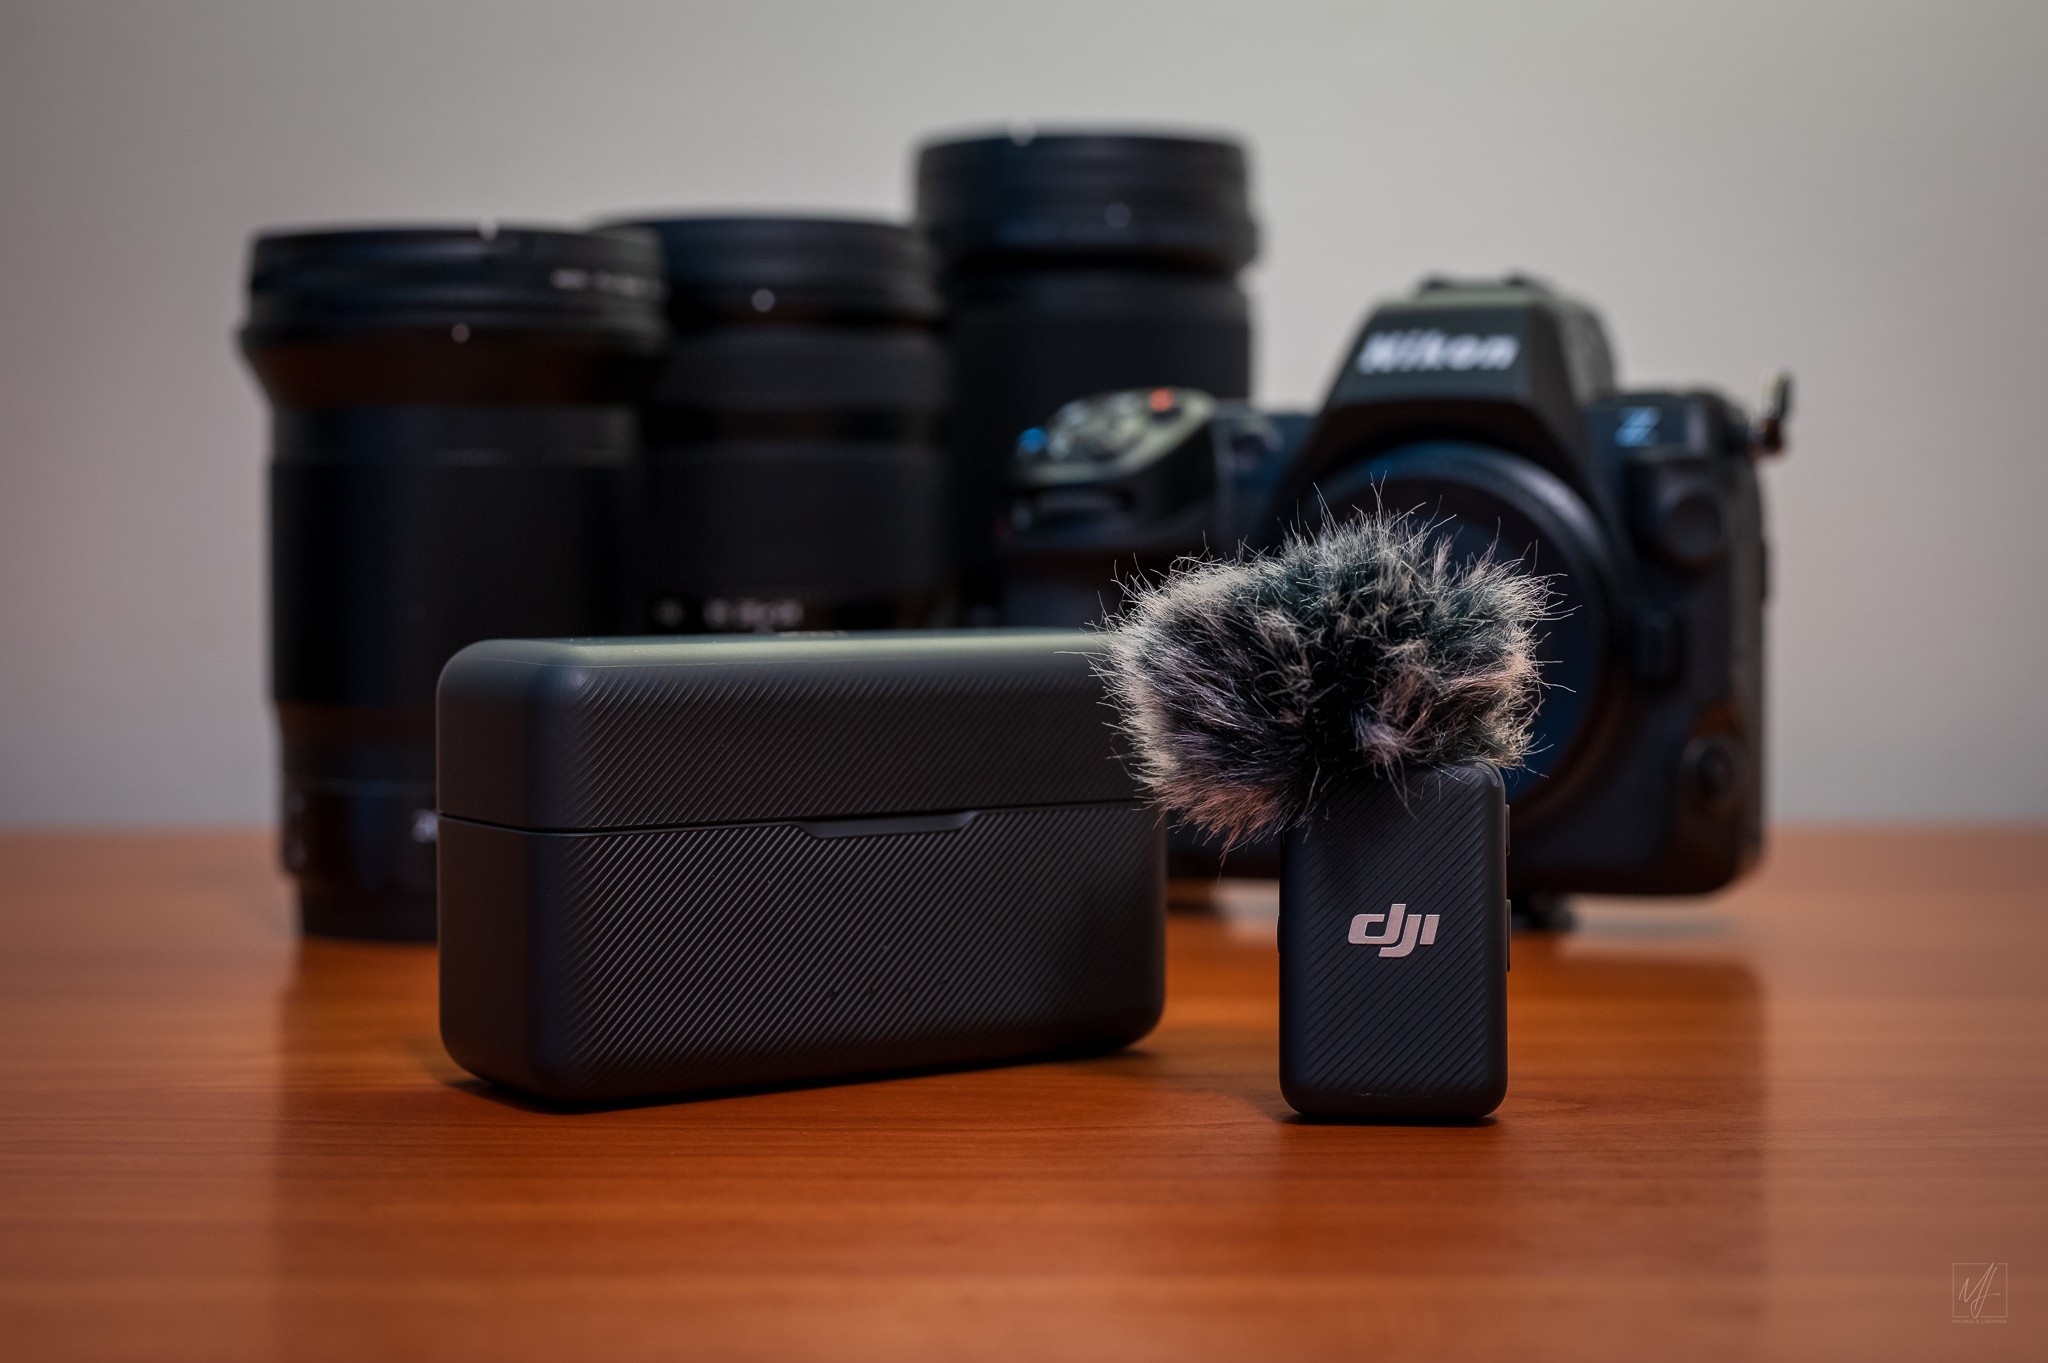
DJI Mic Transmitter: After years of bringing the Nikon ME-1 Microphone, but not really using it, I switched to a DJI mic transmitter with a specific purpose in mind. When touring with a group of people there is always a certain amount of ambient sound from among members of the group. When editing I’m always looking for audio with clean ambient sound … free of any commentary or camera shutter sounds. So I brought the tiny DJI Mic transmitter and at each site we visited I stepped away from the group to record 30 seconds of clean audio.
NIKKOR Z 50mm f/1.8 S • ISO 1600 • 1/6 sec at f/5.6
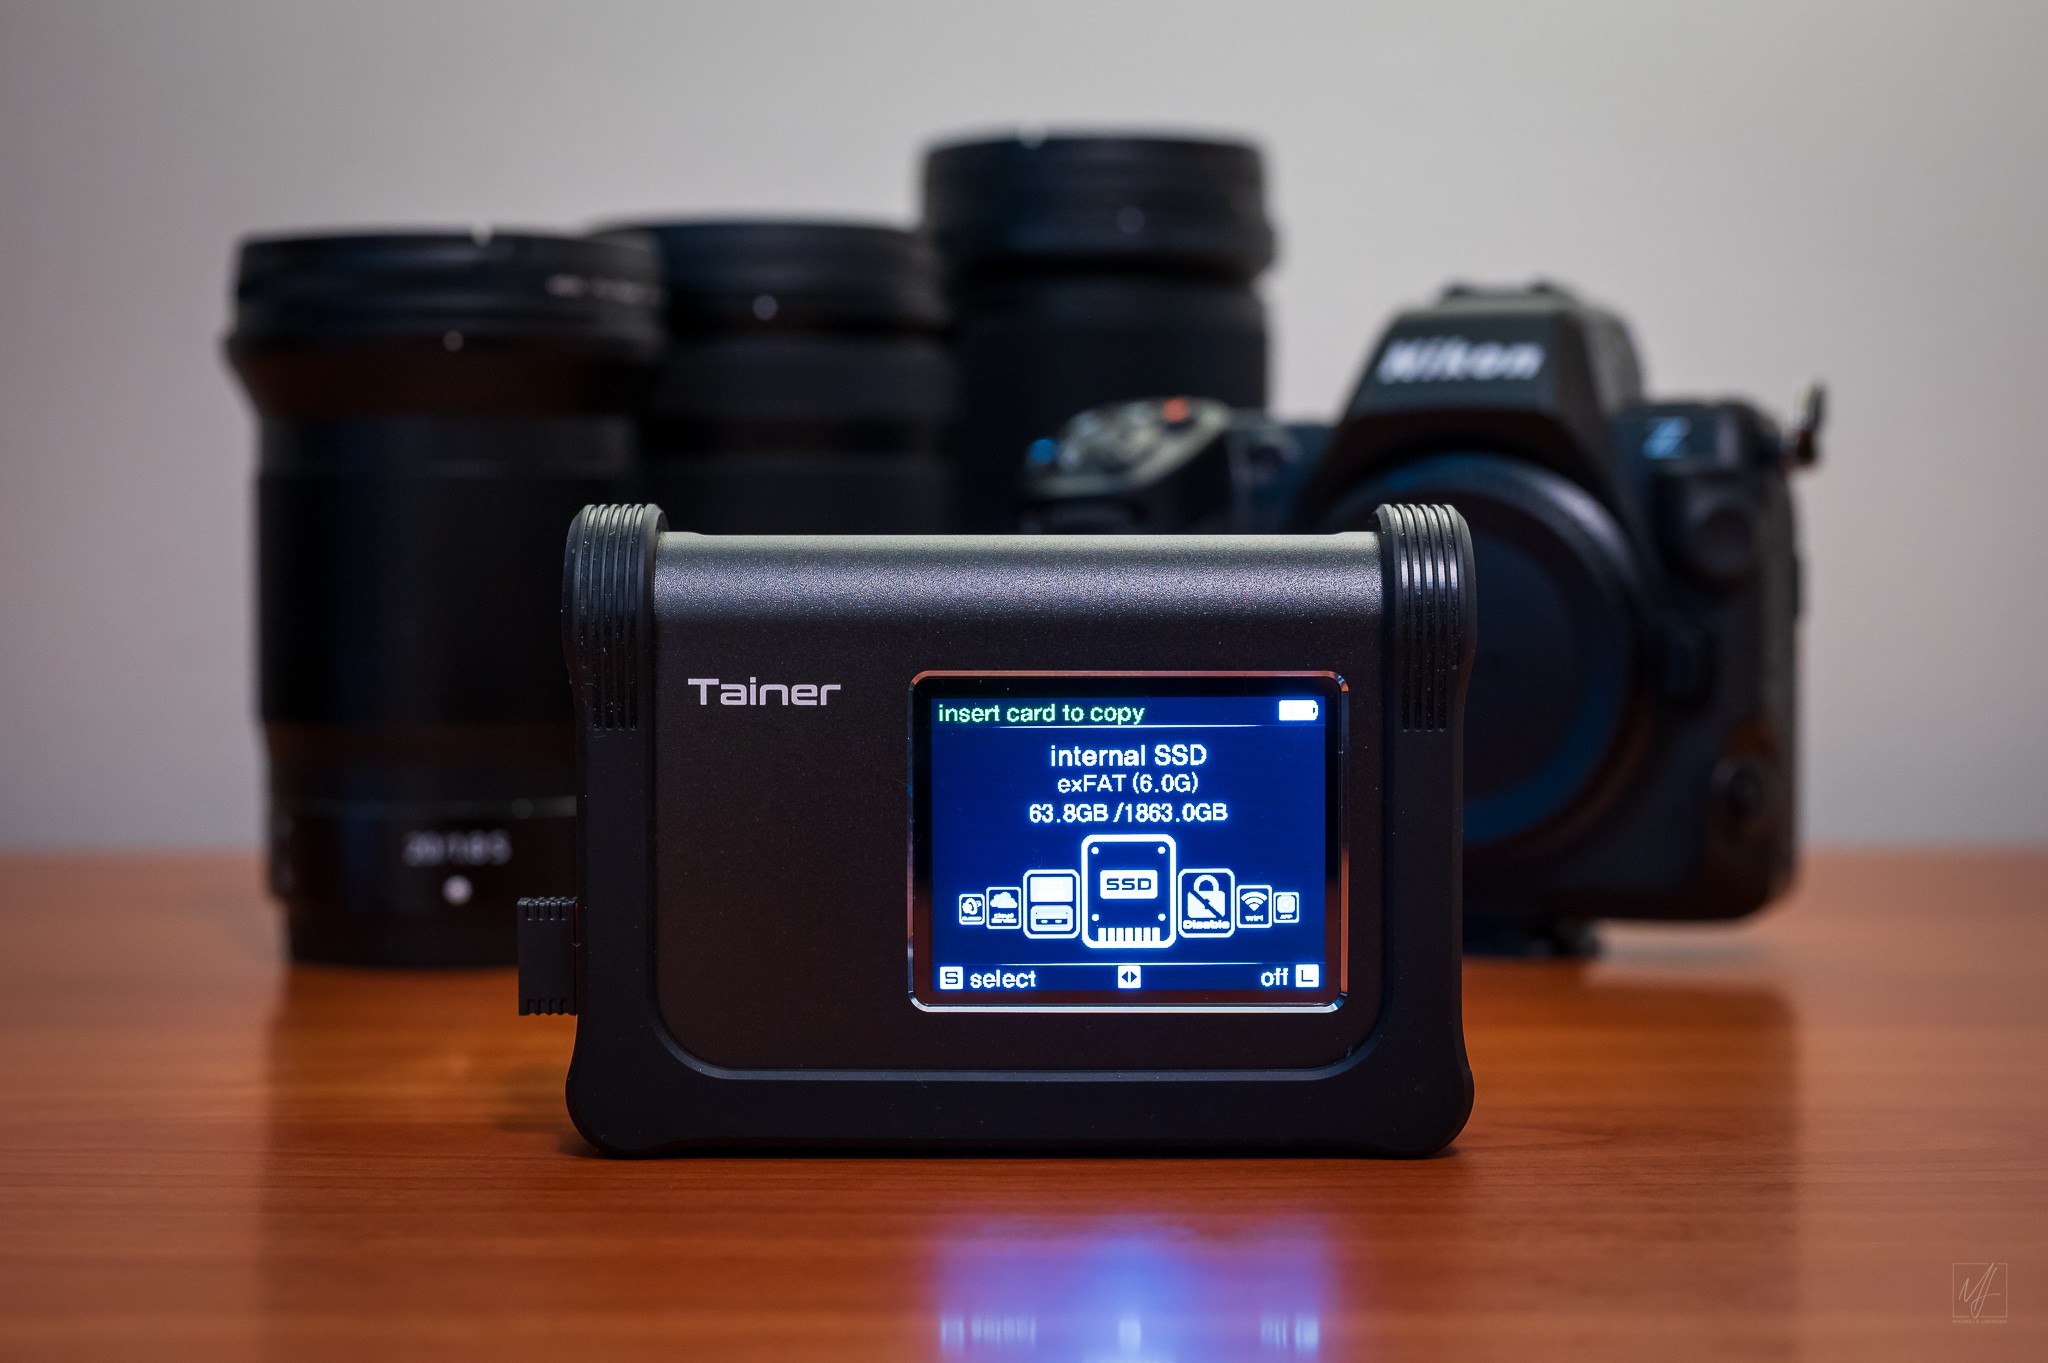
Clouzen Tainer: The newest addition to the kit. It’s always concerned me that while traveling I don’t have a good file backup method to ensure the safety of the photo and video media. At home I use the basic backup method of primary and secondary copies onsite with a third copy backed up offsite. Using the Clouzen Tainer I can make backup copies of media files from the CFexpress and SDXC cards in a matter of minutes. I quickly got into the habit of backing up files at the end of each day or sometimes on a bus transfer day. It worked very well and this is a good addition to the travel gear!
NIKKOR Z 50mm f/1.8 S • ISO 1600 • 1/13 sec at f/5.6
Memory Cards and File Management
For this trip I brought two Delkin Devices Black 150GB CFexpress Type B cards and two Delkin Devices Black 128GB UHS-II SDXC cards. I previously used SanDisk 128GB Extreme Pro CFexpress cards and, not surprisingly, experienced a number of ‘Hot Card’ warnings in the extreme heat of Athens, Greece last summer. I replaced the SanDisk cards with the Delkin Blacks and haven’t had a ‘Hot Card’ warning since. But admittedly, the 40F/4.4C daytime temps in Iceland were never going to result in a hot CF express card!

NIKKOR Z 50mm f/1.8 S • ISO 1600 • 1/13 sec at f/5.6
Each 150GB CFexpress card holds about 1,800 14-bit NEF files. I setup the Nikon Z8 with a 150GB CFexpress card in slot 1 to store the NEF raw photo files with a 128GB SDXC card in slot 2 as the destination for 4k 24fps H.265 10-bit MOV files. About halfway through the trip, as is my usual practice, I swapped out the initial set of memory cards for the second set. At the end of the trip, between the Z8, the DJI OSMO Pocket 3. and the iPhone 16, I ended up with 617 picture files totaling 27.74GB. Not counting travel days, that’s a shooting rate of about 102.8 per day – right on my average of about 100 photos per day on international trips.
| Photo | Files | Gigabytes |
|---|---|---|
| Nikon Z8 NEF | 584 | 27.36 |
| DJI Osmo Pocket 3 DNG | 10 | 0.18 |
| iPhone 16 JPG | 25 | 0.20 |
| TOTAL | 617 | 27.74 |
Between the Z8, the DJI Osmo Pocket 3, the iPhone 16, and the DJI Mic transmitter I ended up with 271 movie and audio files totaling 41.93GB with a running time of about 50 minutes.
| Video | Files | Gigabytes |
|---|---|---|
| Nikon Z8 MOV | 208 | 35.80 |
| DJI Osmo Pocket 3 MP4 | 41 | 5.58 |
| iPhone 12 mini MOV | 2 | 0.49 |
| DJI Mic Transmitter WAV | 30 | 0.06 |
| TOTAL | 271 | 41.93 |
Shooting Guidelines
Like I did for Italy and Greece, I developed a series of shooting rules or guidelines based on my previous experience working with media after trips. Here are the guidelines and how I did …
- Record 30 seconds ambience at each site using the DJI Mic Transmitter … I did this and boosted the audio gain on the mic +6dB for a better audio level compared to the Italy and Greece ambience recordings.
- Capture all photos and video with Nikon Z8 … I did not do this. I thought it would be helpful to work with media from a single source after the trip. While the OSMO Pocket 3 captures great stills it doesn’t record GPS positioning or account for time zone changes. But in the Víðgelmir Cave lava tunnel it seemed the better choice. And sometimes the best camera is the one you have easiest access to, so inevitably there are iPhone photos.
- Capture interstitial timelapses with the DJI OSMO Pocket 3 … I do this. I captured a couple of timelapse sequences, but nothing really great. Not sure if they will make it into the final video.
- No iPhone photos or video … I did not do this. See second bullet above.
Fitness Data
While I’m sharing media data captured during the trip, I’m also sharing some of the fitness data captured by the Apple Watch as we made our way across Iceland. Over 9 days of travel there were 102,691 steps, 44.6 miles, and 136 flights of stairs!
| Steps | Miles | Stairs | |
|---|---|---|---|
| IAD | 15,785 | 7.4 | 7 |
| IAD to KEF | 11,693 | 5.7 | 9 |
| Reykjavik to Hvammstangi | 10,021 | 4.0 | 14 |
| Hvammstangi to Akyreyri | 10,546 | 4.3 | 6 |
| Akyreyri | 12,886 | 5.1 | 20 |
| Akyreyri | 13,886 | 6.0 | 28 |
| Akyreyri to Reykjavik | 8,696 | 3.7 | 35 |
| Golden Circle | 11,961 | 5.2 | 12 |
| KEF to JFK to DCA | 7,217 | 3.3 | 5 |
| TOTAL | 102,691 | 44.6 | 136 |
WordPress Blog Updates
For the daily blog updates I use the Z8’s built-in Wi-Fi to connect via the SnapBridge app installed on the iPhone 16. Once connected it’s easy to select pictures to transfer to the phone, and then incorporate those photos in the daily trip blog updates using the Jetpack for WordPress mobile app. Several times a day while traveling, I open SnapBridge, browse through the available pictures on the Z8, and download a couple for use in that day’s post. With Jetpack it’s easy to draft new text, insert photos, make edits, and move paragraphs. Internet access in Iceland was good. Between uploading photos and drafting the content – the daily blog updates take about an hour each day to complete … usually on the bus between locations … or maybe at dinner at the end of the day!
Photo Workflow
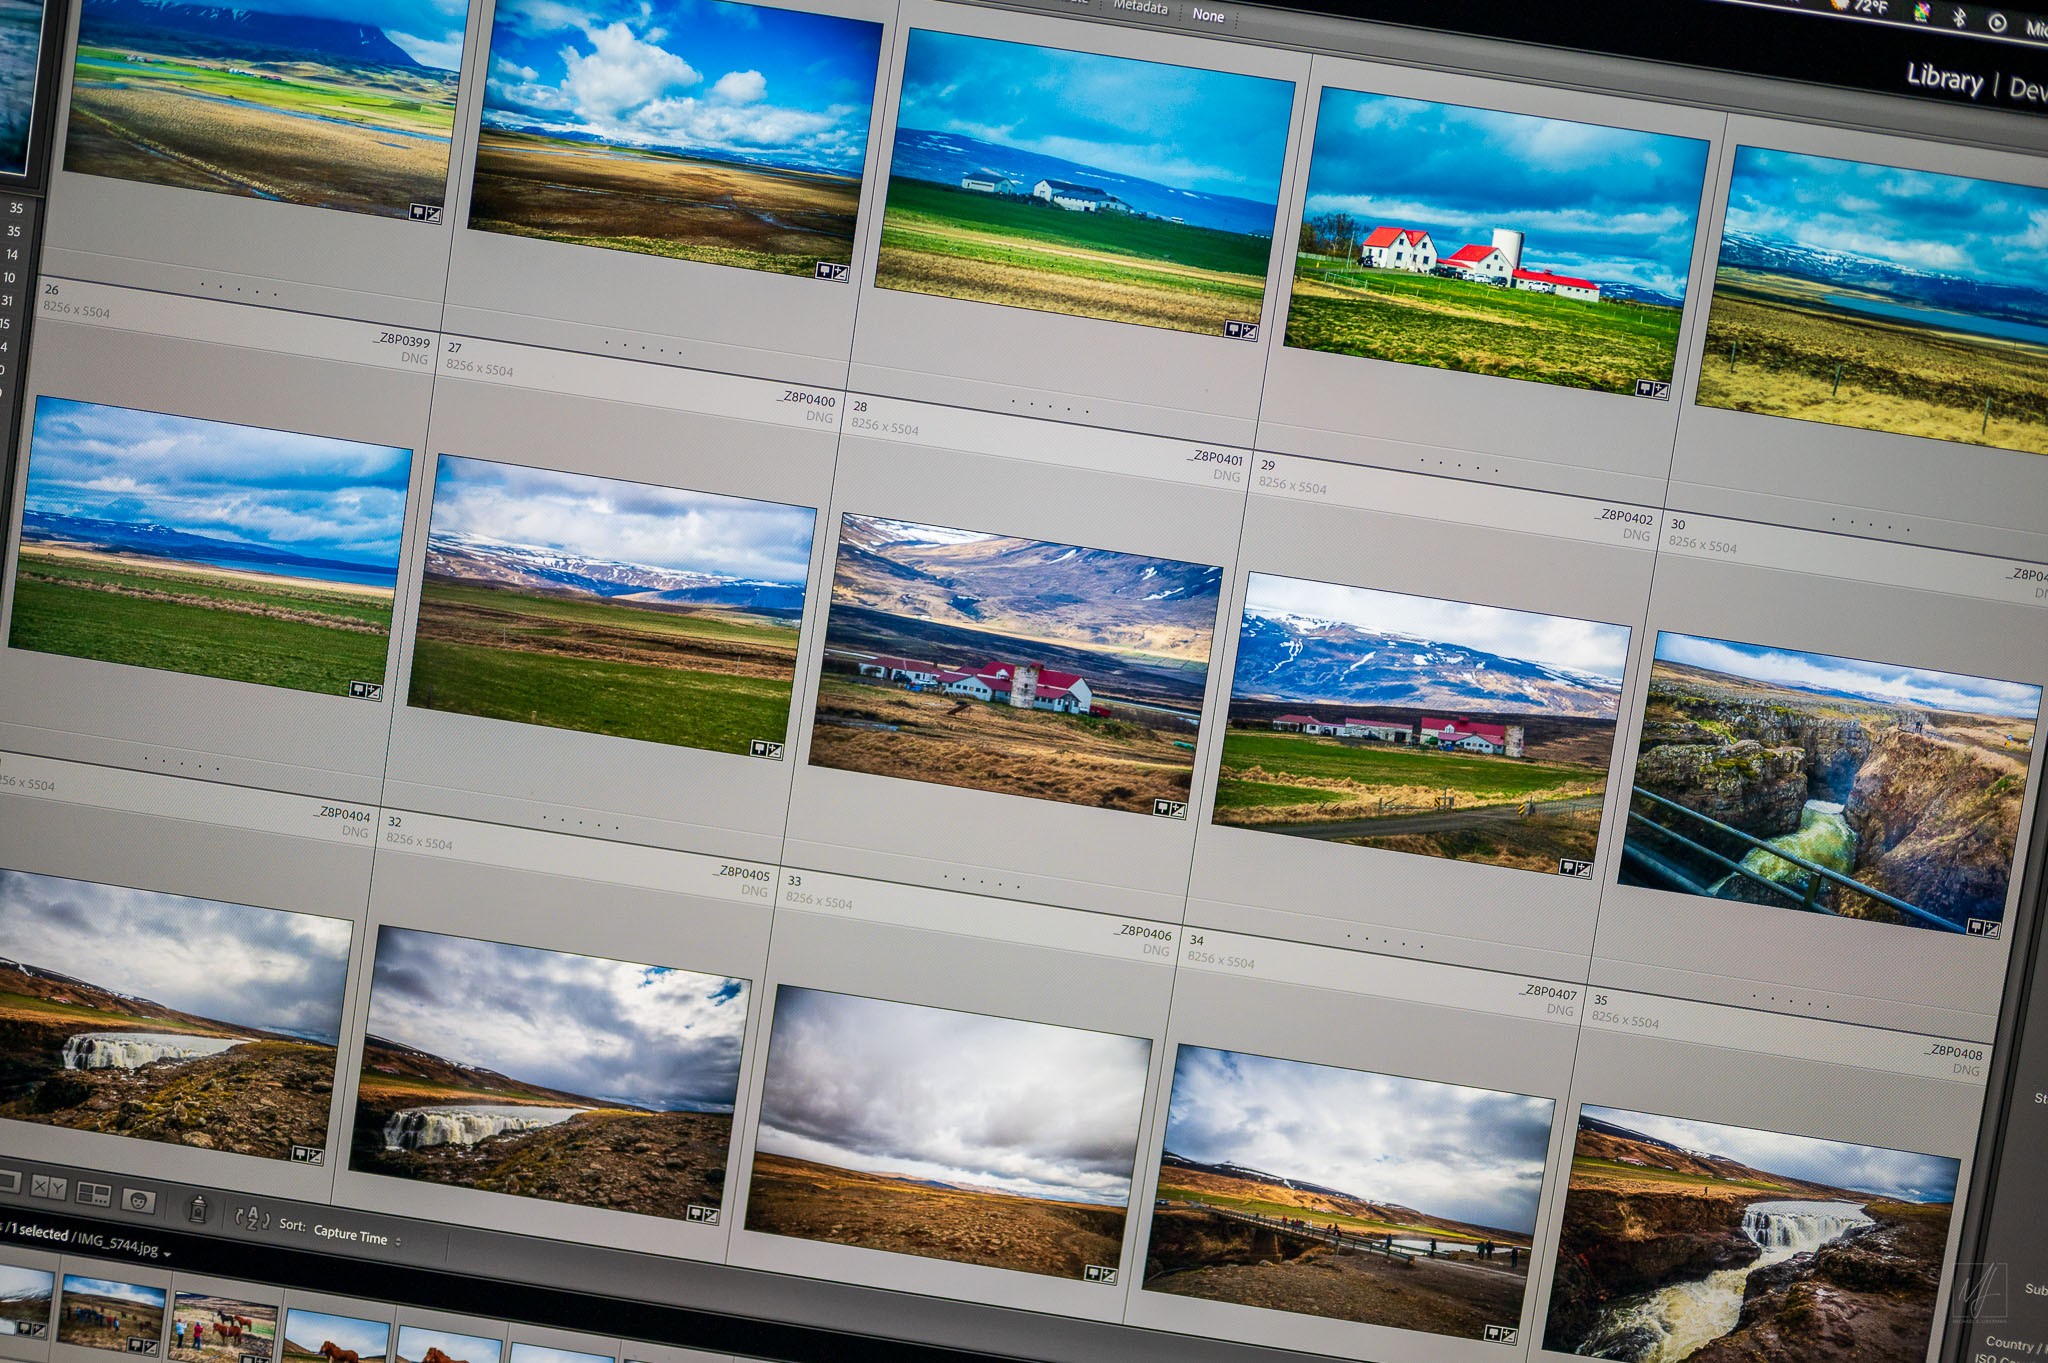
My standard workflow for photos and video remains the same. I’m working with Adobe Photoshop Lightroom Classic for photo management and editing – using the Creative Cloud Photography plan.
NIKKOR Z 50mm f/1.8 S • ISO 640 • 1/500 sec at f/1.8
Several years ago I dropped keywording as a workflow step and substituted sorting into collections. I find using collections really helps to identify the best images – those I want to focus on for post-processing. The simplified version of the photo workflow is:
- Import as DNG to folders named by date and location
- Delete duplicates and rejects … photos that are out of focus or the inevitable inadvertent photos of the ground
- Geoencode
- Rename by date with sequential numbers
- Collections for Full Shoot, Picks, and Selects
- Post-process
- Caption
- Output using Jeffrey Friedl’s Metadata Wrangler Lightroom Plugin to format captions to include caption text along with city, country, GPS location, camera, lens, and exposure information
- Import to WordPress with Katsushi Kawamori’s Upload Media Exif Date so that uploads to the Media Library are sorted chronologically by date and time captured.
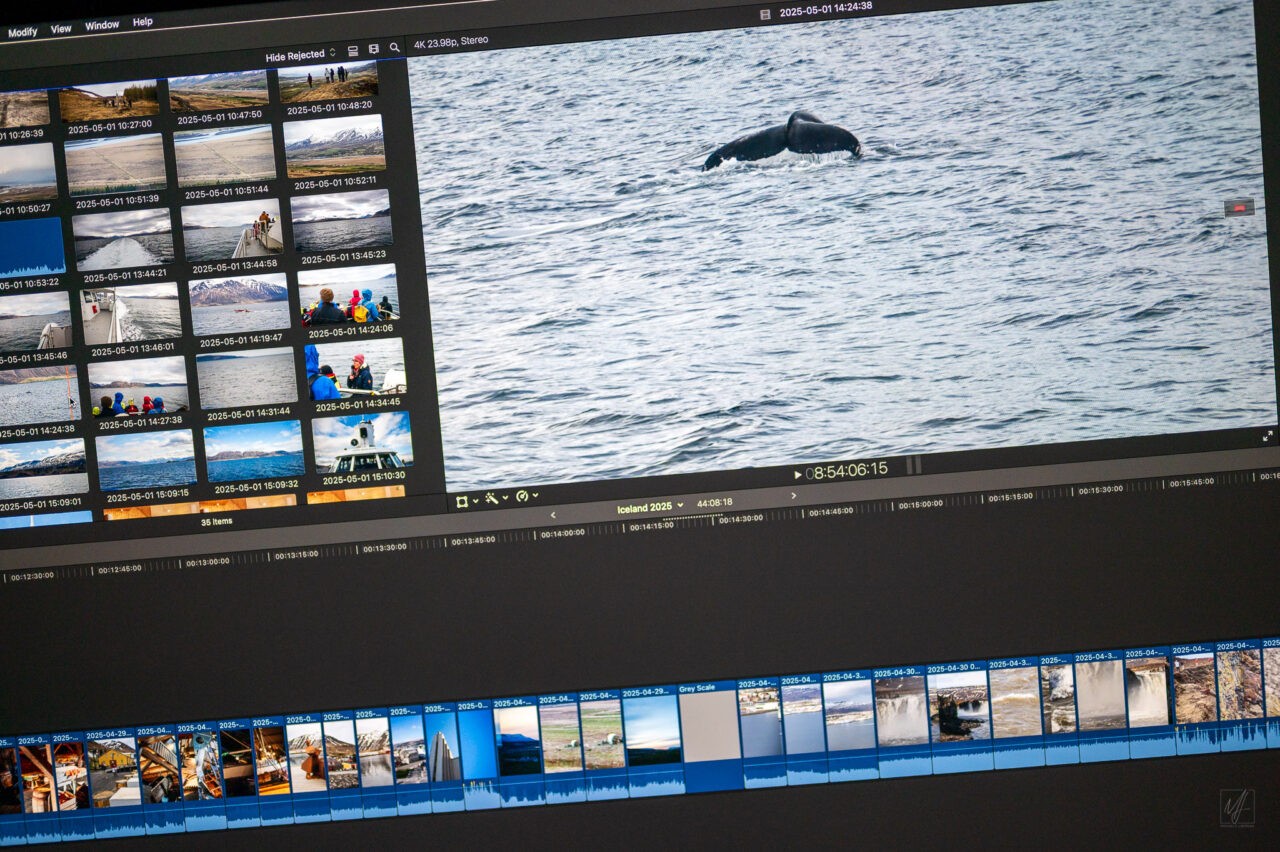
Video Workflow
Video files are digitized using Apple Final Cut Pro to events named by date and location. After import files are renamed by date and time.
NIKKOR Z 50mm f/1.8 S • ISO 720 • 1/500 sec at f/1.8
With all trip photo and video files transferred I confirm onsite and offsite backups are complete (using CrashPlan for Small Business to manage both backups) and then reformat the CFexpress and SDXC cards for use on the next project and then figure out when I’ll actually edit the video!
In the meantime, time to start planning and preparing for the next trip!
Thank you for your excellent technical summary of how you again captured an amazing trip! I so appreciate all your blogs and amazing photos. I look forward to the final videos. Thank you Michael!
Thanks for taking a look, Shannon!!